How To Pair Switch Controller
The Nintendo Switch is a versatile gaming console that offers a unique gaming experience with its detachable controllers. To get the most out of your Switch, it's essential to know how to pair your controllers correctly. In this article, we'll take you through the process of pairing your Switch controller, from the basics to advanced customization options. First, we'll cover the fundamentals of Switch controller pairing, including the different types of controllers and the pairing process. Then, we'll provide a step-by-step guide on how to pair your controller, making it easy for you to get started. Finally, we'll explore advanced pairing options and customization, allowing you to personalize your gaming experience. By the end of this article, you'll be able to pair your Switch controller with confidence. So, let's start with the basics - Understanding the Basics of Switch Controller Pairing.
Understanding the Basics of Switch Controller Pairing
The world of gaming has become increasingly complex, with various controllers and devices available for different gaming platforms. One of the most popular gaming consoles, the Nintendo Switch, offers a range of controllers that can be paired with the device for an enhanced gaming experience. However, many users struggle with the basics of switch controller pairing, leading to frustration and disappointment. To overcome this, it's essential to understand the fundamentals of switch controller pairing, including the role of Bluetooth technology, the different types of switch controllers and their pairing requirements, and the pre-pairing checklist to ensure a smooth connection. In this article, we'll delve into these topics, starting with the basics of Bluetooth technology and how it enables seamless connectivity between devices. What is Bluetooth and How Does it Work?
What is Bluetooth and How Does it Work?
Bluetooth is a wireless personal area network (PAN) technology that allows devices to communicate with each other over short distances, typically within a range of 30 feet. It operates on the 2.4 GHz frequency band and uses a radio communication protocol to transmit data between devices. Bluetooth devices use a technique called frequency hopping spread spectrum to minimize interference from other devices. Bluetooth devices are categorized into three classes, each with a different transmission range: Class 1 devices have a range of up to 100 meters, Class 2 devices have a range of up to 20 meters, and Class 3 devices have a range of up to 1 meter. Bluetooth devices can operate in two modes: master and slave. The master device initiates the connection and controls the data transfer, while the slave device responds to the master device's requests. Bluetooth devices use a process called pairing to establish a secure connection between devices. During pairing, the devices exchange cryptographic keys to secure the data transfer. Once paired, the devices can communicate with each other and exchange data. Bluetooth technology is widely used in many devices, including headphones, speakers, keyboards, and game controllers, such as the Nintendo Switch controller. Understanding how Bluetooth works is essential for pairing a Switch controller with a console or other device.
Types of Switch Controllers and Their Pairing Requirements
There are several types of Switch controllers, each with its unique pairing requirements. The standard Nintendo Switch Pro Controller and the Nintendo Switch Joy-Con controllers can be paired with the console using Bluetooth technology. To pair these controllers, simply go to the Switch's System Settings, select "Controllers and Sensors," and then choose "Change Grip/Order" or "Pair New Controllers." The Switch will then search for nearby controllers and prompt you to press the pairing button on the controller. The Nintendo Switch Lite, on the other hand, does not have detachable Joy-Con controllers, but it can still be paired with external controllers like the Pro Controller or third-party gamepads. Some third-party controllers, such as the 8Bitdo SN30/SF30, require a separate adapter or receiver to connect to the Switch, while others, like the PowerA Enhanced Wireless Controller, use Bluetooth technology for pairing. Additionally, some controllers, like the Nintendo Switch Online NES and SNES controllers, require a subscription to the Nintendo Switch Online service to pair and use. It's essential to check the specific pairing requirements for your controller to ensure a smooth and hassle-free gaming experience.
Pre-Pairing Checklist: Ensuring a Smooth Connection
When pairing a Nintendo Switch controller, it's essential to ensure a smooth connection by following a pre-pairing checklist. First, make sure the controller is fully charged or has fresh batteries, as a low battery can cause connectivity issues. Next, check that the Switch console is updated to the latest software version, as outdated software can lead to pairing problems. Additionally, verify that the controller is not already paired to another device, as this can prevent it from connecting to the Switch. It's also crucial to ensure that the controller is in pairing mode, which is usually indicated by a flashing light or a specific button combination. Furthermore, check for any physical obstructions or interference from other devices that could disrupt the Bluetooth signal. Finally, restart both the controller and the Switch console to ensure a clean slate for the pairing process. By following this pre-pairing checklist, you can help ensure a successful and hassle-free connection between your controller and the Nintendo Switch.
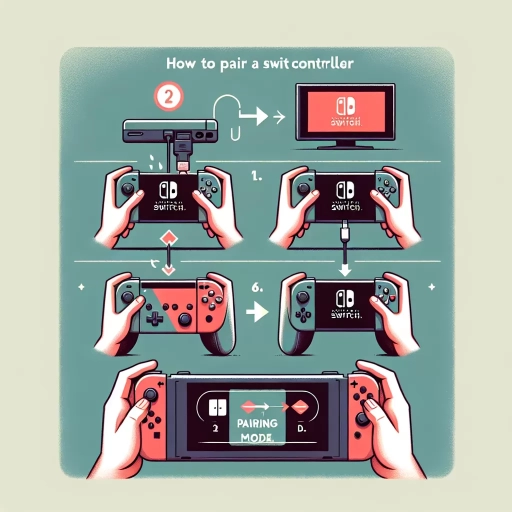
Step-by-Step Guide to Pairing Your Switch Controller
Pairing your Nintendo Switch controller can seem like a daunting task, but it's actually quite straightforward. To get started, you'll need to put your Switch in pairing mode, which allows it to detect and connect to nearby controllers. In this article, we'll take you through the step-by-step process of pairing your Switch controller, including how to put your Switch in pairing mode, connect your controller to the Switch via Bluetooth, and troubleshoot common pairing issues. By following these simple steps, you'll be able to enjoy a seamless gaming experience with your Switch. So, let's get started by putting your Switch in pairing mode.
Putting Your Switch in Pairing Mode
To put your Switch in pairing mode, start by going to the Home screen of your console. From there, navigate to the System Settings, which is represented by a gear icon. Scroll down and select "Controllers and Sensors" from the menu. Next, choose "Change Grip/Order" and then select "Pair New Controllers" or "Pair New Grip." This will prompt your Switch to enter pairing mode, and it will begin searching for nearby controllers to connect to. You'll know your Switch is in pairing mode when you see the "Pairing" screen, which displays a countdown timer and a message indicating that the console is searching for controllers. During this time, your Switch will be discoverable by controllers, allowing you to pair them successfully. Make sure to have your controller nearby and ready to pair, as the pairing process typically only takes a few seconds to complete.
Connecting Your Controller to the Switch via Bluetooth
To connect your controller to the Switch via Bluetooth, start by ensuring your controller is in pairing mode. For most controllers, this involves holding down the pairing button until the lights begin to flash. Next, navigate to the Switch's home screen and select the "Controllers" option. From there, choose "Change Grip/Order" and then "Pair New Controller." The Switch will then search for nearby Bluetooth devices. When your controller appears in the list, select it to initiate the pairing process. You may be prompted to enter a passcode or confirm the pairing on your controller. Once paired, your controller should be connected to the Switch via Bluetooth, allowing you to play games wirelessly. Note that some controllers may have slightly different pairing procedures, so be sure to consult your controller's user manual if you encounter any issues. Additionally, ensure that your controller is fully charged and that there are no other devices interfering with the Bluetooth signal. By following these steps, you should be able to successfully connect your controller to the Switch via Bluetooth.
Troubleshooting Common Pairing Issues
When troubleshooting common pairing issues with your Switch controller, there are several steps you can take to resolve the problem. First, ensure that your controller is fully charged, as a low battery can prevent pairing. Next, check that your Switch is in pairing mode, indicated by a flashing green light on the console. If your controller is not pairing, try restarting both the controller and the Switch, as this can often resolve connectivity issues. Additionally, check for any physical obstructions between the controller and the Switch, as these can interfere with the Bluetooth signal. If you're using a third-party controller, ensure that it is compatible with the Switch and that the firmware is up to date. You can also try resetting the controller to its factory settings, which can resolve any software-related issues. If none of these steps resolve the issue, try pairing the controller with a different Switch or device to rule out any problems with the console itself. By following these troubleshooting steps, you should be able to identify and resolve any common pairing issues with your Switch controller.
Advanced Pairing Options and Customization
The Nintendo Switch offers a range of advanced pairing options and customization features that can enhance your gaming experience. With the ability to pair multiple controllers, customize your controller settings, and use the Nintendo Switch Online app for enhanced pairing, you can take your gaming to the next level. One of the key benefits of the Nintendo Switch is its flexibility, and this is particularly evident in its pairing options. By using the Nintendo Switch Online app, you can easily pair your controllers and access a range of additional features, such as voice chat and online multiplayer. In this article, we will explore the advanced pairing options and customization features available on the Nintendo Switch, starting with the benefits of using the Nintendo Switch Online app for enhanced pairing.
Using the Nintendo Switch Online App for Enhanced Pairing
The Nintendo Switch Online app offers a convenient way to enhance your pairing experience with your Switch console. By downloading the app on your mobile device, you can access a range of features that make it easier to pair your controller and customize your gaming experience. One of the key benefits of using the app is the ability to pair your controller wirelessly, eliminating the need for a physical connection. This not only makes it more convenient but also reduces the risk of damage to your console or controller. Additionally, the app allows you to customize your controller settings, such as button mapping and vibration, to suit your gaming preferences. You can also use the app to update your controller's firmware, ensuring that you have the latest features and improvements. Furthermore, the app provides a range of other features, including voice chat, online multiplayer, and access to exclusive content, making it an essential tool for any serious Switch gamer. By using the Nintendo Switch Online app, you can take your gaming experience to the next level and enjoy a more seamless and enjoyable pairing process.
Customizing Your Controller Settings for a Personalized Experience
Customizing your controller settings can significantly enhance your gaming experience on the Nintendo Switch. By tailoring the controls to your preferences, you can improve your performance, reduce fatigue, and enjoy a more immersive experience. To access the controller settings, navigate to the System Settings on your Switch, then select "Controllers and Sensors." From here, you can adjust various settings, such as button mapping, vibration intensity, and motion controls. For example, you can swap the A and B buttons, invert the Y-axis, or adjust the dead zone for the analog sticks. Additionally, you can customize the HD rumble and motion controls to suit your playstyle. If you're using a Pro Controller, you can also adjust the trigger sensitivity and adjust the vibration motors. By fine-tuning these settings, you can create a personalized experience that suits your gaming needs and preferences. Furthermore, you can also save multiple controller profiles, allowing you to quickly switch between different settings for different games or playstyles. This feature is particularly useful if you play a variety of games that require different control schemes. Overall, customizing your controller settings can make a significant difference in your gaming experience, and the Nintendo Switch offers a range of options to help you get the most out of your controller.
Pairing Multiple Controllers for Multiplayer Gaming
When it comes to multiplayer gaming on the Nintendo Switch, pairing multiple controllers is a straightforward process that can enhance the overall gaming experience. To pair multiple controllers, start by ensuring that all controllers are fully charged and turned off. Then, go to the Switch's Home screen and select the "Controllers" option. From there, choose "Change Grip/Order" and select the "Pair New Controllers" option. The Switch will then search for available controllers, and you can select the ones you want to pair. You can pair up to eight controllers at a time, including Joy-Con, Nintendo Switch Pro Controllers, and even third-party controllers. Once paired, you can customize the controller layout and settings to suit your gaming needs. For example, you can assign specific controllers to specific players, adjust the vibration settings, and even customize the button mapping. Additionally, you can also use the Switch's built-in feature to create custom controller profiles, which can be saved and loaded for future gaming sessions. By pairing multiple controllers, you can enjoy a more immersive and engaging multiplayer gaming experience on the Nintendo Switch.