How To Screenshot On A Dell Laptop
Taking a screenshot on a Dell laptop is a straightforward process that can be accomplished in several ways. Whether you need to capture a full screen, a selected area, or a specific window, there are various methods to achieve this. In this article, we will explore three primary methods to take a screenshot on a Dell laptop: using keyboard shortcuts, utilizing the Snipping Tool, and employing other alternative methods. We will delve into the details of each approach, starting with the most convenient and widely used method - using keyboard shortcuts. By the end of this article, you will be equipped with the knowledge to take screenshots on your Dell laptop with ease. So, let's begin by exploring the simplest way to capture a screenshot using keyboard shortcuts.
Using Keyboard Shortcuts to Take a Screenshot on a Dell Laptop
Here is the introduction paragraph: Taking a screenshot on a Dell laptop can be a convenient way to capture and share information, from a funny meme to a technical issue. Fortunately, Dell laptops offer several keyboard shortcuts to take a screenshot, making it easy to capture exactly what you need. In this article, we will explore three simple methods to take a screenshot on a Dell laptop: using the Print Screen (PrtScn) key, using the Windows key + Print Screen (PrtScn) combination, and using the Alt + Print Screen (PrtScn) combination. By the end of this article, you will be able to quickly and easily take a screenshot on your Dell laptop using the method that suits you best. Let's start with the most basic method: using the Print Screen (PrtScn) key.
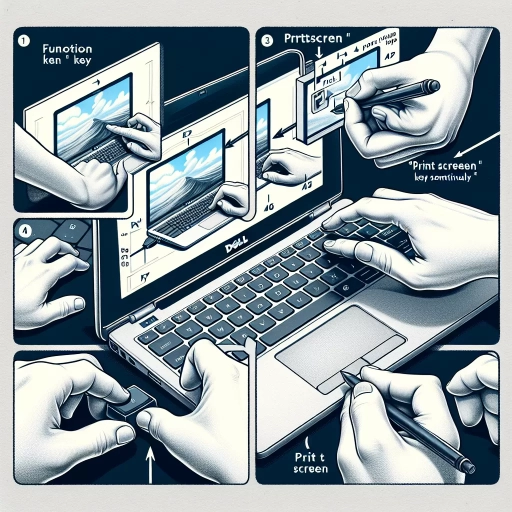
Using the Print Screen (PrtScn) Key
Using the Print Screen (PrtScn) key is a simple and quick way to capture a screenshot on your Dell laptop. Located on the top row of your keyboard, usually between the F12 key and the ScrLk key, the PrtScn key allows you to capture the entire screen or a selected area. To use the PrtScn key, simply press it once to capture the entire screen, including all windows, icons, and the taskbar. The screenshot will be copied to the clipboard, and you can then paste it into an image editing program like Microsoft Paint or Adobe Photoshop to save and edit it. Alternatively, you can press the Alt + PrtScn keys simultaneously to capture only the currently active window. This method is useful when you want to capture a specific window or dialog box without including the rest of the screen. Additionally, you can also press the Windows + PrtScn keys together to capture the entire screen and automatically save it as a file in the "Screenshots" folder in your Pictures folder. This method is convenient when you want to quickly capture and save a screenshot without having to open an image editing program. Overall, using the PrtScn key is a convenient and flexible way to take screenshots on your Dell laptop, offering various options to suit your needs.
Using the Windows Key + Print Screen (PrtScn) Combination
Using the Windows Key + Print Screen (PrtScn) Combination. To take a screenshot of your entire screen and automatically save it to the "Screenshots" folder, press the Windows key + Print Screen (PrtScn) simultaneously. This method is particularly useful when you want to capture a screenshot of your entire desktop, including all open windows and icons. When you press the Windows key + Print Screen, the screen will dim for a brief moment, indicating that the screenshot has been taken. The screenshot will be saved as a PNG file in the "Screenshots" folder, which is located in the "Pictures" folder. You can access the "Screenshots" folder by navigating to "This PC" > "Pictures" > "Screenshots". From there, you can view, edit, or share your screenshot as needed. This method is a convenient way to capture and save screenshots without having to open the Snipping Tool or other screenshot software.
Using the Alt + Print Screen (PrtScn) Combination
When you want to capture a specific window on your Dell laptop, using the Alt + Print Screen (PrtScn) combination is the way to go. This keyboard shortcut allows you to take a screenshot of the currently active window, which is the window that is currently in focus and on top of other windows. To use this combination, simply press and hold the Alt key, then press the Print Screen (PrtScn) key. The screenshot will be copied to the clipboard, and you can then paste it into an image editing program, such as Paint or Adobe Photoshop, to save and edit the screenshot. This method is particularly useful when you want to capture a specific window or dialog box without including the rest of the desktop or other windows in the screenshot. Additionally, using the Alt + Print Screen combination can help you to avoid having to crop or edit the screenshot later, as it allows you to capture only the specific window you need. Overall, this keyboard shortcut is a quick and easy way to take a screenshot of a specific window on your Dell laptop.
Using the Snipping Tool to Take a Screenshot on a Dell Laptop
The Snipping Tool is a built-in feature on Dell laptops that allows users to take screenshots of their screen. This feature is particularly useful for capturing important information, such as error messages or online content, that you want to save for later reference. To use the Snipping Tool, you can access it from the Start menu, and then use it to capture a full-screen screenshot or a custom screenshot of a specific area of your screen. In this article, we will explore how to access the Snipping Tool from the Start menu, use it to capture a full-screen screenshot, and use it to capture a custom screenshot. By the end of this article, you will be able to take screenshots like a pro using the Snipping Tool on your Dell laptop. So, let's get started by accessing the Snipping Tool from the Start menu.
Accessing the Snipping Tool from the Start Menu
To access the Snipping Tool from the Start menu, click on the Start button located at the bottom left corner of your Dell laptop's screen. This will open the Start menu, displaying a list of frequently used apps, documents, and settings. From here, you can type "Snipping Tool" in the search bar to quickly locate the app. Alternatively, you can scroll down the list of apps and find the Snipping Tool icon, which resembles a pair of scissors. Once you've located the Snipping Tool, click on it to open the app. The Snipping Tool will then be displayed on your screen, allowing you to select the type of screenshot you want to take, such as a full screen, window, or rectangular snip. With the Snipping Tool open, you can easily capture a screenshot of your Dell laptop's screen and edit it as needed.
Using the Snipping Tool to Capture a Full-Screen Screenshot
Capturing a full-screen screenshot using the Snipping Tool on a Dell laptop is a straightforward process that can be completed in a few simple steps. To start, locate the Snipping Tool icon on your Dell laptop, which can usually be found in the Start menu or by searching for it in the search bar. Once you've opened the Snipping Tool, click on the "New" button to initiate the screenshot process. From the drop-down menu, select "Full Screen" to capture the entire screen. The Snipping Tool will then automatically capture the full screen and open the screenshot in the Snipping Tool editor, where you can annotate, highlight, and save the image as desired. Alternatively, you can also use the keyboard shortcut "Windows + Print Screen" to capture a full-screen screenshot, which will automatically save the image to the "Screenshots" folder in your Pictures library. By using the Snipping Tool to capture a full-screen screenshot, you can easily share or save important information, such as error messages or tutorials, for future reference.
Using the Snipping Tool to Capture a Custom Screenshot
Using the Snipping Tool to capture a custom screenshot is a convenient and flexible way to capture specific parts of your screen. To access the Snipping Tool, you can search for it in the Start menu or type "snipping tool" in the Windows search bar. Once you open the Snipping Tool, you'll see a simple interface with several options. You can choose from four different snip types: Full Screen, Window, Rectangular Snip, and Free-form Snip. The Rectangular Snip option allows you to capture a specific rectangular area of your screen, while the Free-form Snip option lets you capture any shape or size of screenshot you want. To capture a custom screenshot, select the Rectangular Snip or Free-form Snip option, then click and drag your mouse to select the area of the screen you want to capture. You can also use the keyboard shortcut Ctrl + PrtScn to capture a screenshot of the entire screen, and then use the Snipping Tool to edit and crop the screenshot to your desired size. Once you've captured your screenshot, you can save it as an image file, copy it to the clipboard, or email it directly from the Snipping Tool. The Snipping Tool also allows you to add annotations, such as text, arrows, and highlights, to your screenshot, making it a useful tool for creating tutorials, presentations, and other visual content. Overall, the Snipping Tool is a powerful and versatile tool for capturing custom screenshots on your Dell laptop.
Using Other Methods to Take a Screenshot on a Dell Laptop
While taking a screenshot on a Dell laptop is relatively straightforward, there are several alternative methods you can use to capture your screen. If you're looking for more advanced features or greater flexibility, you can use the Game Bar, the Windows Snip & Sketch app, or third-party screenshot software. Each of these methods offers unique benefits and can be useful in different situations. For example, the Game Bar is particularly useful for capturing screenshots of games or other full-screen applications, while the Snip & Sketch app provides more advanced editing tools. Third-party software, on the other hand, often offers additional features such as automatic saving and sharing options. In this article, we'll explore each of these methods in more detail, starting with using the Game Bar to take a screenshot.
Using the Game Bar to Take a Screenshot
Here is the paragraphy: The Game Bar is a built-in feature in Windows 10 that allows you to take screenshots of your games and other applications. To use the Game Bar to take a screenshot, follow these steps: Press the Windows key + G to open the Game Bar. You can also search for "Game Bar" in the Start menu to open it. Once the Game Bar is open, click on the screenshot button, which looks like a camera. You can also use the keyboard shortcut Windows key + Alt + Print Screen to take a screenshot. The screenshot will be saved to the "Captures" folder in your "Videos" folder. You can also customize the Game Bar settings to change the default save location and other options. To do this, click on the gear icon in the top right corner of the Game Bar and select "Settings." From here, you can change the save location, set a custom keyboard shortcut, and more. The Game Bar is a convenient way to take screenshots of your games and other applications, and it's easy to use.
Using the Windows Snip & Sketch App to Take a Screenshot
The Windows Snip & Sketch app is a powerful tool for taking screenshots on a Dell laptop. To use it, first, open the app by searching for it in the Start menu or by typing "Snip & Sketch" in the search bar. Once the app is open, click on the "New" button to start a new screenshot. You will then be presented with several options for taking a screenshot, including "Full screen," "Window," and "Rectangular snip." Choose the option that best suits your needs. If you select "Full screen," the app will automatically capture the entire screen. If you select "Window," you will be prompted to select a specific window to capture. If you select "Rectangular snip," you will be able to draw a rectangle around the area of the screen you want to capture. Once you have selected your screenshot option, the app will capture the screenshot and open it in the Snip & Sketch editor, where you can annotate, highlight, and save the screenshot as needed. The Snip & Sketch app also allows you to delay the screenshot by up to 10 seconds, which can be useful if you need to capture a screenshot of a menu or other temporary item on the screen. Overall, the Windows Snip & Sketch app is a versatile and user-friendly tool for taking screenshots on a Dell laptop.
Using Third-Party Screenshot Software
Using third-party screenshot software is a viable alternative to the built-in methods on a Dell laptop. There are numerous options available, each with its unique features and functionalities. Snagit, for instance, is a popular choice among professionals, offering advanced editing tools and the ability to capture scrolling screens. Another option is Lightshot, which allows users to capture and edit screenshots with ease, as well as share them directly to social media or cloud storage. Other notable mentions include Greenshot, which offers customizable hotkeys and annotation tools, and ShareX, which provides a wide range of capture options and automatic image uploading. When choosing a third-party screenshot software, consider the specific features you need, such as image editing, sharing, and organization capabilities. Some software may also offer additional features like video recording, screen recording, and OCR (Optical Character Recognition) capabilities. By exploring the various options available, you can find the perfect tool to suit your screenshotting needs and enhance your productivity.