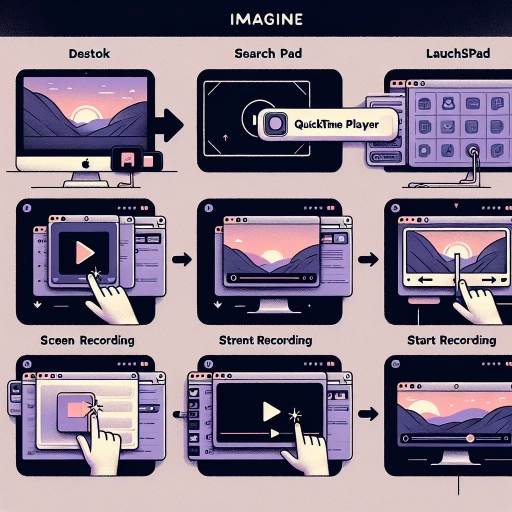
How To Screen Record On Mac
Understanding Screen Recording on Mac
The Basics of Screen Recording
Screen recording on Mac is a simple, efficient and useful tool that allows you to capture whatever is on your screen. This tool is particularly effective for creating tutorials, capturing video calls or recording game sessions. To do so, Mac uses a built-in app called QuickTime Player. While the basics of screen recording may seem straightforward, there are a few critical steps to ensure a high-quality recording. These steps include selecting an appropriate recording area, choosing the right audio source, and configuring proper screen recording settings.
- QuickTime Player: This is the default media player and screen recording tool on mac. It provides basic functionalities such as play, record, edit and share for both audio and video formats.
- Recording area selection: Before starting the recording session, it's important to select the recording area. You can either choose to capture the entire screen or a selected portion.
- Audio source: Based on the content, users can choose whether to record audio through the built-in microphone or capture the system's audio.
Steps to Start Screen Recording on Mac
Implementing the screen recording function on Mac is an easy process which typically involves four steps. These steps are opening QuickTime Player, going to the file menu, choosing new screen recording and pressing the record button. Each step entails specific considerations to optimize the recording session.
- Launching QuickTime Player: You can locate QuickTime Player in the applications folder or search it using Finder. Once open, the user interface is relatively intuitive to navigate.
- File Menu: After opening QuickTime Player, navigate to the "File" menu located at the top-bar and click "New Screen Recording."
- Start Recording: Once everything is set, click the red recording button to commence your screen recording session.
Advanced screen recording options on Mac
For users who need more advanced functions or professional-quality results, third-party screen recording tools are available. These tools offer enhanced features such as simultaneous webcam recording, system audio recording, and annotative tools during recording. Hence, they can be a valuable consideration for users looking to step up their recording game.
- Simultaneous webcam recording: This feature is beneficial for creating tutorial videos where it's essential to record the presenter's face in conjunction with the screen recording.
- System audio recording: Unlike QuickTime Player, some third-party tools allow capturing of system audio, a functionality that is handy for recording in-app sound.
- Annotative tools: For an interactive and illustrative recording, third-party screen recording tools offer real-time annotations such as drawings, texts, and callouts.