How To Adjust Headlights
Here is the introduction paragraph: Properly adjusted headlights are crucial for safe and effective nighttime driving. However, many drivers neglect to check and adjust their headlights, which can lead to reduced visibility, increased risk of accidents, and even traffic tickets. In this article, we will provide a comprehensive guide on how to adjust headlights, starting with understanding the importance of proper headlight adjustment. We will also cover the necessary tools and preparations needed for the process, as well as provide a step-by-step guide to help you adjust your headlights with ease. By the end of this article, you will be equipped with the knowledge and skills to ensure your headlights are properly adjusted, providing you with improved visibility and safety on the road. So, let's begin by understanding the importance of proper headlight adjustment.
Understanding the Importance of Proper Headlight Adjustment
Proper headlight adjustment is crucial for safe and responsible driving. When headlights are not adjusted correctly, they can cause glare for oncoming traffic, reduce visibility for the driver, and increase the risk of accidents. In this article, we will explore the importance of proper headlight adjustment and its impact on road safety. We will discuss how proper headlight adjustment can reduce glare for oncoming traffic, improve visibility for the driver, and enhance safety on the road. By understanding the significance of proper headlight adjustment, drivers can take steps to ensure their headlights are adjusted correctly, reducing the risk of accidents and promoting a safer driving environment. One of the most significant benefits of proper headlight adjustment is reducing glare for oncoming traffic, which we will discuss in more detail next.
Reducing Glare for Oncoming Traffic
Adjusting your headlights to reduce glare for oncoming traffic is a crucial aspect of ensuring road safety. When your headlights are not properly adjusted, they can cause discomfort and distraction to other drivers, increasing the risk of accidents. To reduce glare, start by checking your owner's manual for the recommended headlight adjustment settings. Typically, the aim of the headlights should be slightly below the horizon, with the center of the beam about 2-3 inches below the center of the headlight lens. You can use a wall or a screen to test the beam pattern and make adjustments as needed. Additionally, consider using a headlight adjustment tool or consulting a professional mechanic if you're unsure about the process. It's also essential to ensure that your headlights are clean and free of debris, as dirt and grime can scatter light and increase glare. By taking these steps, you can significantly reduce the glare from your headlights and contribute to a safer driving environment for everyone on the road.
Improving Visibility for the Driver
Proper headlight adjustment is crucial for ensuring the safety of drivers, passengers, and pedestrians on the road. One of the primary reasons for adjusting headlights is to improve visibility for the driver. When headlights are not adjusted correctly, they can cause glare, blind spots, and reduced visibility, making it difficult for drivers to see the road ahead. This can lead to accidents, especially at night or in low-light conditions. By adjusting the headlights to the correct position, drivers can improve their visibility, reducing the risk of accidents and ensuring a safer driving experience. Additionally, proper headlight adjustment can also help to reduce eye strain and fatigue, allowing drivers to stay focused and alert on the road. Furthermore, adjusting headlights to the correct position can also help to improve the overall performance of the vehicle, as it allows the driver to see the road ahead more clearly, making it easier to navigate through traffic and road conditions. Overall, improving visibility for the driver is a critical aspect of headlight adjustment, and it is essential to ensure that headlights are adjusted correctly to ensure a safe and enjoyable driving experience.
Enhancing Safety on the Road
Adjusting your headlights is a crucial aspect of ensuring safety on the road, but it's just one piece of the puzzle. To truly enhance safety, it's essential to consider the broader context of road safety. This includes maintaining your vehicle in good condition, being aware of your surroundings, and adopting defensive driving techniques. Regularly checking and replacing worn-out tires, brake pads, and other critical components can help prevent accidents. Additionally, staying alert and focused on the road, avoiding distractions like using your phone while driving, and being mindful of other drivers' behavior can significantly reduce the risk of accidents. Furthermore, understanding and following traffic laws and regulations, such as speed limits and right-of-way rules, is vital for safe driving. By combining these factors with proper headlight adjustment, you can significantly enhance your safety on the road and reduce the risk of accidents.
Tools and Preparations Needed for Headlight Adjustment
Adjusting your vehicle's headlights is a crucial maintenance task that ensures safe driving, especially at night or in low-visibility conditions. To achieve proper headlight alignment, it's essential to have the right tools and preparations in place. This involves gathering essential tools and equipment, such as a screwdriver, pliers, and a headlight adjustment gauge, to name a few. Additionally, consulting the vehicle's owner's manual is vital to understand the specific headlight adjustment procedure for your particular vehicle make and model. Furthermore, choosing a safe and level workspace is critical to ensure accurate adjustments and prevent any potential hazards. By having these tools and preparations in place, you'll be well on your way to achieving optimal headlight alignment. To get started, let's take a closer look at the essential tools and equipment you'll need to gather.
Gathering Essential Tools and Equipment
When it comes to adjusting your headlights, having the right tools and equipment is crucial to ensure a safe and successful process. To start, you'll need a screwdriver, preferably a Torx or Phillips head, to remove any trim or bezels that may be obstructing access to the headlight assembly. A wrench or socket set may also be required to loosen any bolts or nuts that hold the headlight in place. Additionally, a flashlight or work light can be helpful in illuminating the area, allowing you to see what you're doing more clearly. A level or straightedge can also be useful in ensuring that the headlight is properly aligned. Furthermore, a pair of gloves and safety glasses can provide protection from any sharp edges or debris that may be encountered during the process. It's also a good idea to have a repair manual or online instructions specific to your vehicle's make and model, as this can provide valuable guidance and diagrams to help you navigate the adjustment process. Finally, a friend or assistant can be helpful in holding the headlight in place or providing an extra set of hands, making the process easier and more efficient. By gathering these essential tools and equipment, you'll be well-prepared to tackle the task of adjusting your headlights and ensure that your vehicle is safe and roadworthy.
Consulting the Vehicle's Owner's Manual
When consulting the vehicle's owner's manual for headlight adjustment, it is essential to understand the specific instructions and guidelines provided by the manufacturer. The owner's manual typically contains detailed information on the headlight adjustment procedure, including the location of the adjustment screws or clips, the recommended adjustment settings, and any specific tools required. By consulting the manual, you can ensure that you are following the correct procedure and avoiding any potential damage to the headlight assembly or other components. Additionally, the manual may provide troubleshooting tips and guidelines for common issues that may arise during the adjustment process. It is also important to note that some vehicles may have specific requirements or recommendations for headlight adjustment, such as the use of specialized tools or the need for professional assistance. By consulting the owner's manual, you can ensure that you are aware of these requirements and can take the necessary steps to ensure a safe and effective headlight adjustment. Furthermore, the manual may also provide information on the importance of proper headlight alignment and how it can affect the vehicle's safety and performance. By following the manufacturer's guidelines and recommendations, you can ensure that your headlights are properly adjusted and functioning correctly, which is essential for safe driving, especially at night or in low-visibility conditions. Overall, consulting the vehicle's owner's manual is a crucial step in the headlight adjustment process, and it can help you to achieve a safe and effective adjustment that meets the manufacturer's standards.
Choosing a Safe and Level Workspace
Choosing a safe and level workspace is crucial when adjusting your vehicle's headlights. A level surface ensures that your measurements and adjustments are accurate, which is essential for proper headlight alignment. Look for a flat and even surface, such as a garage floor or a parking lot, and make sure it's free from any obstacles or debris. Avoid working on uneven or sloping surfaces, as this can affect the accuracy of your adjustments. Additionally, ensure that the workspace is well-lit and clear of any distractions, allowing you to focus on the task at hand. It's also a good idea to consult your vehicle's owner's manual for any specific recommendations on workspace requirements. By choosing a safe and level workspace, you'll be able to make precise adjustments and ensure that your headlights are properly aligned, providing optimal visibility and safety on the road.
Step-by-Step Guide to Adjusting Headlights
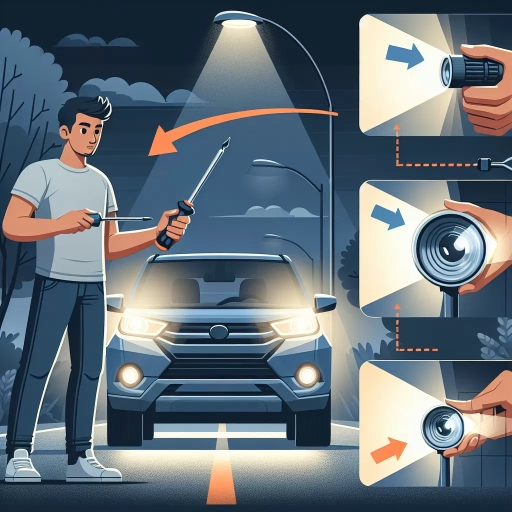
Adjusting your vehicle's headlights is a crucial maintenance task that ensures safe driving, especially at night or in low-visibility conditions. A misaligned headlight beam can cause glare for oncoming traffic, reduce your visibility, and even lead to accidents. Fortunately, adjusting your headlights is a relatively simple process that can be done at home with a few tools. In this step-by-step guide, we will walk you through the process of adjusting your headlights, starting with locating the headlight adjustment screws, then setting the headlight beam pattern, and finally testing and fine-tuning the headlights. By following these steps, you can ensure your headlights are properly aligned and functioning optimally. So, let's get started by locating the headlight adjustment screws.
Locating the Headlight Adjustment Screws
Locating the headlight adjustment screws is a crucial step in adjusting your vehicle's headlights. The screws are usually located on the headlight assembly, and their exact position may vary depending on the make and model of your vehicle. Typically, you can find the adjustment screws on the top or side of the headlight assembly, and they may be covered with a plastic or metal cap. To locate the screws, start by consulting your vehicle's owner's manual or searching online for specific instructions for your vehicle's make and model. You can also look for a diagram or illustration of the headlight assembly in the manual or online. If you're still having trouble finding the screws, you can try looking for a small notch or slot on the headlight assembly, as this is often where the adjustment screws are located. Additionally, some vehicles may have a separate adjustment mechanism, such as a dial or lever, which can be used to adjust the headlights. In this case, you may need to consult the owner's manual or contact a professional mechanic for assistance. Once you've located the adjustment screws, you can proceed to adjust your headlights to ensure they are properly aligned and providing adequate illumination on the road.
Setting the Headlight Beam Pattern
Adjusting the headlight beam pattern is a crucial step in ensuring optimal visibility and safety on the road. The headlight beam pattern refers to the way the light is distributed on the road ahead, and it's essential to set it correctly to avoid dazzling other drivers or pedestrians. To set the headlight beam pattern, start by locating the headlight adjustment screws, usually found on the headlight assembly or on the dashboard. Next, turn on the headlights and observe the beam pattern on a wall or screen. The ideal beam pattern should have a sharp cutoff at the top and a gradual decline in intensity towards the bottom. If the beam pattern is too high or too low, adjust the screws accordingly. For most vehicles, the headlight beam pattern should be set so that the center of the beam is about 2-3 inches below the center of the headlight lens. Additionally, the beam pattern should be adjusted so that it's not too wide or too narrow, as this can affect visibility and safety. It's also important to note that some vehicles may have different headlight beam pattern settings for different driving conditions, such as city or highway driving. Consult your vehicle's owner's manual for specific instructions on how to adjust the headlight beam pattern for your particular vehicle. By setting the headlight beam pattern correctly, you can ensure optimal visibility and safety on the road, and avoid potential hazards such as dazzling other drivers or pedestrians.
Testing and Fine-Tuning the Headlights
Testing and fine-tuning the headlights is a crucial step in ensuring they are properly adjusted and providing optimal visibility on the road. To test the headlights, start by finding a flat and level surface, such as an empty parking lot, and position the vehicle so that the headlights are about 25 feet away from a wall or other reflective surface. Turn on the headlights and check the beam pattern to ensure it is even and symmetrical. Check for any signs of unevenness, such as a beam that is higher on one side than the other, or a beam that is not centered. If the beam pattern is uneven, adjust the headlights accordingly. Next, check the beam's distance and height. The beam should be about 2-3 inches below the center of the headlight lens and should not shine directly into the eyes of oncoming traffic. If the beam is too high or too low, adjust the headlights to achieve the correct position. Finally, test the headlights at different angles, such as when turning or changing lanes, to ensure they are providing adequate visibility in all driving situations. By fine-tuning the headlights, drivers can ensure they are getting the best possible visibility on the road, which can help to reduce the risk of accidents and improve overall safety.