How Long Do Carved Pumpkins Last
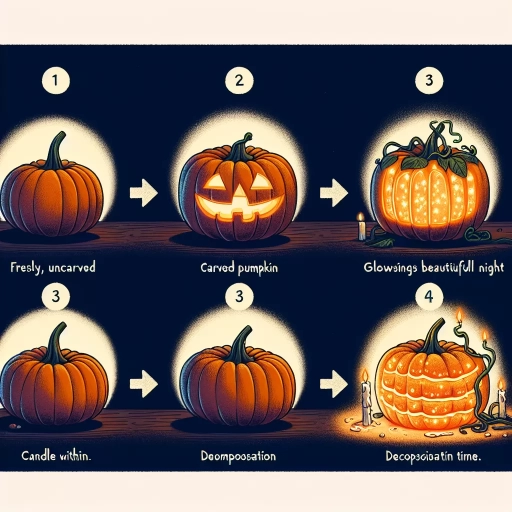
Carved pumpkins are a staple of the fall season, adding a touch of warmth and personality to any home or yard. However, many people wonder how long these festive decorations can last. The answer depends on several factors, including the type of pumpkin, the carving design, and how well the pumpkin is cared for. In this article, we will explore the factors that affect the longevity of carved pumpkins, provide tips on how to extend their life, and offer solutions to common issues that may arise. By understanding these key elements, you can enjoy your carved pumpkin for a longer period and make the most of the fall season. So, let's start by examining the factors that affect the longevity of carved pumpkins.
Factors Affecting the Longevity of Carved Pumpkins
Carved pumpkins are a staple of fall decorations, but their longevity can vary greatly depending on several factors. To keep your carved pumpkin fresh and intact for as long as possible, it's essential to consider the impact of temperature and humidity, handling and display, and carving techniques and tools. Temperature and humidity, in particular, play a significant role in determining the lifespan of a carved pumpkin. When exposed to warm temperatures and high humidity, carved pumpkins can quickly become a breeding ground for bacteria and mold, leading to a rapid decline in their appearance and structural integrity. By understanding the effects of temperature and humidity on carved pumpkins, you can take steps to create an environment that slows down the decay process and keeps your pumpkin looking its best. (Note: The supporting paragraph should be 200 words and the transition to Temperature and Humidity should be at the end of the paragraph)
Temperature and Humidity
Temperature and humidity are two crucial environmental factors that significantly impact the longevity of carved pumpkins. Temperature affects the rate of respiration and metabolism in pumpkins, with higher temperatures accelerating the breakdown of cellular components and leading to faster spoilage. Ideally, carved pumpkins should be kept in a cool, dry place with a consistent temperature between 50°F and 60°F (10°C and 15°C). Avoid placing them near heating vents, radiators, or direct sunlight, as this can cause rapid deterioration. On the other hand, humidity plays a critical role in preventing moisture loss and maintaining the pumpkin's structural integrity. A relative humidity of 50-60% is optimal, as it helps to slow down the dehydration process and reduce the risk of mold and bacterial growth. If the air is too dry, the pumpkin may shrivel and become brittle, while excessive moisture can lead to rot and decay. By controlling temperature and humidity levels, you can help extend the life of your carved pumpkin and keep it looking fresh and vibrant for a longer period.
Handling and Display
Carved pumpkins are a popular decoration during the fall season, but they can be delicate and require proper handling and display to maintain their longevity. To keep your carved pumpkin fresh for a longer period, it's essential to handle it carefully to avoid damaging the flesh. When carving, use a serrated knife and make smooth, gentle cuts to prevent tearing the pumpkin. After carving, use a soft brush or a damp cloth to remove any excess pulp and fibers from the design. This will help prevent moisture from accumulating and promote air circulation, which can contribute to mold and rot. When displaying your carved pumpkin, choose a location with good air circulation and avoid placing it near direct sunlight, heat sources, or moisture. A temperature range of 50-60°F (10-15°C) is ideal for preserving the pumpkin. You can also apply a commercial pumpkin preservative or a homemade solution of equal parts water and bleach to the cut surfaces to help prevent decay. By following these handling and display tips, you can enjoy your carved pumpkin for several days to a week or more, depending on the pumpkin's variety, carving design, and environmental conditions.
Carving Techniques and Tools
Carving techniques and tools play a crucial role in determining the longevity of carved pumpkins. The type of carving tool used can significantly impact the pumpkin's lifespan. A serrated knife, for example, can cause more damage to the pumpkin's flesh than a specialized pumpkin-carving tool, leading to a shorter lifespan. The technique used to carve the design also affects the pumpkin's longevity. A shallow, intricate design can be more prone to drying out and cracking than a deeper, more simplistic design. Additionally, the direction of the cuts can also impact the pumpkin's lifespan. Cutting in a direction that follows the natural curve of the pumpkin can help to reduce stress on the flesh, while cutting against the curve can cause more damage. Furthermore, the use of a scoop or spoon to remove the pumpkin's insides can also affect the longevity of the carved pumpkin. If the insides are not removed carefully, it can cause damage to the flesh and lead to a shorter lifespan. Overall, using the right tools and techniques can help to extend the life of a carved pumpkin.
How to Extend the Life of Your Carved Pumpkin
As the spooky season approaches, many of us are eager to carve our pumpkins and display them on our doorsteps. However, we often find ourselves disappointed when our carefully crafted designs begin to wither and decay after just a few days. But fear not, dear pumpkin enthusiasts! With a few simple techniques and some basic knowledge, you can extend the life of your carved pumpkin and keep it looking fresh and festive for weeks to come. To achieve this, it's essential to focus on three key areas: preservation methods and treatments, environmental control and monitoring, and regular maintenance and upkeep. By implementing these strategies, you can significantly prolong the lifespan of your pumpkin and enjoy it throughout the Halloween season. One of the most critical steps in preserving your pumpkin is to apply the right treatments and methods, which we'll explore in more detail below.
Preservation Methods and Treatments
Preservation methods and treatments can significantly extend the life of your carved pumpkin. One effective method is to apply a commercial pumpkin preservative or a homemade solution of equal parts water and bleach to the cut surfaces. This helps prevent mold and bacteria growth, which can cause the pumpkin to decay quickly. Another approach is to use a petroleum-based product, such as petroleum jelly or cooking spray, to coat the carved surfaces and prevent moisture from entering the pumpkin. Additionally, you can try using a natural preservative like cinnamon, nutmeg, or cloves to repel insects and fungi. It's also essential to keep your carved pumpkin away from direct sunlight, heat sources, and moisture to slow down the decay process. By implementing these preservation methods and treatments, you can enjoy your carved pumpkin for a longer period.
Environmental Control and Monitoring
Environmental control and monitoring play a crucial role in extending the life of carved pumpkins. By regulating the temperature, humidity, and light exposure, you can significantly slow down the decay process. Ideally, carved pumpkins should be kept in a cool, dry place with a consistent temperature between 50°F to 60°F (10°C to 15°C). This will help to slow down the growth of bacteria and mold. Additionally, monitoring the humidity levels is essential, as high humidity can lead to moisture accumulation, which can cause the pumpkin to rot faster. It is recommended to keep the humidity level below 60%. Furthermore, direct sunlight can cause the pumpkin to dry out and become brittle, so it's best to place it in a shaded area or use a UV-filtering window film to filter out the harsh sunlight. By controlling these environmental factors, you can help to preserve the carved pumpkin and keep it fresh for a longer period. Regular monitoring of the pumpkin's condition is also essential, as it will allow you to catch any signs of decay or damage early on, and take corrective action to extend its life. By combining environmental control and monitoring with proper care and handling, you can enjoy your carved pumpkin for several weeks or even months.
Regular Maintenance and Upkeep
Regular maintenance and upkeep are crucial to extending the life of your carved pumpkin. To keep your pumpkin fresh and prevent decay, make sure to clean and dry it thoroughly after carving. Use a soft brush or cloth to remove any dirt, debris, or excess pulp from the carved areas. Then, apply a commercial pumpkin preservative or a homemade solution of equal parts water and bleach to the cut surfaces. This will help prevent bacterial growth and mold. Next, place your pumpkin in a cool, dry location, away from direct sunlight and heat sources. Check on your pumpkin daily, and if you notice any signs of decay, such as soft spots or mold, remove the affected area immediately. You can also use a hair dryer on a low setting to dry out the carved areas and prevent moisture from accumulating. By following these simple maintenance and upkeep tips, you can help extend the life of your carved pumpkin and keep it looking fresh and festive throughout the Halloween season.
Common Issues and Solutions for Carved Pumpkins
Carved pumpkins are a staple of the fall season, but they can be finicky to maintain. Many people struggle with common issues that can cause their pumpkins to deteriorate quickly, such as mold and fungal growth, pests and insects, and general deterioration. However, with the right techniques and solutions, you can keep your carved pumpkin looking its best throughout the season. In this article, we will explore three key areas to focus on: preventing mold and fungal growth, dealing with pests and insects, and repairing and reviving a deteriorating pumpkin. By following these tips, you can enjoy your carved pumpkin for weeks to come. To start, let's take a closer look at one of the most common issues that can affect carved pumpkins: preventing mold and fungal growth.
Preventing Mold and Fungal Growth
Preventing mold and fungal growth is crucial to extend the lifespan of carved pumpkins. To prevent mold and fungal growth, it's essential to create an environment that inhibits their development. One effective way to do this is by applying a commercial pumpkin preservative or a homemade solution of equal parts water and bleach to the cut surfaces of the pumpkin. This will help to kill any bacteria or fungi that may be present, reducing the risk of mold and fungal growth. Additionally, making sure the pumpkin is completely dry before carving and storing it in a cool, dry place can also help to prevent moisture from accumulating and creating an ideal environment for mold and fungi to grow. Furthermore, using a serrated knife to carve the pumpkin, rather than a regular knife, can help to reduce the amount of moisture that is released from the pumpkin, making it more difficult for mold and fungi to develop. By taking these simple steps, you can help to prevent mold and fungal growth and keep your carved pumpkin looking fresh and healthy for a longer period.
Dealing with Pests and Insects
Dealing with pests and insects is a common issue when it comes to carved pumpkins. These unwanted critters can cause significant damage to the pumpkin, leading to rot and decay. To prevent pests and insects from ruining your carved pumpkin, there are several steps you can take. First, make sure to clean and dry the pumpkin thoroughly before carving. This will help remove any dirt, bacteria, or other debris that may attract pests. Next, apply a commercial pumpkin preservative or a homemade solution of equal parts water and bleach to the cut surfaces of the pumpkin. This will help prevent the growth of bacteria and mold, which can attract pests. You can also try using natural deterrents such as cinnamon, nutmeg, or cloves to repel pests. Additionally, keep your carved pumpkin away from direct sunlight and heat sources, as these can cause the pumpkin to dry out and become more susceptible to pest damage. Finally, check your pumpkin regularly for signs of pests or insects, and take action immediately if you notice any problems. By following these steps, you can help keep your carved pumpkin fresh and pest-free for a longer period.
Repairing and Reviving a Deteriorating Pumpkin
Carved pumpkins can be a beautiful and festive addition to any home or yard, but they can also be prone to deterioration. If you've noticed that your carved pumpkin is starting to rot, mold, or become discolored, there are several steps you can take to repair and revive it. First, remove any visible mold or mildew from the surface of the pumpkin using a soft-bristled brush or a clean cloth. Next, mix a solution of equal parts water and bleach, and use it to gently scrub away any remaining mold or stains. Be sure to wear gloves and work in a well-ventilated area to avoid exposure to the bleach. Once the pumpkin is clean, use a dry cloth to pat it dry and remove any excess moisture. To help prevent further deterioration, you can apply a commercial pumpkin preservative or a homemade solution of equal parts water and petroleum jelly to the carved areas. This will help to lock in moisture and prevent bacteria and mold from growing. Finally, place the pumpkin in a cool, dry location, away from direct sunlight and heat sources, to help slow down the deterioration process. By following these steps, you can help to repair and revive your deteriorating pumpkin and keep it looking its best for a longer period of time.