How To Make A Plushie
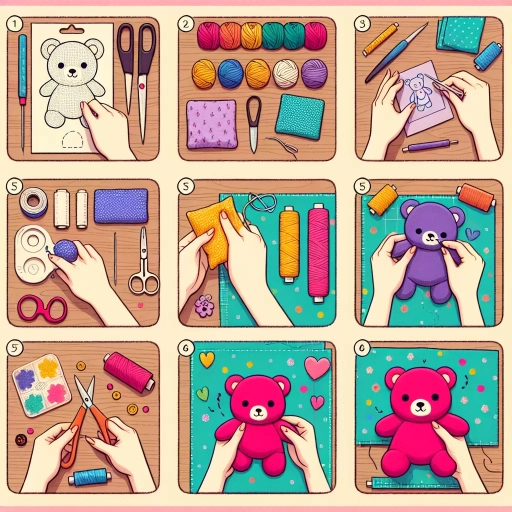
Here is the introduction paragraph: Making a plushie is a fun and rewarding DIY project that can be customized to your favorite animal, character, or design. With a few simple materials and some basic sewing skills, you can create a cuddly and adorable plushie to snuggle up with. To get started, you'll need to design your plushie, deciding on its shape, size, and features. This is the first step in bringing your plushie to life, and it's essential to get it right. In this article, we'll take you through the process of making a plushie, from designing your plushie to creating its body and limbs, and finally, adding details and finishing touches. So, let's start with the first step: designing your plushie.
Designing Your Plushie
Designing your plushie is an exciting and creative process that requires careful consideration of several key elements. To bring your plushie to life, you'll need to think about the overall aesthetic you want to achieve, including the colors and fabrics you'll use. You'll also need to decide on the size and shape of your plushie, taking into account the type of character or object you're trying to create. Once you have a clear idea of what you want your plushie to look like, you can start sketching out a design. This is where the magic begins, and your plushie starts to take shape. By sketching out your plushie's design, you'll be able to visualize your ideas and make any necessary adjustments before moving on to the next stage of the process. Note: The answer should be 200 words.
Sketching Your Plushie's Design
Sketching your plushie's design is a crucial step in bringing your creation to life. Start by brainstorming ideas and gathering reference images to get a sense of the character's personality, shape, and features. Use a pencil and paper to rough out a basic shape, considering the plushie's size, proportions, and pose. Think about the overall aesthetic you want to achieve, such as cute, realistic, or stylized. As you refine your design, pay attention to details like facial expressions, textures, and accessories. Consider the type of fabric and materials you'll use to bring your design to life, and how they'll impact the overall look and feel of your plushie. Don't be afraid to experiment and try out different ideas – sketching is a process, and it's okay to make mistakes. Once you're happy with your design, use a ruler or other straightedge to create a more precise drawing, and consider adding color or shading to give your plushie more depth and dimension. By taking the time to carefully sketch out your plushie's design, you'll be able to create a clear and cohesive vision that will guide the rest of your project.
Choosing the Right Fabric and Colors
When it comes to designing your plushie, choosing the right fabric and colors is crucial. The type of fabric you select will not only affect the overall look and feel of your plushie but also its durability and longevity. For a cuddly and soft plushie, consider using fabrics like fleece, minky, or Sherpa. These materials are gentle on the skin, easy to work with, and provide a plush texture that's perfect for snuggling. If you're looking for a more durable option, cotton or canvas can be great alternatives. They're easy to clean and can withstand repeated washing and use. When it comes to colors, the possibilities are endless. You can choose a single solid color or get creative with patterns and textures. Consider the personality and theme of your plushie when selecting colors. For example, a bright and bold color scheme might be perfect for a playful character, while a softer pastel palette might be more suitable for a gentle creature. You can also use contrasting colors to create visual interest and add depth to your design. Additionally, think about the color of the thread, buttons, or other embellishments you'll be using, as they can greatly impact the overall aesthetic of your plushie. By carefully selecting the right fabric and colors, you can bring your plushie design to life and create a truly unique and lovable companion.
Deciding on the Plushie's Size and Shape
When deciding on the plushie's size and shape, consider the purpose of the plushie and the age group it's intended for. A larger plushie may be more suitable for a decorative piece or a cuddle buddy, while a smaller one may be better suited for a keychain or a charm. For children, a plushie that is around 10-15 inches in size is often ideal, as it is large enough to be cuddly but small enough to be easily carried around. For adults, a larger plushie may be preferred, such as one that is 18-20 inches in size. The shape of the plushie is also important, as it can affect the overall appearance and cuddliness of the plushie. A plushie with a rounded shape, such as a ball or a cylinder, can be very cuddly and inviting, while a plushie with a more angular shape, such as a square or a triangle, may be better suited for a decorative piece. Additionally, consider the complexity of the design and the amount of detail you want to include. A simpler design may be better suited for a smaller plushie, while a more complex design may be better suited for a larger plushie. Ultimately, the size and shape of the plushie will depend on your personal preference and the intended use of the plushie.
Creating the Plushie's Body and Limbs
Creating a plushie's body and limbs is a crucial step in bringing your cuddly companion to life. To achieve a professional-looking plushie, it's essential to follow a series of steps that require attention to detail and patience. The process begins with cutting out the fabric pieces, which involves carefully tracing and cutting out the body and limb patterns from your chosen fabric. This step requires precision and accuracy to ensure that the pieces fit together seamlessly. Once the fabric pieces are cut out, the next step is to sew the body and limbs together, using a strong and durable stitch to secure the seams. Finally, the plushie is stuffed with polyester fiberfill to give it a soft and cuddly texture. By following these steps, you can create a plushie with a sturdy body and limbs that will withstand snuggles and playtime. With the right techniques and materials, you can bring your plushie to life and enjoy it for years to come. Now, let's start by cutting out the fabric pieces, a crucial step that sets the foundation for a well-made plushie.
Cutting Out the Fabric Pieces
Cutting out the fabric pieces is a crucial step in creating a plushie, as it sets the foundation for the entire project. To begin, carefully review your pattern or design to ensure you understand the different components that make up your plushie. Next, lay out your fabric on a flat surface, smoothing out any wrinkles or creases. Using your pattern or template, carefully cut out each fabric piece, making sure to add a 1/4 inch seam allowance around each edge. It's essential to cut accurately and smoothly, as rough edges can lead to a poorly constructed plushie. If you're using a complex pattern, consider cutting out each piece individually, rather than trying to cut multiple pieces at once. This will help prevent mistakes and ensure that each piece is cut correctly. Additionally, use a rotary cutter and mat to make cutting easier and more precise. Once you've cut out all the fabric pieces, set them aside and prepare for the next step in creating your plushie's body and limbs.
Sewing the Body and Limbs Together
Sewing the body and limbs together is a crucial step in creating a plushie. To start, place the body pieces right sides together and pin them in place, making sure to align the edges carefully. Then, sew around the edges, leaving a small opening for turning the body right side out. Use a 1/4 inch seam allowance and a straight stitch or a zigzag stitch to prevent fraying. Once the body is sewn, turn it right side out and press the seams with an iron to create a crisp fold. Next, sew the limbs together in the same way, making sure to leave a small opening for turning them right side out. When sewing the limbs, use a slightly smaller seam allowance to ensure they fit snugly into the body. After the limbs are sewn, turn them right side out and press the seams with an iron. To attach the limbs to the body, use a whipstitch or a ladder stitch to sew them in place, making sure to match the edges carefully. Start by sewing the head and tail to the body, then move on to the arms and legs. Use a matching thread color to blend in with the fabric, and make sure to sew in a consistent and even manner. Finally, stuff the body and limbs with polyester fiberfill to give the plushie its desired shape and texture. Make sure to stuff the limbs firmly, but not too tightly, to ensure they remain flexible and poseable. With the body and limbs sewn together, the plushie is starting to take shape, and the next step is to add the details and embellishments that bring it to life.
Stuffing the Plushie with Polyester Fiberfill
When it comes to stuffing the plushie with polyester fiberfill, it's essential to do it correctly to achieve the desired shape and texture. Start by holding the plushie's body with the opening facing upwards and use a handful of fiberfill to fill the head and neck area. Gently push the fiberfill into the corners and make sure to fill it firmly, but not too tightly, as this can cause the fabric to pucker. Next, move on to the body and limbs, filling each section separately to maintain even distribution. Use a chopstick or pencil to help guide the fiberfill into tight spaces and ensure that the plushie's extremities are well-filled. As you stuff, use your fingers to fluff and shape the fiberfill, making sure it's evenly distributed and the plushie is taking shape. It's also crucial to leave a small opening to turn the plushie right side out, so be careful not to overstuff the area around the opening. By following these steps, you'll be able to achieve a plushie that's cuddly, soft, and has a professional finish.
Adding Details and Finishing Touches
Adding details and finishing touches to a plushie can elevate it from a simple stuffed animal to a lovable and endearing companion. To achieve this, it's essential to focus on the finer details that bring the plushie to life. One of the most critical aspects of adding details is embroidering the eyes, nose, and mouth, which can make or break the plushie's overall expression. Additionally, adding ears, tail, and other accessories can enhance the plushie's personality and charm. Finally, a topstitch can be used to finalize the plushie and give it a polished finish. By incorporating these details, you can create a plushie that is not only visually appealing but also full of character. In this article, we will explore the process of adding details and finishing touches to a plushie, starting with the crucial step of embroidering eyes, nose, and mouth.
Embroidering Eyes, Nose, and Mouth
Embroidering eyes, nose, and mouth is a crucial step in bringing your plushie to life. To start, thread your needle with a contrasting color to the fabric of your plushie, and tie a knot at the end. For the eyes, use a French knot or a satin stitch to create a circular shape, making sure to keep your stitches small and even. You can also use beads or felt for a more dimensional look. For the nose, a small straight stitch or a tiny triangle made from a few stitches will do the trick. The mouth can be created using a curved stitch or a small straight stitch, depending on the desired expression. When embroidering, make sure to keep your tension even and not too tight, as this can cause the fabric to pucker. It's also essential to use a hoop or a stabilizing material to keep your fabric taut, making it easier to stitch. To add more personality to your plushie, you can experiment with different embroidery stitches, such as the running stitch or the backstitch, to create eyebrows, eyelashes, or other facial features. With patience and practice, you can create a adorable and expressive face for your plushie that will make it truly special.
Adding Ears, Tail, and Other Accessories
Adding ears, tail, and other accessories can elevate your plushie from a simple stuffed animal to a unique and personalized creation. To add ears, start by cutting out two identical shapes from fabric, felt, or fleece, depending on the desired texture and appearance. Place the shapes right sides together and sew around the edges, leaving a small opening to turn the ears right side out. Stuff the ears with polyester fiberfill and attach them to the head using a needle and thread or hot glue. For a tail, cut out a long, thin shape and sew or glue it to the back of the plushie, making sure it's secure and evenly spaced. Other accessories like eyes, nose, and mouth can be added using embroidery floss, felt, or fabric paint. You can also add embellishments like bows, buttons, or sequins to give your plushie a personalized touch. When adding accessories, make sure to balance them with the overall design and proportions of the plushie, and don't be afraid to experiment and try out different combinations to find the perfect look.
Finalizing the Plushie with a Topstitch
Finalizing the plushie with a topstitch is a crucial step that adds a professional finish to your handmade creation. A topstitch is a decorative stitch that is sewn along the edges of the plushie, typically using a contrasting thread color to make it stand out. To begin, thread your sewing machine with the chosen thread color and set the stitch length to a medium or long length, depending on the desired appearance. Next, place the plushie under the machine's presser foot, aligning the edge of the plushie with the edge of the presser foot. Slowly sew along the edge of the plushie, maintaining a consistent distance from the edge and keeping the thread taut. As you sew, gently guide the plushie to ensure a smooth, even stitch. It's essential to keep the plushie flat and stable, using pins or clips if necessary, to prevent bunching or distortion. Once you've completed the topstitch, inspect the plushie for any areas that may require additional stitching or touch-ups. Finally, trim any excess thread, and your plushie is now complete, with a beautiful, professional-looking topstitch that adds a finishing touch to your handmade creation.