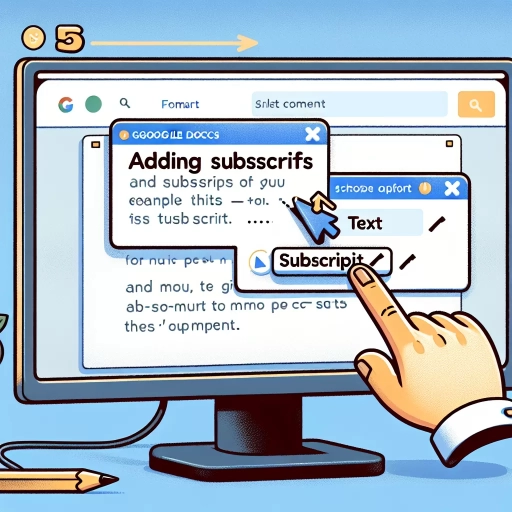
How To Add Subscripts In Google Docs
Here is the introduction paragraph: Adding subscripts in Google Docs can be a bit tricky, but don't worry, we've got you covered. Whether you're a student working on a science project, a researcher writing a paper, or a teacher creating educational materials, you'll likely need to include subscripts in your document at some point. Fortunately, Google Docs provides several ways to add subscripts, making it easy to format your text to meet your needs. In this article, we'll explore three methods for adding subscripts in Google Docs: using the Equation Editor, using keyboard shortcuts, and using the Format tab. We'll start by looking at the Equation Editor, a powerful tool that allows you to create complex equations and formulas with ease. By using the Equation Editor, you can add subscripts to your text in a matter of seconds, and we'll show you how.
Using the Equation Editor
The Equation Editor is a powerful tool that allows users to create complex mathematical equations with ease. With its intuitive interface and extensive features, it's no wonder that it's a favorite among students, teachers, and professionals alike. But what makes the Equation Editor truly shine is its ability to create subscripts, which are essential for expressing mathematical concepts accurately. In this article, we'll explore how to access the Equation Editor, create subscripts with it, and customize subscript formatting to suit your needs. By the end of this article, you'll be well on your way to becoming an Equation Editor pro. So, let's get started by accessing the Equation Editor.
Accessing the Equation Editor
To access the equation editor in Google Docs, you can follow these simple steps. First, open your Google Doc and place your cursor where you want to insert the equation. Next, click on the "Insert" menu at the top of the page and select "Equation" from the drop-down menu. Alternatively, you can also use the keyboard shortcut "Alt + = " (Windows) or "Command + = " (Mac) to open the equation editor. Once you've accessed the equation editor, you can start typing your equation using LaTeX or MathType syntax, or use the built-in equation templates and symbols to create your equation. The equation editor also allows you to edit and format your equation as needed, including changing font size, color, and alignment. With the equation editor, you can easily add complex mathematical equations to your Google Doc, making it a powerful tool for students, teachers, and professionals alike.
Creating Subscripts with the Equation Editor
Creating subscripts with the Equation Editor in Google Docs is a straightforward process that allows you to add professional-looking mathematical expressions to your documents. To start, navigate to the "Insert" menu and select "Equation" from the drop-down list. This will open the Equation Editor, a powerful tool that enables you to create complex mathematical equations and formulas. To create a subscript, click on the "Subscript" button in the Equation Editor toolbar, which looks like a small "x" with a subscript "2" next to it. Alternatively, you can use the keyboard shortcut "Ctrl + =" (Windows) or "Cmd + =" (Mac) to toggle subscript mode on and off. Once you're in subscript mode, type the text you want to appear as a subscript, and it will be automatically formatted with a smaller font size and positioned below the baseline of the surrounding text. You can also use the Equation Editor to create more complex subscripts, such as nested subscripts or subscripts with multiple levels of nesting. To do this, simply click on the "Subscript" button again to create a new level of subscripting, and then type the text you want to appear at that level. With the Equation Editor, you have complete control over the formatting and layout of your subscripts, allowing you to create professional-looking mathematical expressions with ease.
Customizing Subscript Formatting
Customizing subscript formatting in Google Docs is a straightforward process that allows users to personalize the appearance of their subscripts. To begin, select the text you want to format as a subscript by highlighting it with your cursor. Next, navigate to the "Format" tab in the top menu bar and click on "Text" to open the text formatting options. From the drop-down menu, select "Subscript" to apply the default subscript formatting. However, if you want to customize the subscript formatting, click on the "More" option at the bottom of the menu. This will open the "Text properties" sidebar, where you can adjust the font, size, color, and style of your subscript text. You can also use the "Superscript" and "Subscript" buttons in the toolbar to quickly apply these formatting options. Additionally, you can use keyboard shortcuts to apply subscript formatting, such as pressing "Ctrl + ," (Windows) or "Cmd + ," (Mac) to decrease the font size and apply subscript formatting. By customizing subscript formatting, you can enhance the readability and visual appeal of your documents, making it easier to communicate complex information to your audience.
Using Keyboard Shortcuts
Using keyboard shortcuts can significantly improve your productivity and efficiency when working on a computer. By learning and utilizing these shortcuts, you can save time and effort, allowing you to focus on more important tasks. In this article, we will explore three essential keyboard shortcuts that can enhance your typing experience: using the subscript shortcut, using the superscript shortcut, and combining subscript and superscript. These shortcuts are particularly useful when working with mathematical or scientific formulas, as well as when creating documents that require special formatting. By mastering these shortcuts, you can streamline your workflow and produce high-quality documents with ease. Let's start by exploring the subscript shortcut, which allows you to quickly and easily format text as a subscript.
Using the Subscript Shortcut
Using the subscript shortcut is a convenient way to add subscripts to your text in Google Docs. To use the subscript shortcut, select the text you want to subscript and press Ctrl +, (Windows) or Command +, (Mac). This will automatically convert the selected text to subscript. Alternatively, you can also use the keyboard shortcut Ctrl + Shift +, (Windows) or Command + Shift +, (Mac) to toggle subscript on and off. This shortcut is especially useful when you need to add subscripts to multiple parts of your text, as it saves you the time and effort of going to the menu every time. Additionally, the subscript shortcut can also be used in combination with other formatting options, such as superscript and strikethrough, to create more complex formatting effects. By using the subscript shortcut, you can quickly and easily add subscripts to your text in Google Docs, making it a valuable tool for anyone who needs to create documents with mathematical or scientific notation.
Using the Superscript Shortcut
Using the Superscript Shortcut is a convenient way to add superscripts to your text in Google Docs. To use this shortcut, select the text you want to superscript and press Ctrl + . (period) on a PC or Command + . (period) on a Mac. This will automatically convert the selected text into a superscript. Alternatively, you can also use the keyboard shortcut Ctrl + Shift + > (greater-than sign) on a PC or Command + Shift + > (greater-than sign) on a Mac to achieve the same result. By using the Superscript Shortcut, you can quickly and easily add superscripts to your text without having to navigate through the menu options. This shortcut is especially useful when working with mathematical equations, scientific formulas, or any other text that requires superscripts. Additionally, using the Superscript Shortcut can also help you to maintain consistency in your formatting throughout your document. By using this shortcut, you can ensure that all your superscripts are formatted correctly and uniformly, which can enhance the overall appearance and readability of your document. Overall, the Superscript Shortcut is a useful tool that can save you time and effort when working with superscripts in Google Docs.
Combining Subscript and Superscript
Combining subscript and superscript in Google Docs is a straightforward process that can be achieved using keyboard shortcuts. To combine subscript and superscript, start by selecting the text you want to format. Then, use the keyboard shortcut Ctrl +, (comma) to subscript the text, and immediately follow it with the keyboard shortcut Ctrl +. (period) to superscript the text. For example, if you want to write H2O with the 2 as a subscript and the O as a superscript, you would select the 2, press Ctrl +, (comma), and then select the O and press Ctrl +. (period). This will result in the correct formatting of H2O. Alternatively, you can use the menu options to achieve the same result. To do this, select the text you want to format, go to the "Format" tab, and select "Text" from the drop-down menu. From there, you can select "Subscript" and then "Superscript" to achieve the desired formatting. By combining subscript and superscript, you can add complex formatting to your text in Google Docs, making it easier to convey complex information and ideas.
Using the Format Tab
The Format tab in Microsoft Word is a powerful tool that allows users to customize the appearance of their text. With the Format tab, users can change the font, size, color, and style of their text, as well as add special effects such as subscript and superscript. In this article, we will explore how to use the Format tab to add subscript formatting to text, including selecting the text to be subscripted, applying subscript formatting, and adjusting font size and style. By mastering the Format tab, users can create professional-looking documents with ease. To get started, the first step is to select the text that you want to subscript, which we will discuss in the next section, Selecting the Text to be Subscripted.
Selecting the Text to be Subscripted
When selecting the text to be subscripted in Google Docs, it's essential to be precise to ensure that only the desired characters are affected. To do this, place your cursor at the beginning of the text you want to subscript, then drag it to the end of the text while holding down the mouse button. Alternatively, you can use the keyboard shortcut Ctrl+A (Windows) or Command+A (Mac) to select all the text in the document, and then use the mouse to deselect any text that you don't want to subscript. If you want to subscript a single character, simply place your cursor next to it and use the mouse to select it. You can also use the "Select all" option from the "Edit" menu to select all the text in the document, and then use the "Format" tab to subscript the selected text. It's also worth noting that you can select multiple non-contiguous sections of text by holding down the Ctrl key (Windows) or Command key (Mac) while selecting the text. This allows you to subscript different parts of the document without having to subscript the entire text. By being precise in your text selection, you can ensure that your subscripts are applied correctly and consistently throughout your document.
Applying Subscript Formatting
Applying subscript formatting in Google Docs is a straightforward process that can be accomplished using the Format tab. To start, select the text you want to format as a subscript by highlighting it with your cursor. Next, navigate to the Format tab in the top menu bar and click on it to reveal a drop-down menu. From this menu, select "Text" and then click on "Subscript" from the sub-menu that appears. Alternatively, you can use the keyboard shortcut Ctrl +, (Windows) or Command +, (Mac) to apply subscript formatting quickly. Once you've applied the subscript formatting, you can adjust the font size and style as needed to ensure that your text is readable and visually appealing. It's also worth noting that you can apply subscript formatting to individual characters or entire words, depending on your needs. By following these simple steps, you can easily add subscripts to your Google Doc and enhance the overall appearance and clarity of your text.
Adjusting Font Size and Style
Adjusting font size and style is a crucial aspect of formatting text in Google Docs. To adjust font size, select the text you want to modify and navigate to the Format tab. In the Format tab, click on the "Font size" dropdown menu and choose from the available options, ranging from 6 to 400 points. You can also enter a custom font size by typing it in the box. Additionally, you can use the keyboard shortcuts Ctrl+Shift+> (Windows) or Command+Shift+> (Mac) to increase font size and Ctrl+Shift+< (Windows) or Command+Shift+< (Mac) to decrease font size. To adjust font style, select the text and click on the "Font" dropdown menu in the Format tab. Here, you can choose from various font styles, including bold, italic, and strikethrough. You can also use the keyboard shortcuts Ctrl+B (Windows) or Command+B (Mac) to bold text, Ctrl+I (Windows) or Command+I (Mac) to italicize text, and Ctrl+Shift+X (Windows) or Command+Shift+X (Mac) to strikethrough text. Furthermore, you can also use the "Clear formatting" option in the Format tab to remove all formatting from the selected text and start from scratch. This feature is particularly useful when you want to apply a consistent formatting style throughout your document. By adjusting font size and style, you can enhance the readability and visual appeal of your text, making it more engaging and effective in conveying your message.