How To Use Apple Pencil On Ipad
The Apple Pencil is a powerful tool that can unlock a world of creativity and productivity on your iPad. With its precise tip and intuitive design, the Apple Pencil is perfect for artists, writers, and anyone looking to get more out of their iPad. But how do you get started with using the Apple Pencil on your iPad? In this article, we'll explore the basics of using the Apple Pencil, from getting started to using it for creative tasks and integrating it into your workflow. We'll cover the essential steps to get you up and running with the Apple Pencil, including pairing it with your iPad and learning the basic gestures. We'll also delve into the world of creative possibilities, from drawing and painting to note-taking and writing. Finally, we'll show you how to integrate the Apple Pencil into your daily routine, making it an indispensable tool for work and play. So, let's get started with the basics – Getting Started with Apple Pencil on iPad.
Getting Started with Apple Pencil on iPad
Here is the introduction paragraph: Getting started with Apple Pencil on your iPad is an exciting experience that can unlock a world of creativity and productivity. To ensure a seamless experience, it's essential to understand the basics of using Apple Pencil with your iPad. This includes pairing your Apple Pencil with your device, understanding which iPads are compatible with the Apple Pencil, and learning how to properly charge and maintain your stylus. By mastering these fundamental steps, you'll be well on your way to enjoying the full range of benefits that Apple Pencil has to offer. In this article, we'll dive into the details of each of these topics, starting with the first step: pairing your Apple Pencil with your iPad.
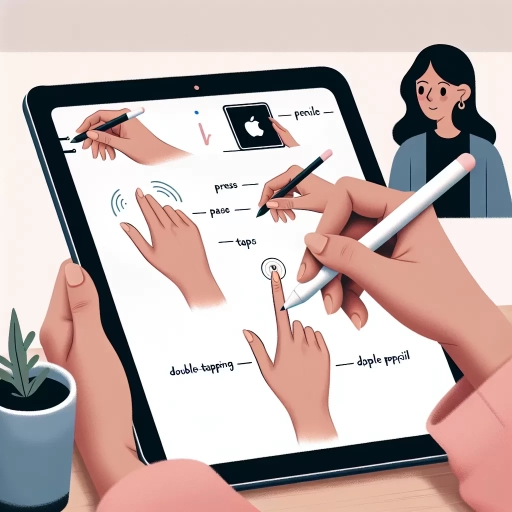
Pairing Apple Pencil with Your iPad
To pair your Apple Pencil with your iPad, start by making sure your iPad is compatible with the Apple Pencil. The Apple Pencil (1st generation) is compatible with the iPad (6th generation), iPad Air (3rd generation), iPad mini (5th generation), and iPad Pro 12.9-inch (1st and 2nd generation) and 10.5-inch. The Apple Pencil (2nd generation) is compatible with the iPad Air (4th generation), iPad mini (6th generation), and iPad Pro 12.9-inch (3rd and 4th generation) and 11-inch (1st and 2nd generation). Once you've confirmed compatibility, remove the cap from your Apple Pencil and insert the Lightning connector into the Lightning port on your iPad. You'll see a prompt on your iPad asking if you want to pair the Apple Pencil. Tap "Pair" to complete the pairing process. If you're using an Apple Pencil (2nd generation), you can also pair it by attaching it to the side of your iPad and waiting for the prompt to appear. Your Apple Pencil is now paired and ready to use with your iPad. You can use it to take notes, create artwork, and mark up documents with precision and accuracy. To check the battery level of your Apple Pencil, go to Settings > Apple Pencil on your iPad. You can also use the Apple Pencil to wake your iPad and start taking notes immediately by tapping the Lock screen with the Apple Pencil.
Understanding Apple Pencil Compatibility
The Apple Pencil is a versatile and powerful tool that can be used with various iPad models, but it's essential to understand its compatibility before making a purchase or using it with your device. The first-generation Apple Pencil is compatible with the iPad (6th generation), iPad Air (3rd generation), iPad mini (5th generation), and iPad Pro (12.9-inch) (1st and 2nd generation), iPad Pro (10.5-inch), and iPad Pro (9.7-inch). On the other hand, the second-generation Apple Pencil is compatible with the iPad Air (4th generation), iPad mini (6th generation), iPad Pro (12.9-inch) (3rd and 4th generation), and iPad Pro (11-inch) (1st and 2nd generation). It's crucial to note that the Apple Pencil is not compatible with the iPad (5th generation) or earlier models, and it's also not compatible with the iPhone. Additionally, some features like wireless charging and pairing are only available on the second-generation Apple Pencil and compatible iPad models. To ensure seamless compatibility, it's recommended to check the Apple support website for the most up-to-date information on Apple Pencil compatibility with your specific iPad model.
Charging and Maintaining Your Apple Pencil
Charging and maintaining your Apple Pencil is a straightforward process that ensures optimal performance and longevity. To charge your Apple Pencil, simply plug it into the Lightning connector on your iPad, and it will start charging immediately. The Apple Pencil charges quickly, reaching 30 minutes of use in just 15 seconds of charging. A full charge takes around 10 minutes and provides up to 12 hours of use. To check the battery level, go to Settings > Apple Pencil on your iPad. It's also a good idea to keep your Apple Pencil clean and dry to prevent damage. Avoid exposing it to water or extreme temperatures, and gently wipe it with a soft cloth if it gets dirty. Additionally, make sure to store your Apple Pencil in a safe place when not in use to prevent it from getting lost or damaged. By following these simple charging and maintenance tips, you can enjoy a seamless and productive experience with your Apple Pencil on your iPad.
Using Apple Pencil for Creative Tasks
The Apple Pencil is a powerful tool that can unlock a world of creative possibilities. With its precision and versatility, it's perfect for a wide range of artistic tasks. Whether you're a professional artist or a hobbyist, the Apple Pencil can help you bring your ideas to life. In this article, we'll explore three key ways to use the Apple Pencil for creative tasks: sketching and drawing, using it with creative apps, and enhancing your artwork with its features. By the end of this article, you'll be equipped with the knowledge and inspiration to take your creativity to the next level. So, let's start by exploring the basics of sketching and drawing with the Apple Pencil.
Sketching and Drawing with Apple Pencil
Sketching and drawing with Apple Pencil is a game-changer for creatives, offering a seamless and intuitive experience that rivals traditional mediums. With the Apple Pencil, artists can bring their ideas to life with precision and accuracy, taking advantage of the iPad's large touchscreen display and responsive stylus. The Pencil's advanced technology allows for a range of line widths and styles, from fine details to broad strokes, making it ideal for sketching, drawing, and painting. The Apple Pencil also supports tilt recognition, allowing artists to create subtle shading and texture effects with ease. Whether you're a professional illustrator, graphic designer, or simply a hobbyist, the Apple Pencil is the perfect tool for unlocking your creativity and bringing your artistic vision to life. With a range of compatible apps, including Procreate, Adobe Illustrator Draw, and Autodesk Sketchbook, the possibilities are endless, and the results are truly stunning. By combining the Apple Pencil with the iPad's portability and versatility, artists can work on their craft anywhere, anytime, making it easier than ever to stay inspired and productive. Whether you're sketching from life, creating digital art, or simply doodling for fun, the Apple Pencil is the ultimate tool for anyone looking to unleash their creativity and take their artistic skills to the next level.
Using Apple Pencil with Creative Apps
Using Apple Pencil with creative apps is a game-changer for artists, designers, and writers. The Apple Pencil's precision and responsiveness make it an ideal tool for a variety of creative tasks, from sketching and painting to note-taking and writing. With the Apple Pencil, you can bring your ideas to life with incredible accuracy and detail. Many creative apps, such as Procreate, Adobe Illustrator Draw, and Autodesk Sketchbook, are optimized for use with the Apple Pencil, offering a range of features and tools that take advantage of the pencil's capabilities. For example, you can use the Apple Pencil to create intricate illustrations, edit photos, and design graphics with precision and ease. The Apple Pencil also supports tilt recognition, allowing you to create a range of line widths and styles, and palm rejection, which prevents accidental marks and ensures that your creations are accurate and intentional. Whether you're a professional artist or a hobbyist, using the Apple Pencil with creative apps can help you unlock your full potential and bring your ideas to life in a way that's both fun and fulfilling.
Enhancing Your Artwork with Apple Pencil Features
The Apple Pencil is a powerful tool that can elevate your artwork to new heights. With its advanced features, you can create stunning pieces that showcase your creativity and skill. One of the standout features of the Apple Pencil is its ability to detect subtle changes in pressure, allowing you to create a range of line widths and styles. This means you can achieve delicate, precise lines for detailed work, or bold, expressive strokes for more dramatic effects. Additionally, the Apple Pencil's tilt recognition feature allows you to create a range of shading and texture effects, adding depth and dimension to your artwork. You can also use the Apple Pencil to create subtle, nuanced color transitions, blending colors seamlessly to create a realistic, lifelike effect. Furthermore, the Apple Pencil's palm rejection feature ensures that your hand movements are ignored, allowing you to focus on creating without worrying about accidental marks. With the Apple Pencil, you can also take advantage of advanced features like pixel perfect precision, which allows you to create intricate details and patterns with ease. Overall, the Apple Pencil is an indispensable tool for artists, offering a range of features that can help you unlock your full creative potential and produce truly stunning artwork.
Integrating Apple Pencil into Your Workflow
The Apple Pencil is a powerful tool that can greatly enhance your productivity and workflow. By integrating it into your daily tasks, you can streamline your work process, improve your organization, and increase your overall efficiency. One of the key ways to utilize the Apple Pencil is for note-taking and organization, allowing you to quickly jot down ideas and keep track of important information. Additionally, the Apple Pencil can be used to mark up documents and PDFs, making it easy to provide feedback and collaborate with others. Furthermore, the Apple Pencil can also be used to sign documents and create digital signatures, eliminating the need for physical paperwork. By exploring these different use cases, you can unlock the full potential of the Apple Pencil and take your workflow to the next level. In this article, we will start by exploring how to use the Apple Pencil for note-taking and organization.
Using Apple Pencil for Note-Taking and Organization
Using Apple Pencil for note-taking and organization is a game-changer for students, professionals, and anyone looking to boost their productivity. With the Apple Pencil, you can take handwritten notes, annotate documents, and organize your thoughts with ease. The Pencil's precision and responsiveness make it feel like writing on paper, allowing you to focus on the content rather than the tool. You can use the Apple Pencil with a variety of apps, including the Notes app, which offers a range of features such as text recognition, audio recording, and organization tools. Additionally, apps like GoodNotes, Notability, and Evernote offer advanced features like handwriting recognition, tagging, and searching, making it easy to find and access your notes. The Apple Pencil also allows you to create custom notebooks, folders, and tags, enabling you to keep your notes organized and easily accessible. Furthermore, with the iPad's multitasking capabilities, you can use the Apple Pencil to take notes while referencing other apps or websites, making it an indispensable tool for research and study. Overall, using Apple Pencil for note-taking and organization is a powerful way to streamline your workflow, increase productivity, and achieve your goals.
Marking Up Documents and PDFs with Apple Pencil
Marking up documents and PDFs is one of the most practical uses of the Apple Pencil, allowing you to annotate and highlight important information with precision and ease. With the Apple Pencil, you can effortlessly mark up documents, PDFs, and even web pages, making it an indispensable tool for students, professionals, and anyone who needs to review and annotate digital content. To get started, simply open the document or PDF you want to mark up, and tap the Apple Pencil icon in the top right corner of the screen. This will bring up the Markup toolbar, which offers a range of tools, including a pen, highlighter, and eraser. You can also use the ruler tool to draw straight lines and shapes, and the text tool to add typed notes. As you mark up your document, you can easily switch between tools and adjust the size and color of your annotations. When you're finished, you can save your marked-up document as a new file, or share it with others via email or messaging apps. The Apple Pencil's precision and responsiveness make it ideal for marking up complex documents, such as contracts, reports, and academic papers, and its intuitive interface makes it easy to use, even for those who are new to digital annotation. Whether you're a student highlighting important passages in a textbook, a professional reviewing a contract, or simply someone who likes to annotate articles and web pages, the Apple Pencil is the perfect tool for marking up documents and PDFs on your iPad.
Signing Documents and Creating Digital Signatures
Signing documents and creating digital signatures is a crucial aspect of integrating Apple Pencil into your workflow. With the Apple Pencil, you can easily sign documents and create digital signatures, making it a convenient and efficient way to complete tasks. To sign a document, simply open the document in an app that supports Apple Pencil, such as Notes or Pages, and use the Apple Pencil to sign your name. You can also use the Apple Pencil to create a digital signature, which can be used to sign documents electronically. To create a digital signature, go to the Settings app, select "General," and then select "Apple Pencil." From there, you can create a digital signature by signing your name with the Apple Pencil. Once you've created a digital signature, you can use it to sign documents in any app that supports Apple Pencil. Additionally, you can also use third-party apps, such as Adobe Sign or DocuSign, to create and manage digital signatures. These apps allow you to create, send, and sign documents electronically, making it easy to complete tasks and collaborate with others. Overall, signing documents and creating digital signatures with Apple Pencil is a convenient and efficient way to complete tasks and streamline your workflow.