How To Take Pictures Of The Moon With Iphone
Capturing the moon's beauty with an iPhone can be a challenging yet rewarding experience. With the right techniques and equipment, you can take stunning photos of our celestial neighbor. To get started, it's essential to understand the importance of equipment and settings, timing and composition, and editing and post-processing. In this article, we'll explore these three key aspects of moon photography with an iPhone. We'll begin by discussing the necessary equipment and settings to ensure you're prepared for a successful moon photography session. (Note: I made some minor changes to the original paragraph to make it more concise and engaging.)
Equipment and Settings
When it comes to capturing stunning images of the night sky, having the right equipment and settings is crucial. To take your astrophotography to the next level, consider investing in a telephoto lens or a telescope adapter, which can help you get up close and personal with celestial objects. Additionally, adjusting your camera settings for low light conditions is essential to avoid noise and capture more detail. Finally, using a tripod for stability is vital to prevent camera shake and ensure sharp images. By implementing these techniques, you can significantly improve the quality of your astrophotography. To start, let's take a closer look at how using a telephoto lens or a telescope adapter can enhance your night sky photography.
Use a Telephoto Lens or a Telescope Adapter
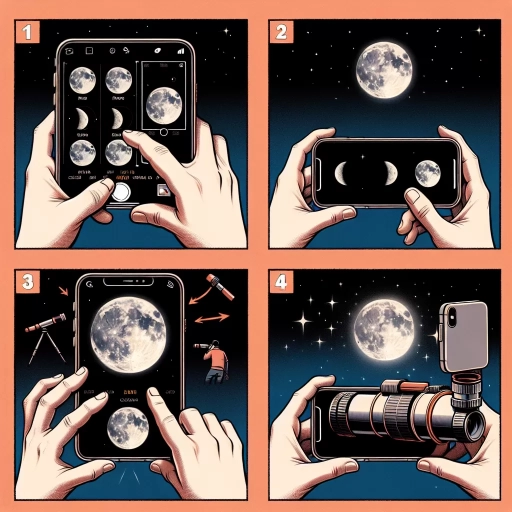
When it comes to capturing high-quality images of the moon with your iPhone, using a telephoto lens or a telescope adapter can make a significant difference. A telephoto lens can help you get closer to the moon without physically moving, allowing you to capture more detailed images. Look for a lens with a focal length of at least 60mm to 100mm, which can provide a good balance between magnification and image quality. On the other hand, a telescope adapter can connect your iPhone to a telescope, enabling you to capture stunning images of the moon with incredible detail. This is especially useful for capturing images of the moon's surface, craters, and other features. When choosing a telescope adapter, make sure it is compatible with your iPhone model and the telescope you plan to use. Additionally, consider the adapter's optical quality, stability, and ease of use to ensure you get the best possible results. By using a telephoto lens or a telescope adapter, you can take your moon photography to the next level and capture images that are truly out of this world.
Adjust the Camera Settings for Low Light
When capturing the moon with your iPhone, adjusting the camera settings for low light is crucial to achieve a well-exposed and detailed image. Since the moon is a distant object, it's essential to use a combination of camera settings to compensate for the low light conditions. Start by enabling the "Night mode" feature, which allows the camera to capture more light and reduce noise. You can access Night mode by tapping the moon icon in the camera app. Next, adjust the exposure compensation by swiping up or down on the sun/cloud icon to increase or decrease the brightness. A lower exposure compensation will help to capture more detail in the moon's surface. Additionally, consider using a tripod or a stabilizing device to minimize camera shake and ensure a sharper image. If you're using an iPhone 11 or later, you can also enable the "Deep Fusion" feature, which helps to improve texture and detail in low-light conditions. By adjusting these camera settings, you'll be able to capture a well-exposed and detailed image of the moon, even in low-light conditions.
Use a Tripod for Stability
Using a tripod for stability is essential when taking pictures of the moon with an iPhone. A tripod provides a stable base for your device, allowing you to capture sharp images without camera shake or blur. This is particularly important when shooting in low light conditions, as the moon's illumination can be quite dim. By mounting your iPhone on a tripod, you can ensure that your device remains steady, even when using slower shutter speeds or longer focal lengths. Additionally, a tripod enables you to take multiple shots of the moon without having to worry about camera movement, making it easier to capture the perfect image. You can also use the tripod's adjustable head to fine-tune the composition of your shot, ensuring that the moon is perfectly framed in the center of the image. Furthermore, using a tripod allows you to take advantage of your iPhone's advanced camera features, such as Night mode or Time-Lapse, which can help to enhance the quality of your moon photos. Overall, a tripod is a must-have accessory for anyone looking to capture high-quality images of the moon with their iPhone.
Timing and Composition
When it comes to capturing stunning photographs, timing and composition are two essential elements that can make or break an image. A well-timed shot can freeze a moment in time, while a well-composed image can guide the viewer's eye and create a lasting impression. To take your photography skills to the next level, it's crucial to understand the importance of timing and composition. One way to achieve this is by shooting during the golden hour or blue hour, when the soft, warm light can add depth and dimension to your images. Additionally, using the rule of thirds can help create balanced composition, while experimenting with different angles and perspectives can add a unique twist to your photos. By mastering these techniques, you can take your photography to new heights. So, let's start by exploring the benefits of shooting during the golden hour or blue hour.
Shoot During the Golden Hour or Blue Hour
When it comes to capturing stunning moon photos with your iPhone, timing is everything. One of the most crucial factors to consider is the time of day you take your shot. The golden hour, which occurs during the first hour after sunrise and the last hour before sunset, is a great time to capture the moon. The soft, warm light of the golden hour adds a magical touch to your photos, making the moon appear more vibrant and detailed. However, if you're looking for a more dramatic and moody shot, consider shooting during the blue hour, which occurs just before sunrise and after sunset. The blue hour's cool, blue tones create a sense of mystery and depth, making the moon appear more ethereal and captivating. By shooting during these optimal times, you can add an extra layer of depth and emotion to your moon photos, making them truly unforgettable.
Use the Rule of Thirds for Balanced Composition
The Rule of Thirds is a fundamental principle in photography that can help you achieve balanced composition in your moon photos. Imagine your image is divided into thirds both horizontally and vertically, creating nine equal parts. Place the moon at one of the intersections of these lines, rather than centering it. This technique creates a more dynamic and visually appealing image. For example, if the moon is rising or setting, place it at the top-left or top-right intersection, allowing the landscape or horizon to fill the rest of the frame. By using the Rule of Thirds, you can create a sense of balance and harmony in your photo, drawing the viewer's eye to the moon while also showcasing the surrounding environment. Additionally, this technique can help you avoid centering the moon, which can sometimes result in a static and uninteresting composition. By applying the Rule of Thirds, you can add depth and interest to your moon photos, making them more engaging and captivating.
Experiment with Different Angles and Perspectives
Experimenting with different angles and perspectives can add a new level of depth and interest to your moon photography. Instead of shooting from eye level, try getting low or climbing high to capture the moon from a unique vantage point. Shooting from a low angle, such as from the ground or a low wall, can make the moon appear larger and more imposing, while shooting from a high angle, such as from a rooftop or a hill, can provide a sense of grandeur and expansiveness. You can also experiment with Dutch angles, where you tilt your camera to one side, or use a wide-angle lens to capture the moon in relation to its surroundings. Additionally, try incorporating interesting foreground elements, such as trees, buildings, or rocks, to add context and depth to your image. By experimenting with different angles and perspectives, you can create a more dynamic and engaging image that showcases the moon in a new and interesting way.
Editing and Post-Processing
When it comes to editing and post-processing, there are several techniques that can elevate your photos from good to great. One approach is to use the iPhone's built-in editing app, which offers a range of tools and features that can help enhance your images. Another option is to apply a moon-specific preset or filter, which can add a touch of magic to your lunar photos. Additionally, adjusting the exposure and contrast can help achieve a natural look that showcases the beauty of the moon. By combining these techniques, you can create stunning images that capture the essence of the night sky. To get started, let's take a closer look at how to use the iPhone's built-in editing app to enhance your moon photos.
Use the iPhone's Built-in Editing App
The iPhone's built-in editing app, Photos, offers a range of tools to enhance and refine your moon photos. To access the editing app, open the Photos app, select the moon photo you want to edit, and tap the "Edit" button. The app provides a variety of adjustments, including exposure, contrast, and saturation, which can be used to balance the brightness and color of the image. The "Markup" tool allows you to add text, drawings, or shapes to the photo, while the "Filters" option offers a range of pre-set filters to give your image a unique look. Additionally, the "Adjust" tool provides more advanced options, such as adjusting the highlights, shadows, and black point, to fine-tune the image. By using these tools, you can make subtle adjustments to your moon photo to enhance its overall quality and aesthetic appeal.
Apply a Moon-Specific Preset or Filter
When it comes to editing and post-processing your moon photos, applying a moon-specific preset or filter can make a significant difference in enhancing the overall look and feel of your image. A moon-specific preset or filter is designed to optimize the colors, contrast, and brightness of your photo to bring out the details and textures of the lunar surface. These presets or filters can be found in various photo editing apps, such as Adobe Lightroom or VSCO, and can be applied with just a few taps. By applying a moon-specific preset or filter, you can instantly enhance the colors and contrast of your photo, making the moon appear more vibrant and detailed. Additionally, these presets or filters can also help to reduce noise and grain, resulting in a cleaner and more polished image. Some popular moon-specific presets or filters include the "Moon" preset in Adobe Lightroom, which enhances the colors and contrast of the lunar surface, or the "Lunar" filter in VSCO, which adds a warm and dreamy tone to your photo. By experimenting with different moon-specific presets or filters, you can find the one that works best for your image and takes your moon photography to the next level.
Adjust the Exposure and Contrast for a Natural Look
Adjusting the exposure and contrast of your moon photo is crucial to achieve a natural look. To do this, open the Photos app on your iPhone and select the moon photo you want to edit. Tap the "Edit" button and then select the "Adjust" tab. Here, you can adjust the exposure by sliding the slider left or right. If the moon is overexposed, slide the slider to the left to reduce the brightness. If it's underexposed, slide it to the right to increase the brightness. Next, adjust the contrast by sliding the slider up or down. If the contrast is too high, the moon may appear too bright and the surrounding sky too dark. By reducing the contrast, you can achieve a more balanced look. Additionally, you can also adjust the highlights and shadows to fine-tune the exposure. To do this, tap the "Light" tab and adjust the "Highlights" and "Shadows" sliders. By adjusting these settings, you can recover details in the bright and dark areas of the image. Finally, tap "Done" to save the changes. By adjusting the exposure and contrast, you can achieve a natural look that showcases the beauty of the moon.