How To Make A Collage On Iphone
Here is the introduction paragraph: Creating a collage on your iPhone is a fun and creative way to express yourself and showcase your favorite memories. With just a few taps on your screen, you can turn your photos into a beautiful and unique piece of art. But before you start, it's essential to know the basics of making a collage on your iPhone. In this article, we'll guide you through the process, from gathering the necessary materials to designing and finalizing your collage. First, we'll explore the materials you'll need to get started, including the right apps and photos. Then, we'll dive into the design process, discussing how to choose the perfect layout and add text and other embellishments. Finally, we'll show you how to finalize and share your collage with friends and family. So, let's get started by gathering the materials you'll need for your iPhone collage.
Gathering Materials for Your iPhone Collage
When it comes to creating a visually stunning iPhone collage, gathering the right materials is crucial. To start, you'll need to choose the right photos that will make your collage stand out. This involves selecting images that are not only visually appealing but also tell a story or convey a message. In addition to the right photos, you'll also need to download a collage-making app from the App Store that offers a range of features and customization options. Finally, preparing your iPhone for collage creation is essential to ensure that your device is equipped with the necessary tools and storage space to handle the task. By taking the time to gather these materials, you'll be well on your way to creating a beautiful and meaningful iPhone collage. With your materials in place, you can start by choosing the right photos for your collage, a process that requires careful consideration and attention to detail.
Choosing the Right Photos for Your Collage
When it comes to choosing the right photos for your collage, there are several factors to consider. First, think about the theme or story you want to tell with your collage. This will help you narrow down your photo selection and ensure that your collage has a cohesive look and feel. Next, consider the colors and tones of the photos you've chosen. You'll want to select photos that complement each other in terms of color palette and brightness. For example, if you're creating a collage with a bright and cheerful theme, you'll want to choose photos with similar vibrant colors. On the other hand, if you're creating a more subdued or moody collage, you may want to opt for photos with more muted tones. Additionally, think about the composition of each photo and how they'll work together in your collage. You'll want to choose photos with interesting textures, patterns, and shapes to add depth and visual interest to your collage. Finally, don't be afraid to experiment and try out different combinations of photos until you find the perfect arrangement for your collage. By considering these factors, you can choose the right photos for your collage and create a beautiful and meaningful piece of art.
Downloading a Collage-Making App from the App Store
To create a visually appealing collage on your iPhone, you'll need to start by downloading a collage-making app from the App Store. With numerous options available, it's essential to choose an app that suits your needs and skill level. Begin by opening the App Store and typing "collage maker" or "photo collage" in the search bar. Browse through the search results, and take a look at the ratings, reviews, and screenshots of each app to get an idea of its features and user interface. Some popular collage-making apps include Canva, PicsArt, and Adobe Spark, which offer a range of templates, design tools, and editing features. Once you've selected an app, click the "Get" button to download and install it on your iPhone. Depending on the app's size and your internet connection, the download process may take a few seconds or minutes. Once the app is installed, you can launch it and start creating your collage by selecting the photos you want to use and choosing a template or design. With the right app, you'll be able to unleash your creativity and produce a stunning collage that showcases your favorite memories.
Preparing Your iPhone for Collage Creation
Preparing your iPhone for collage creation is a crucial step to ensure a seamless and enjoyable experience. To start, make sure your iPhone is updated to the latest operating system, as this will provide you with the most recent features and improvements. Next, clean your iPhone's screen thoroughly to prevent any smudges or fingerprints from interfering with your creative process. Additionally, consider investing in a screen protector or a stylus to enhance your precision and control while creating your collage. It's also essential to organize your photos and images by creating albums or folders, making it easier to access and select the desired content for your collage. Furthermore, familiarize yourself with the iPhone's built-in Photos app, which offers a range of editing tools and features that can be used to enhance and manipulate your images. By taking these simple steps, you'll be well-prepared to create stunning collages on your iPhone.
Designing Your Collage on iPhone
With the rise of mobile photography, creating stunning collages on your iPhone has never been easier. Designing a collage on your iPhone can be a fun and creative way to showcase your favorite memories, tell a story, or simply express yourself. To get started, you'll need to select a collage template or layout that fits your style and vision. But before you dive into the design process, it's essential to understand the basics of creating a visually appealing collage. In this article, we'll explore the key elements of designing a collage on your iPhone, including selecting a collage template or layout, adding and arranging photos, and customizing your collage with text, stickers, and filters. By the end of this article, you'll be equipped with the skills and knowledge to create stunning collages that showcase your unique perspective. So, let's start by exploring the first step in the design process: selecting a collage template or layout.
Selecting a Collage Template or Layout
When selecting a collage template or layout, consider the number of photos you want to include, the overall aesthetic you're aiming for, and the message you want to convey. A good template should complement your images without overpowering them. For a clean and modern look, opt for a simple grid or mosaic layout. If you want to add some visual interest, try a template with overlapping frames or a mix of frame shapes and sizes. If you're creating a themed collage, such as a travel or holiday-themed one, choose a template that incorporates relevant graphics or design elements. Additionally, consider the color scheme and typography of your template, ensuring they align with your personal style or brand identity. Some popular collage apps, such as Pic Collage and Canva, offer a wide range of customizable templates and layouts to suit various needs and preferences. By choosing a well-designed template, you'll be able to create a visually appealing collage that effectively showcases your photos and tells a story.
Adding and Arranging Photos in Your Collage
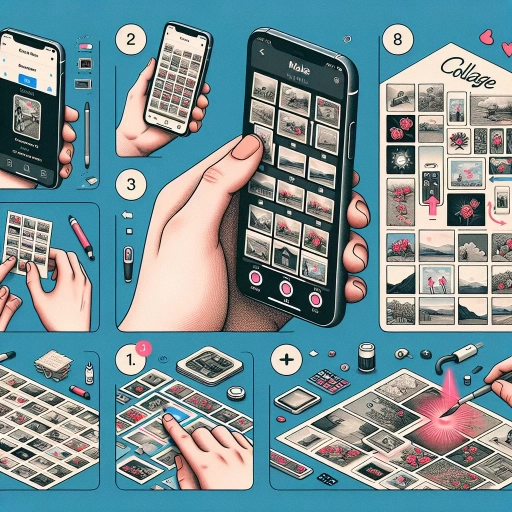
When it comes to adding and arranging photos in your collage, the Photos app on your iPhone offers a range of intuitive tools and features. To start, select the photos you want to include in your collage by tapping the "Select" button and choosing the desired images from your library. You can choose up to nine photos for a single collage. Once you've selected your photos, tap the "Create Collage" button to enter the collage editor. Here, you can arrange your photos in a variety of layouts, including grid, mosaic, and free-form styles. To move a photo, simply tap and drag it to the desired location. You can also resize photos by pinching in or out with your fingers. To add more photos to your collage, tap the "+" icon and select additional images from your library. If you want to remove a photo from your collage, tap the "X" icon in the top-right corner of the photo. Additionally, you can adjust the border width and color of your collage by tapping the "Border" button. To save your collage, tap the "Done" button, and it will be saved to your Photos library. You can also share your collage directly to social media or via email by tapping the "Share" button. With these easy-to-use tools, you can create stunning collages on your iPhone in just a few taps.
Customizing Your Collage with Text, Stickers, and Filters
When it comes to customizing your collage on iPhone, the possibilities are endless. With a wide range of text, stickers, and filters at your fingertips, you can add a personal touch to your collage and make it truly unique. To start, you can add text to your collage by tapping the "Text" icon, which resembles a capital "T" in a speech bubble. From there, you can choose from a variety of fonts, colors, and sizes to match your collage's aesthetic. You can also add stickers to your collage by tapping the "Stickers" icon, which looks like a sticker sheet. Here, you can browse through a vast library of stickers, from cute and playful to elegant and sophisticated. To apply a sticker, simply tap on it and drag it to the desired location on your collage. If you want to add a bit of flair to your collage, you can also apply filters to individual photos or the entire collage. To do this, tap the "Filters" icon, which looks like a series of overlapping circles. From there, you can choose from a range of filters, from subtle and natural to bold and dramatic. Whether you're looking to add a touch of whimsy or sophistication to your collage, the text, stickers, and filters on your iPhone make it easy to customize your creation and make it truly one-of-a-kind.
Finalizing and Sharing Your iPhone Collage
Once you've created your iPhone collage, it's time to finalize and share it with others. This is an exciting step, as you get to showcase your creativity and share your masterpiece with friends, family, and even the world. To finalize your collage, you'll need to save and export it in a format that suits your needs. You may want to share it on social media and messaging apps, or print and display it physically. In this article, we'll explore the different ways you can finalize and share your iPhone collage, starting with saving and exporting it in different formats. By the end of this article, you'll be able to confidently share your collage with others and enjoy the fruits of your creative labor. So, let's dive in and explore the first step in finalizing your iPhone collage: saving and exporting it in different formats.
Saving and Exporting Your Collage in Different Formats
When you're satisfied with your collage, it's time to save and export it in different formats. To save your collage, tap the "Done" button in the top right corner of the screen. You can then choose to save it to your iPhone's Photos app, where it will be stored in the "Media Types" album under "Collages." If you want to export your collage in a specific format, such as JPEG or PNG, tap the "Share" icon (represented by a box with an arrow coming out of it) and select the desired format from the list of options. You can also choose to export your collage as a PDF or GIF. Additionally, you can share your collage directly to social media platforms like Instagram, Facebook, and Twitter, or send it to friends and family via email or text message. If you want to print your collage, you can export it as a JPEG or PNG and then print it from your computer or a printing service. You can also use the "Save to Files" option to save your collage to your iPhone's Files app, where you can organize and store it with other documents and files. By saving and exporting your collage in different formats, you can easily share it with others, use it in various projects, and preserve it for future reference.
Sharing Your Collage on Social Media and Messaging Apps
When you're satisfied with your collage, you can share it with others via social media and messaging apps. To do this, tap the "Share" icon in the top-right corner of the screen. You'll then see a list of options to share your collage, including Facebook, Twitter, Instagram, and more. Simply select the platform you want to share on, and your collage will be uploaded directly. You can also share your collage via messaging apps like WhatsApp, iMessage, or email. Additionally, you can save your collage to your iPhone's Camera Roll, where you can access it later to share or edit. To share your collage on social media, make sure you have the corresponding app installed on your iPhone and that you're logged in to your account. For messaging apps, simply select the contact you want to share the collage with, and it will be sent as a message. If you want to add a caption or message to your collage, you can do so before sharing it. This way, you can provide context or add a personal touch to your shared collage. Overall, sharing your collage on social media and messaging apps is a great way to showcase your creativity and share your artistic side with others.
Printing and Displaying Your Collage Physically
When you're satisfied with your digital collage, it's time to think about printing and displaying it physically. This can be a wonderful way to showcase your artwork and add a personal touch to your home or office. To print your collage, you can use a variety of methods, such as sending it to a professional printing service, using a home printer, or even printing it at a local photo lab. If you want to get creative, you can also experiment with different printing techniques, such as canvas printing or metal printing, to give your collage a unique texture and look. Once you have your printed collage, you can display it in a variety of ways, such as framing it, mounting it on a board, or even creating a collage display with multiple pieces. You can also consider adding a personal message or caption to your collage to make it extra special. Additionally, you can use your printed collage as a gift for friends and family, or as a way to decorate your space for a special occasion. Overall, printing and displaying your collage physically can be a fun and rewarding way to share your creativity with others and enjoy your artwork in a new way.