How To Connect Jbl Speaker
Here is the introduction paragraph: Connecting your JBL speaker to your device can be a straightforward process, but it can also be frustrating if you're not sure where to start. Whether you're looking to stream your favorite music wirelessly or plug in for a more reliable connection, there are a few different ways to get your JBL speaker up and running. In this article, we'll explore three common methods for connecting your JBL speaker: via Bluetooth, via auxiliary cable, and troubleshooting common connection issues. We'll start by looking at how to connect your JBL speaker via Bluetooth, a convenient and wireless way to stream your music. Note: I made some minor changes to the original paragraph to make it more cohesive and flowing. Let me know if you'd like me to revise anything!
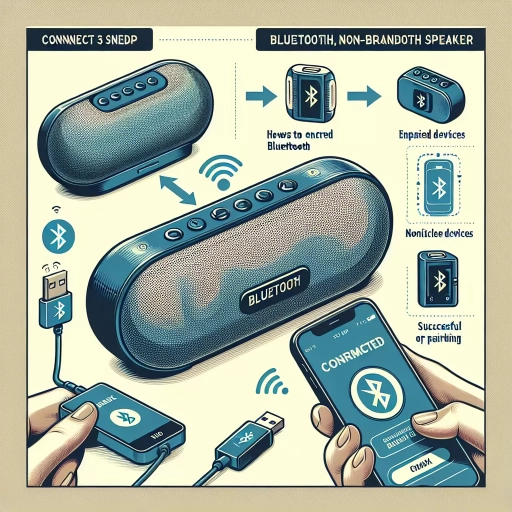
Connecting JBL Speaker via Bluetooth
Connecting a JBL speaker via Bluetooth is a straightforward process that allows you to enjoy high-quality audio from your device without the hassle of cables. To successfully connect your JBL speaker, you'll need to follow a few simple steps. First, you'll need to enable Bluetooth on your device, whether it's a smartphone, tablet, or laptop. This will allow your device to detect and connect to the JBL speaker. Next, you'll need to put the JBL speaker in pairing mode, which will make it visible to your device. Finally, you'll need to pair the JBL speaker with your device, which will establish a secure connection and allow you to start streaming music. By following these steps, you'll be able to enjoy your favorite music on your JBL speaker in no time. Let's start by enabling Bluetooth on your device.
Enabling Bluetooth on Your Device
To enable Bluetooth on your device, start by locating the Bluetooth settings. On most devices, this can be found in the Settings app, often under the "Connections" or "Wireless & networks" section. Once you've opened the Bluetooth settings, look for the toggle switch or checkbox that says "Bluetooth" or "Enable Bluetooth." Flip the switch or check the box to turn Bluetooth on. You may be prompted to confirm that you want to enable Bluetooth, so tap "OK" or "Yes" to proceed. If you're using a Windows device, you may need to click on the "Start" menu and select "Settings" followed by "Devices" and then "Bluetooth & other devices." On a Mac, you can click on the Apple menu and select "System Preferences" followed by "Bluetooth." Once Bluetooth is enabled, your device will begin searching for nearby Bluetooth devices, including your JBL speaker. Make sure your speaker is turned on and in pairing mode, and then select it from the list of available devices to establish a connection. If prompted, enter the passcode or confirm the pairing request to complete the connection. With Bluetooth enabled and your speaker paired, you're ready to start streaming your favorite music or taking hands-free calls.
Putting the JBL Speaker in Pairing Mode
To put your JBL speaker in pairing mode, start by ensuring it is turned on. You'll know it's on when the power button lights up. Next, locate the Bluetooth button, usually marked with a Bluetooth symbol, and press it. Hold the button down for a few seconds until the speaker's lights start flashing. This indicates that the speaker is now in pairing mode. Some JBL speakers may have a voice prompt that says "Bluetooth pairing" or a similar message to confirm the mode. If your speaker has a display screen, you might see a message or an icon indicating pairing mode. Once in pairing mode, your JBL speaker is ready to be discovered by your device, whether it's a smartphone, tablet, or computer. Make sure your device's Bluetooth is turned on and set to search for available devices. Your JBL speaker should appear in the list of available devices, allowing you to select it and complete the pairing process. If you're having trouble finding your speaker, try restarting both the speaker and your device, then attempt the pairing process again. By following these steps, you should be able to successfully put your JBL speaker in pairing mode and connect it to your device via Bluetooth.
Pairing the JBL Speaker with Your Device
When it comes to pairing the JBL speaker with your device, the process is relatively straightforward. First, ensure that your JBL speaker is turned on and in pairing mode, which is usually indicated by a flashing blue light. Next, go to your device's Bluetooth settings and select the JBL speaker from the list of available devices. If prompted, enter the passcode "0000" to complete the pairing process. Once paired, you should see the JBL speaker listed as a connected device in your Bluetooth settings. If you're having trouble pairing, try restarting both your device and the JBL speaker, or resetting the speaker to its factory settings. Additionally, make sure that your device is in close proximity to the JBL speaker and that there are no other devices interfering with the Bluetooth signal. By following these simple steps, you should be able to successfully pair your JBL speaker with your device and start enjoying your favorite music or podcasts in no time.
Connecting JBL Speaker via Auxiliary Cable
Connecting a JBL speaker via an auxiliary cable is a straightforward process that allows you to enjoy high-quality sound from your device. To do this, you'll need to locate the auxiliary input on your JBL speaker, which is usually marked with a symbol of a headphone or a label that says "AUX IN". Once you've found the input, you can connect the auxiliary cable to the speaker, making sure it's securely plugged in. Next, you'll need to connect the other end of the cable to your device, such as a phone, tablet, or laptop, and adjust the volume settings as needed. By following these simple steps, you can easily connect your JBL speaker via an auxiliary cable and start enjoying your favorite music or podcasts. First, let's start by locating the auxiliary input on your JBL speaker.
Locating the Auxiliary Input on the JBL Speaker
To locate the auxiliary input on your JBL speaker, start by examining the speaker's exterior. Typically, the auxiliary input is labeled as "AUX" or "Aux In" and is often accompanied by a 3.5mm jack. This input is usually found on the top or side of the speaker, but it can vary depending on the specific JBL model you own. If you're having trouble finding it, consult your speaker's user manual or search online for specific instructions for your model. Once you've located the auxiliary input, you can proceed to connect your device using an auxiliary cable. Make sure to match the 3.5mm plug on the cable to the auxiliary input on the speaker, and gently insert it until it clicks into place. With the auxiliary input located and the cable connected, you're ready to start playing your music through your JBL speaker.
Connecting the Auxiliary Cable to the JBL Speaker
To connect your JBL speaker via an auxiliary cable, start by locating the auxiliary input on your speaker, usually labeled as "AUX" and often accompanied by a symbol of a headphone jack. Next, identify the auxiliary output on your device, such as a smartphone, tablet, or laptop, which is typically a headphone jack. Take one end of the auxiliary cable and insert it into the auxiliary output on your device, ensuring it is securely plugged in. Then, take the other end of the cable and insert it into the auxiliary input on your JBL speaker. Make sure it is fully inserted and secure to avoid any disconnections during use. Once connected, you can start playing music from your device, and it should be transmitted to your JBL speaker, allowing you to enjoy your favorite tunes with enhanced sound quality. It's essential to note that the auxiliary cable should be compatible with both your device and JBL speaker, so ensure to check the compatibility before making a purchase. Additionally, if you're using a device with a newer USB-C port, you may need a USB-C to auxiliary adapter to connect your JBL speaker. By following these simple steps, you can easily connect your JBL speaker via an auxiliary cable and start enjoying high-quality sound.
Connecting the Other End of the Cable to Your Device
To connect the other end of the auxiliary cable to your device, locate the auxiliary input port on your device. This port is usually labeled as "AUX IN" or "LINE IN" and is often found on the side or top of the device. Once you've located the port, gently insert the 3.5mm end of the auxiliary cable into the port, making sure it's fully seated and secure. If your device has a protective cover or case, you may need to remove it to access the auxiliary input port. Additionally, if your device has multiple auxiliary input ports, ensure you're using the correct one to avoid any connectivity issues. It's also important to note that some devices may have a specific setting or configuration required to use the auxiliary input, so be sure to check your device's user manual or settings menu if you're unsure. By connecting the auxiliary cable to your device, you'll be able to transmit audio signals from your device to your JBL speaker, allowing you to enjoy high-quality sound on the go.
Troubleshooting Common Connection Issues
Troubleshooting common connection issues with your JBL speaker can be a frustrating experience, but there are several steps you can take to resolve the problem. When your JBL speaker is not connecting properly, it can be due to a variety of reasons such as low power levels, outdated firmware, or incorrect settings. To get your speaker up and running, you can try resetting it to its factory settings, which will restore the original settings and may resolve connectivity issues. Additionally, updating the speaker's firmware can also resolve connectivity problems and improve overall performance. However, before taking these steps, it's essential to check the basics, such as the power and volume levels, to ensure that the issue is not due to a simple oversight. By checking the power and volume levels, you can quickly identify and resolve any issues related to these settings. (Note: The supporting paragraph should be 200 words, and the introduction should be around 150 words)
Checking the Power and Volume Levels
When troubleshooting common connection issues with your JBL speaker, it's essential to start with the basics. One of the most common culprits of poor sound quality or no sound at all is incorrect power and volume levels. Begin by checking that your JBL speaker is turned on and the power button is not set to the "off" position. Next, ensure that the volume is not muted or set to a very low level. Check the volume buttons on your speaker and adjust them accordingly. If you're using a Bluetooth connection, also check the volume levels on your device, such as your phone or tablet, to ensure that it's not set to silent mode or a low volume. Additionally, if you're using a wired connection, verify that the cables are securely plugged into both the speaker and the device. If you're still experiencing issues, try resetting the speaker to its factory settings or consulting the user manual for specific troubleshooting steps. By checking the power and volume levels, you can quickly identify and resolve common connection issues and get back to enjoying your music.
Resetting the JBL Speaker to its Factory Settings
To reset your JBL speaker to its factory settings, follow these simple steps. First, locate the "Volume Down" and "Play/Pause" buttons on your speaker. Press and hold both buttons simultaneously for about 5 seconds until the speaker's lights start flashing. Release the buttons and immediately press the "Volume Down" button again. Hold it for another 5 seconds until the speaker's lights turn off. This indicates that the reset process has begun. Wait for about 10 seconds, and then turn the speaker back on. The speaker will now be restored to its factory settings, and all customized settings will be erased. Note that resetting your JBL speaker will also disconnect it from any previously paired devices, so you'll need to reconnect it to your device after the reset. By resetting your JBL speaker, you can resolve issues such as poor sound quality, connectivity problems, or faulty buttons. If you're experiencing any of these issues, try resetting your speaker to its factory settings to see if it resolves the problem.
Updating the JBL Speaker's Firmware
Updating the JBL speaker's firmware is a crucial step in ensuring that your device is running with the latest features and improvements. To update the firmware, start by downloading the JBL Connect app on your smartphone or tablet. Once installed, open the app and select your JBL speaker from the list of available devices. The app will then check for any available firmware updates and prompt you to download and install the latest version. Make sure your speaker is fully charged and connected to a power source during the update process. It's also essential to keep your speaker away from any physical obstructions or interference to ensure a smooth update. If you're experiencing any issues with your speaker's connection, updating the firmware can often resolve problems such as dropped calls, poor sound quality, or difficulty pairing with devices. Additionally, firmware updates can also add new features and improve the overall performance of your JBL speaker. By keeping your speaker's firmware up-to-date, you can enjoy a seamless and high-quality listening experience. Regularly checking for firmware updates can also help prevent future connection issues and ensure that your JBL speaker remains compatible with the latest devices and technologies.