How To Clean Carburetor
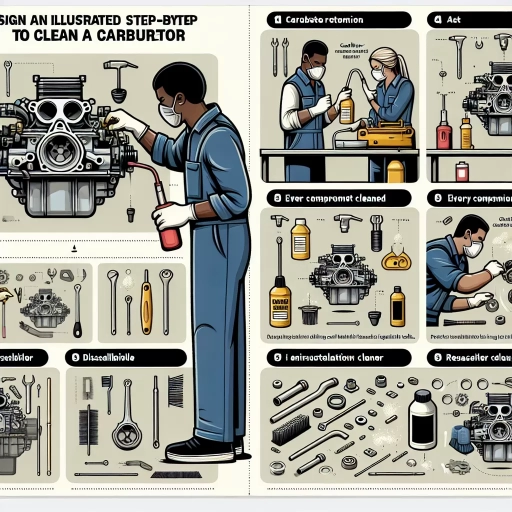
Cleaning a carburetor can be a daunting task, but with the right steps, it can be done effectively. A dirty carburetor can cause poor engine performance, decreased fuel efficiency, and even engine failure. In this article, we will guide you through the process of cleaning a carburetor, from preparation to testing. To start, it's essential to prepare for the cleaning process, which involves gathering the necessary tools and materials, as well as understanding the carburetor's components and how they work. Once prepared, you'll need to disassemble the carburetor, carefully cleaning each part to remove dirt, grime, and varnish. Finally, you'll need to reassemble the carburetor and test it to ensure it's working properly. In the next section, we'll dive into the preparation phase, discussing the tools and materials you'll need to get started.
Preparation for Cleaning the Carburetor
Cleaning the carburetor is a crucial maintenance task for any vehicle owner. A dirty carburetor can lead to poor engine performance, decreased fuel efficiency, and even engine failure. To ensure a successful cleaning process, it's essential to prepare the carburetor properly. This involves several key steps, including disconnecting the fuel line and removing the air filter, taking out the spark plug and draining the fuel tank, and using protective gear and ensuring a well-ventilated workspace. By following these steps, you'll be able to clean the carburetor safely and effectively. In this article, we'll explore each of these steps in detail, starting with the first crucial step: disconnecting the fuel line and removing the air filter.
Disconnect the Fuel Line and Remove the Air Filter
To disconnect the fuel line and remove the air filter, start by locating the fuel line that connects the carburetor to the fuel tank. You'll typically find it attached to the carburetor with a hose clamp or a nut. Loosen the clamp or nut by turning it counterclockwise, then carefully pull the fuel line off the carburetor. Be prepared for any remaining fuel to spill out, so have some rags or a drip pan handy to catch it. Next, move on to the air filter, which is usually held in place by a wing nut or a screw. Remove the nut or screw, and gently pull the air filter away from the carburetor. Take note of any additional components, such as a filter housing or a breather tube, and set them aside for reinstallation later. With the fuel line and air filter removed, you'll have clear access to the carburetor and can proceed with the cleaning process.
Take Out the Spark Plug and Drain the Fuel Tank
Before you start cleaning the carburetor, it's essential to take out the spark plug and drain the fuel tank. This step is crucial to ensure your safety while working on the carburetor. Removing the spark plug will prevent any accidental engine starts, which could lead to serious injury or damage. To remove the spark plug, locate it on the side of the engine and use a spark plug socket to unscrew it. Once removed, set it aside in a safe place. Next, drain the fuel tank to prevent any fuel from flowing into the carburetor while you're cleaning it. You can do this by locating the fuel tank drain plug, usually found at the bottom of the tank, and unscrewing it. Allow the fuel to drain completely before proceeding. Additionally, it's a good idea to disconnect the fuel line from the carburetor to prevent any residual fuel from entering the carburetor. By taking out the spark plug and draining the fuel tank, you'll be able to work on the carburetor safely and effectively.
Use Protective Gear and Ensure a Well-Ventilated Workspace
When cleaning the carburetor, it is essential to use protective gear and ensure a well-ventilated workspace to avoid any potential health risks. Wear protective gloves, safety glasses, and a face mask to prevent exposure to harsh chemicals and debris. A well-ventilated workspace is crucial to prevent the inhalation of fumes from cleaning solvents and to reduce the risk of explosion. Open windows, use a fan, or work in a well-ventilated area to maintain good airflow. Additionally, ensure that the workspace is clear of any flammable materials and that the carburetor is placed on a stable, heat-resistant surface. By taking these precautions, you can minimize the risks associated with cleaning the carburetor and ensure a safe and successful cleaning process.
Disassembling and Cleaning the Carburetor
Disassembling and cleaning the carburetor is a crucial step in maintaining the performance and efficiency of your engine. A dirty carburetor can lead to poor engine performance, decreased fuel efficiency, and even engine failure. To disassemble and clean the carburetor, you will need to start by removing the float bowl and gasket to access the jets. This will allow you to inspect and clean the jets, which are responsible for regulating the flow of fuel into the engine. Additionally, soaking the carburetor parts in a cleaning solution can help to loosen and remove any tough debris and grime. Finally, using a soft-bristled brush to remove debris and grime from the carburetor's surfaces can help to ensure a thorough cleaning. By following these steps, you can help to restore your carburetor to its optimal performance and keep your engine running smoothly. To begin, let's start by removing the float bowl and gasket to access the jets.
Remove the Float Bowl and Gasket to Access the Jets
To access the jets, you'll need to remove the float bowl and gasket. Start by locating the float bowl, which is usually held in place by a few screws or clips. Remove the screws or release the clips to detach the float bowl from the carburetor body. Be careful not to spill any fuel that may still be inside the bowl. Once the float bowl is removed, you'll see the gasket that seals it to the carburetor body. Gently pry the gasket out of its seat, taking care not to damage it or the surrounding surfaces. With the gasket removed, you'll have access to the jets, which are usually located in the carburetor's venturi. The jets are responsible for metering the correct amount of fuel into the engine, and cleaning or replacing them can make a big difference in the carburetor's performance. By removing the float bowl and gasket, you'll be able to inspect and clean the jets, as well as the surrounding area, to ensure that your carburetor is running smoothly and efficiently.
Soak the Carburetor Parts in a Cleaning Solution
Soak the carburetor parts in a cleaning solution to loosen and remove any stubborn grime and debris. This step is crucial in ensuring that all parts are thoroughly cleaned and free of contaminants. To soak the parts, fill a large container with a carburetor cleaning solution, making sure to follow the manufacturer's instructions for the recommended dilution ratio. Submerge all the disassembled parts, including the bowls, jets, and other components, in the solution, making sure they are fully covered. Allow the parts to soak for the recommended time, usually several hours or overnight, to allow the solution to penetrate and break down any tough deposits. During this time, the solution will help to dissolve and loosen any grime, varnish, and debris, making it easier to remove them in the next step. It's essential to note that some parts, such as rubber or plastic components, may require a gentler cleaning solution or a shorter soaking time to prevent damage. Always refer to the manufacturer's instructions for specific guidance on cleaning and soaking carburetor parts. By soaking the parts in a cleaning solution, you'll be able to effectively remove any stubborn grime and debris, ensuring that your carburetor is thoroughly cleaned and ready for reassembly.
Use a Soft-Bristled Brush to Remove Debris and Grime
When it comes to cleaning a carburetor, one of the most effective tools to use is a soft-bristled brush. This type of brush is gentle enough not to scratch or damage the delicate surfaces of the carburetor, yet firm enough to remove stubborn debris and grime. Start by using the brush to sweep away any loose dirt or debris that may be accumulated on the surface of the carburetor. Then, use the brush to gently scrub away any stubborn stains or grime that may be stuck to the surface. Be sure to work in a gentle, circular motion, taking care not to apply too much pressure, which can damage the carburetor's components. As you brush, pay particular attention to any areas with small crevices or holes, as these can be prone to accumulating debris. By using a soft-bristled brush to remove debris and grime, you'll be able to get your carburetor clean and functioning properly in no time.
Reassembling and Testing the Carburetor
Reassembling and testing the carburetor is a crucial step in restoring your vehicle's engine to optimal performance. After disassembling and cleaning the carburetor, it's essential to reattach the float bowl and gasket, ensuring a tight seal to prevent fuel leaks. Additionally, reconnecting the fuel line and air filter is vital to ensure proper airflow and fuel supply. Finally, replacing the spark plug is necessary to ensure the engine is running smoothly. By following these steps, you can ensure your carburetor is functioning correctly and your engine is running at its best. To begin the reassembly process, start by reattaching the float bowl and gasket, ensuring a tight seal.
Reattach the Float Bowl and Gasket, Ensuring a Tight Seal
Reattach the float bowl and gasket, ensuring a tight seal. Begin by applying a thin layer of gasket sealant to the float bowl gasket, taking care not to overapply, as this can compromise the seal. Next, carefully position the float bowl onto the carburetor body, ensuring it is properly aligned with the mounting holes. Gently press the float bowl into place, making sure it is securely seated. Then, use the mounting screws to secure the float bowl, tightening them in a star pattern to avoid applying uneven pressure. Finally, double-check the seal by gently tugging on the float bowl to ensure it is securely attached and there are no signs of leakage. A tight seal is crucial to prevent fuel leaks and ensure proper carburetor function.
Reconnect the Fuel Line and Air Filter, and Replace the Spark Plug
Reconnect the fuel line and air filter, and replace the spark plug to complete the reassembly of the carburetor. Start by reconnecting the fuel line to the carburetor, making sure it is securely attached to prevent any leaks. Next, reattach the air filter, ensuring it is properly seated and secured to the carburetor. If your carburetor has a spark plug, now is the time to replace it with a new one. Make sure to gap the spark plug correctly and tighten it securely to the carburetor. Once these components are reconnected and replaced, your carburetor is ready for testing. Turn the engine over and listen for any unusual sounds or vibrations, and check for any signs of leaks around the fuel line and air filter. If everything seems to be working properly, your carburetor is now clean and ready for use.
Start the Engine and Check for Proper Carburetor Function
Start the engine and check for proper carburetor function. With the carburetor reassembled and reinstalled, it's time to test its performance. Begin by starting the engine and letting it warm up for a few minutes. Listen for any unusual sounds, such as hissing or gurgling, which could indicate a vacuum leak or other issue. Check the engine's idle speed and adjust it as needed to ensure it's within the recommended range. Next, take the vehicle for a test drive to check for proper acceleration and throttle response. Pay attention to any signs of hesitation or stumbling, which could indicate a problem with the carburetor's fuel flow or air/fuel mixture. If the engine is running smoothly and responding well to throttle input, it's likely that the carburetor is functioning properly. However, if you notice any issues, it may be necessary to make further adjustments or repairs to the carburetor. Additionally, check the engine's fuel consumption and performance at different speeds and loads to ensure the carburetor is providing the correct air/fuel mixture. By thoroughly testing the carburetor's function, you can ensure that your engine is running efficiently and effectively.