How To Make Cold Foam Starbucks
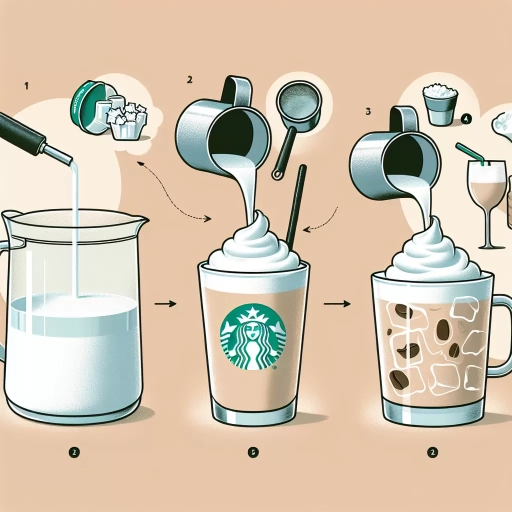
Here is the introduction paragraph: If you're a fan of Starbucks, you've probably noticed the creamy, velvety texture of their cold foam toppings. But have you ever wondered how to make cold foam at home? With a few simple ingredients and some basic equipment, you can create your own delicious cold foam to top your favorite Starbucks drinks. To get started, it's essential to understand the basics of cold foam and its ingredients. In this article, we'll break down the process of making cold foam into three key steps: understanding cold foam and its ingredients, preparing the equipment and ingredients, and creating the perfect cold foam for your Starbucks drinks. By the end of this article, you'll be equipped with the knowledge and skills to make cold foam like a pro. So, let's dive in and start with the foundation of cold foam: understanding what it's made of and how it's created.
Understanding Cold Foam and Its Ingredients
Cold foam has become a popular topping for coffee and other beverages in recent years, but many people are still unclear about what it is and how it's made. To understand cold foam, it's essential to break down its ingredients and their roles in creating this unique topping. Non-fat milk, for instance, plays a crucial part in giving cold foam its light and airy texture. Additionally, natural sweeteners and flavorings are used to enhance the taste without adding refined sugars. By examining the ingredients and their functions, we can gain a deeper understanding of cold foam and its characteristics. So, let's start by exploring the basics of cold foam and how it differs from whipped cream.
What is Cold Foam and How Does it Differ from Whipped Cream?
Cold foam is a type of topping made from milk that has been frothed to a consistency similar to whipped cream, but with a smoother and more velvety texture. Unlike traditional whipped cream, which is made by whipping heavy cream until it becomes stiff and holds its shape, cold foam is created by frothing milk using a combination of air, pressure, and temperature. This process involves forcing air into the milk under pressure, which creates a network of tiny bubbles that give the foam its light and airy texture. Cold foam is often used as a topping for coffee drinks, such as lattes and cappuccinos, and can be flavored with various ingredients like vanilla or cinnamon to enhance its taste. In comparison to whipped cream, cold foam has a more delicate and subtle flavor, and its texture is less dense and more prone to melting. Overall, cold foam offers a unique and refreshing alternative to traditional whipped cream, and its versatility makes it a popular choice among coffee shops and baristas.
The Role of Non-Fat Milk in Creating Cold Foam
The role of non-fat milk in creating cold foam is multifaceted. Non-fat milk serves as the base ingredient for cold foam, providing the necessary liquid and protein structure for the foam to form. The casein proteins present in non-fat milk, specifically, are essential for creating a stable foam. When non-fat milk is whipped, the casein proteins unwind and reorganize into a network of strands that trap air bubbles, resulting in a light and airy texture. Additionally, non-fat milk contains a small amount of natural sweetness, which enhances the overall flavor of the cold foam. Furthermore, the low fat content of non-fat milk allows for a more efficient whipping process, as there is less fat to interfere with the incorporation of air. This results in a faster and more consistent whipping time, making it easier to achieve the desired consistency and texture. Overall, the use of non-fat milk is crucial in creating a high-quality cold foam that is both delicious and visually appealing.
Understanding the Importance of Natural Sweeteners and Flavorings
The use of natural sweeteners and flavorings is crucial in creating a high-quality cold foam, as seen in Starbucks' signature drinks. Unlike artificial sweeteners and flavorings, natural alternatives offer a cleaner and more nuanced taste experience. Natural sweeteners like stevia, honey, and maple syrup provide a richer flavor profile compared to artificial sweeteners like aspartame and sucralose. Moreover, natural flavorings like vanilla and almond extracts add depth and complexity to the cold foam, making it a perfect complement to coffee and other beverages. By using natural sweeteners and flavorings, baristas can create a cold foam that not only tastes better but also aligns with the growing consumer demand for healthier and more sustainable food options. Furthermore, natural sweeteners and flavorings can help to reduce the calorie count of cold foam, making it a guilt-free indulgence for health-conscious consumers. Overall, the use of natural sweeteners and flavorings is essential in crafting a premium cold foam that is both delicious and better for you.
Preparing the Equipment and Ingredients for Cold Foam
Preparing the equipment and ingredients is a crucial step in creating high-quality cold foam. To achieve the perfect texture and consistency, it's essential to have the right tools and ingredients at the right temperature. This involves choosing the right blender for cold foam production, as it can make a significant difference in the final product. Additionally, measuring and preparing non-fat milk and natural sweeteners is vital to ensure the right balance of flavors and textures. Furthermore, chilling the ingredients to the optimal temperature is necessary to prevent the growth of bacteria and to achieve the desired consistency. By paying attention to these details, you can create a delicious and refreshing cold foam that will elevate your coffee drinks to the next level. In this article, we will explore the importance of choosing the right blender for cold foam production, and how it can impact the final product.
Choosing the Right Blender for Cold Foam Production
When it comes to creating the perfect cold foam, having the right blender is crucial. A high-powered blender is essential for incorporating air and breaking down the ingredients to create a smooth and creamy texture. Look for a blender with a strong motor, preferably one with a wattage of at least 1000 watts. This will ensure that the blender can handle the thick and creamy mixture without struggling. Additionally, a blender with a stainless steel or BPA-free plastic pitcher is recommended, as these materials are durable and easy to clean. Some popular blender options for cold foam production include the Vitamix, Blendtec, and Breville. When choosing a blender, also consider the size of the pitcher, as a larger pitcher will allow you to make bigger batches of cold foam. Ultimately, investing in a high-quality blender will make a significant difference in the quality of your cold foam, and it's worth the investment if you plan on making it regularly.
Measuring and Preparing Non-Fat Milk and Natural Sweeteners
When it comes to measuring and preparing non-fat milk and natural sweeteners for cold foam, precision is key. To start, it's essential to use a digital scale to accurately measure the non-fat milk, as the ratio of milk to air is crucial in achieving the perfect cold foam texture. For a standard cold foam recipe, you'll want to use 3.5 ounces of non-fat milk per serving. When it comes to natural sweeteners, such as stevia or erythritol, it's best to use a small amount, as they can be quite potent. A general rule of thumb is to start with a small amount, such as 1/4 teaspoon, and adjust to taste. It's also important to note that natural sweeteners can affect the texture of the cold foam, so it's best to experiment with small batches before scaling up. To prepare the non-fat milk, simply pour it into a cold container and place it in the refrigerator to chill. For natural sweeteners, you can either mix them with a small amount of hot water to dissolve, or simply add them to the milk and whisk until combined. By taking the time to accurately measure and prepare your non-fat milk and natural sweeteners, you'll be well on your way to creating a delicious and healthy cold foam that's sure to impress.
Chilling the Ingredients to the Optimal Temperature
Chilling the ingredients to the optimal temperature is a crucial step in preparing the equipment and ingredients for cold foam. This process involves refrigerating the heavy cream, milk, and any additional flavorings or sweeteners to a temperature between 39°F and 45°F (4°C and 7°C). Chilling the ingredients helps to slow down the growth of bacteria and other microorganisms, ensuring the safety and quality of the cold foam. Moreover, chilling the ingredients allows for better emulsification and incorporation of air, resulting in a smoother and more stable foam. It is essential to note that the temperature of the ingredients should not be too low, as this can cause the cream to become too stiff and difficult to whip. Conversely, if the ingredients are not chilled enough, the foam may not hold its shape or may become too runny. Therefore, it is crucial to monitor the temperature of the ingredients and adjust the chilling time accordingly to achieve the optimal temperature for making cold foam. By chilling the ingredients to the optimal temperature, you can ensure that your cold foam turns out light, airy, and delicious, with a texture that is similar to whipped cream.
Creating the Perfect Cold Foam for Your Starbucks Drinks
Creating the perfect cold foam for your Starbucks drinks is an art that requires precision and attention to detail. To achieve the signature Starbucks cold foam, you need to blend the ingredients to the right consistency and texture, add flavorings and sweeteners to enhance the taste, and follow some top tips to get it just right. By mastering these three key elements, you'll be able to create a cold foam that's both delicious and visually appealing. In this article, we'll dive into the specifics of each of these elements, starting with the foundation of great cold foam: blending the ingredients to the right consistency and texture. By getting this step right, you'll be well on your way to creating a cold foam that's worthy of the Starbucks name.
Blending the Ingredients to the Right Consistency and Texture
Blending the ingredients to the right consistency and texture is a crucial step in creating the perfect cold foam for your Starbucks drinks. To achieve the ideal texture, it's essential to blend the heavy cream, milk, and sugar until they reach a smooth and creamy consistency. Start by blending the ingredients on low speed to break down the sugar and incorporate it into the cream and milk. Gradually increase the speed to medium-high and continue blending until the mixture becomes stiff and holds its shape. Be careful not to over-blend, as this can result in a too-stiff or even buttery consistency. The ideal texture should be similar to whipped cream, but slightly thicker and more stable. If you're using a stand mixer, use the whisk attachment to blend the ingredients, and if you're using a handheld blender, use the beaters or whisk attachment. By blending the ingredients to the right consistency and texture, you'll be able to create a cold foam that's not only delicious but also visually appealing, with a smooth and creamy texture that's perfect for topping your favorite Starbucks drinks.
Adding Flavorings and Sweeteners to Enhance the Taste
Adding flavorings and sweeteners is a crucial step in creating the perfect cold foam for your Starbucks drinks. To enhance the taste, you can add a variety of flavorings such as vanilla, hazelnut, or caramel syrup. Start by adding a small amount, about 1-2 pumps, and adjust to taste. You can also add a sweetener like sugar, honey, or agave nectar to balance out the flavor. If you prefer a creamier flavor, you can add a splash of half-and-half or heavy cream. For a more intense flavor, you can add a shot of espresso or a teaspoon of instant coffee. When adding flavorings and sweeteners, it's essential to taste as you go and adjust the flavor to your liking. This will ensure that your cold foam is not too sweet or overpowering. Additionally, you can also experiment with different combinations of flavorings and sweeteners to create unique and delicious flavors. For example, you can try adding a pump of vanilla and a drizzle of honey for a sweet and creamy flavor. By adding flavorings and sweeteners, you can take your cold foam to the next level and create a delicious and customized topping for your Starbucks drinks.
Top Tips for Achieving the Signature Starbucks Cold Foam
Here is the paragraphy: To achieve the signature Starbucks cold foam, follow these top tips. First, use high-quality heavy cream with a fat content of at least 36% for the best results. Next, make sure your cream is well-chilled in the refrigerator for at least 2 hours or overnight before whipping. When whipping, use a stand mixer or a handheld electric mixer on high speed to incorporate air quickly and evenly. Start with a slow speed to break down the fat molecules, then gradually increase the speed as the cream begins to thicken. Be careful not to over-whip, as this can lead to buttery or grainy texture. Stop whipping when the cream becomes stiff and holds its shape, but still appears smooth and silky. Finally, use the cold foam immediately, or store it in an airtight container in the refrigerator for up to 24 hours. By following these tips, you'll be able to create a rich, creamy, and velvety cold foam that's identical to Starbucks.