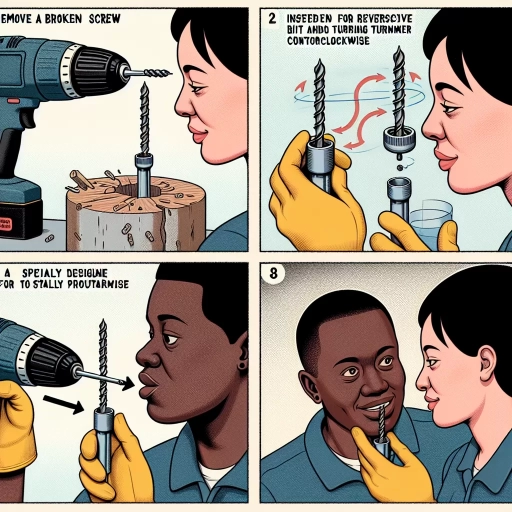
How To Remove Broken Screw
Removing a broken screw can be a frustrating and challenging task, especially if it's stuck in a critical component or a hard-to-reach location. However, with the right approach and techniques, it's possible to successfully remove a broken screw without causing further damage. To achieve this, it's essential to understand the importance of preparation, the various removal methods available, and the necessary post-removal steps to ensure a smooth outcome. In this article, we'll explore these key aspects, starting with the crucial step of preparation, which sets the stage for a successful removal process. By understanding the type of screw, the material it's embedded in, and the tools required, you'll be better equipped to tackle the removal process. Preparation is Key, and it's where we'll begin our journey to remove that broken screw.
Preparation is Key
Preparation is key to a successful outcome in any endeavor. When it comes to removing unwanted items, whether it's a stubborn stain, a pesky weed, or a broken appliance, being prepared can make all the difference. To ensure a smooth and efficient removal process, it's essential to assess the situation, gather the right tools, and choose the most effective removal method. By taking the time to assess the situation, you'll be able to identify potential challenges and develop a plan to overcome them. This will help you to gather the essential tools needed to tackle the task at hand. With the right tools and a solid plan in place, you can then choose the most effective removal method to get the job done quickly and safely. By following these steps, you'll be well on your way to a successful removal. So, let's start by assessing the situation.
Assess the Situation
No need to add any extra information. When dealing with a broken screw, it's essential to assess the situation before attempting to remove it. Take a closer look at the screw head and the surrounding material to determine the extent of the damage. Check if the screw is broken off flush with the surface or if there's a portion of the screw still protruding. Also, examine the material the screw is embedded in, whether it's wood, metal, or plastic, as this will affect the removal method. Additionally, consider the type of screw, such as a Phillips head or flathead, as this will impact the tools needed for removal. Assessing the situation will help you choose the best approach and avoid causing further damage or stripping the surrounding material.
Gather Essential Tools
To effectively remove a broken screw, it is crucial to gather essential tools beforehand. A well-stocked toolkit will save you time and frustration in the long run. Start by collecting a set of screw extractors, which are specifically designed to remove broken or damaged screws. These extractors come in different sizes and types, so make sure to choose the one that matches the screw head. Additionally, a drill press or a handheld drill with a screw extractor bit can be useful in creating a new hole for the extractor. A set of pliers, including needle-nose and slip-joint pliers, can help grip the screw head or extractor, providing extra leverage. A rubber mallet or a hammer can be used to tap the extractor gently into place. Furthermore, a screwdriver set with flathead and Phillips-head drivers can be handy in case the screw head is still intact. Safety goggles and a work light can also be essential in providing good visibility and protecting your eyes from debris. Lastly, a vice or clamps can be used to hold the material in place, ensuring a stable working environment. By gathering these essential tools, you'll be well-prepared to tackle the task of removing a broken screw.
Choose the Right Removal Method
When it comes to removing a broken screw, choosing the right removal method is crucial to avoid damaging the surrounding material or stripping the screw head further. The first step is to assess the situation and determine the type of screw and the material it's embedded in. If the screw is broken off flush with the surface, a screw extractor may be the best option. This tool uses a left-hand drill bit to remove the screw by drilling into the center of the screw head and then extracting it. On the other hand, if the screw is raised above the surface, pliers or a screwdriver may be sufficient to remove it. However, if the screw is stuck or rusted, a more aggressive approach may be necessary, such as using a drill bit to create a new hole or applying heat to loosen the screw. In some cases, a combination of methods may be required to successfully remove the broken screw. Ultimately, the key to choosing the right removal method is to carefully evaluate the situation and select the approach that minimizes the risk of damage and ensures a safe and successful removal.
Removal Methods for Broken Screws
When dealing with a broken screw, it can be frustrating and challenging to remove it without causing further damage. Fortunately, there are several effective removal methods that can help you extract the screw safely and efficiently. Three common methods for removing broken screws include drilling out the screw, using a screw extractor, and applying adhesives or lubricants. Drilling out the screw is a popular method that involves using a drill bit to create a hole in the center of the screw, allowing you to remove the remaining parts. This method requires caution and precision to avoid damaging the surrounding material. By understanding the different removal methods available, you can choose the best approach for your specific situation and successfully remove the broken screw. In this article, we will explore the first method, drilling out the screw, and provide a step-by-step guide on how to do it safely and effectively.
Drilling Out the Screw
Drilling out the screw is a common method for removing broken screws, especially when the screw head is damaged or stripped. This method involves using a drill bit to create a hole in the center of the screw, allowing you to remove the remaining screw material. To drill out a screw, start by selecting a drill bit that is slightly smaller than the screw head. Place the drill bit in the center of the screw and slowly begin drilling, applying gentle to moderate pressure. As you drill, the screw material will begin to break away, and you can use a screw extractor or pliers to remove the remaining material. It's essential to be careful when drilling out a screw, as you don't want to damage the surrounding material or create a larger hole than necessary. If the screw is stuck or rusted, you may need to use a lubricant or penetrating oil to help loosen it before drilling. Additionally, if the screw is in a critical location, such as in a load-bearing joint, it's recommended to consult a professional for assistance to avoid causing further damage. Overall, drilling out a screw can be an effective method for removing broken screws, but it requires patience, caution, and the right tools.
Using a Screw Extractor
When a screw breaks off, it can be a frustrating and challenging situation, especially if it's stuck in a critical component or a hard-to-reach area. In such cases, using a screw extractor can be a lifesaver. A screw extractor is a specialized tool designed to remove broken screws by drilling into the screw head and providing a new means of extracting it. To use a screw extractor, start by selecting the correct size and type of extractor for the broken screw. Next, drill a small pilot hole into the center of the screw head, being careful not to damage the surrounding material. Then, insert the extractor into the pilot hole and turn it clockwise until it bites into the screw. Finally, use a wrench or pliers to turn the extractor counterclockwise, which should loosen and remove the broken screw. It's essential to be patient and gentle when using a screw extractor, as excessive force can damage the surrounding material or push the screw further into the component. Additionally, it's recommended to use a screw extractor with a left-hand thread, as this will help to remove the screw more efficiently. By following these steps and using the right screw extractor, you can successfully remove a broken screw and avoid further damage to the surrounding material.
Applying Adhesives or Lubricants
Applying adhesives or lubricants can be an effective method for removing broken screws. When a screw breaks, it can be challenging to remove the remaining part, especially if it is stuck or rusted. In such cases, applying an adhesive or lubricant can help loosen the screw and make it easier to remove. There are several types of adhesives and lubricants that can be used for this purpose, including epoxy, super glue, WD-40, and silicone spray. Epoxy and super glue can be used to bond the broken screw to a tool or a nut, allowing for easier removal. WD-40 and silicone spray, on the other hand, can be used to lubricate the screw and surrounding material, making it easier to remove. When applying adhesives or lubricants, it is essential to follow the manufacturer's instructions and take necessary safety precautions to avoid any accidents or injuries. Additionally, it is crucial to choose the right type of adhesive or lubricant for the specific material and situation to ensure effective removal of the broken screw.
Post-Removal Steps
After removing a screw, it's essential to take the necessary post-removal steps to ensure the area is safe and secure. This process involves inspecting the screw hole to check for any debris or damage, cleaning the area to prevent dirt and grime from accumulating, and reinstalling a new screw if necessary. By following these steps, you can prevent potential hazards and maintain the integrity of the surrounding material. In this article, we will explore each of these steps in detail, starting with the importance of inspecting the screw hole.
Inspecting the Screw Hole
Here is the paragraphy: Inspecting the screw hole is a crucial step after removing a broken screw. This step helps to ensure that the screw hole is free from any debris, metal shavings, or remaining screw fragments that could interfere with the installation of a new screw. To inspect the screw hole, use a flashlight and a pair of tweezers or a small brush to examine the hole carefully. Look for any visible debris or metal shavings that may have been left behind during the removal process. If you find any debris, use the tweezers or brush to gently remove it from the hole. Additionally, inspect the surrounding area to ensure that there is no damage to the material or any other screws. If the screw hole is damaged or stripped, you may need to use a screw hole repair kit or consult a professional for further assistance. By inspecting the screw hole, you can ensure a secure and proper installation of a new screw, preventing any future problems or damage.
Cleaning the Area
Cleaning the area around the screw hole is a crucial step after removing a broken screw. This process ensures that any remaining debris, metal shavings, or residue from the removal process are eliminated, providing a clean slate for the next steps. Start by using compressed air to blow away any loose particles from the surface. This is especially effective for removing metal shavings that might have been generated during the removal process. Next, use a soft-bristled brush or a small, dry paintbrush to gently sweep away any remaining debris from the screw hole and the surrounding area. For more stubborn residue, a cotton swab dipped in a small amount of isopropyl alcohol can be used. Gently rub the swab around the screw hole, being careful not to push any debris further into the hole. Once the area is clean, use a dry section of the cotton swab to wipe away any remaining alcohol, ensuring the area is completely dry. This step is important to prevent any moisture from interfering with the next steps, such as applying adhesive or inserting a new screw. By thoroughly cleaning the area, you ensure a secure and lasting repair.
Reinstalling a New Screw
Here is the paragraphy: Reinstalling a new screw is a relatively straightforward process that requires attention to detail and the right tools. To begin, inspect the screw hole to ensure it is free from debris and old screw fragments. If necessary, use a small brush or cloth to clean out the hole. Next, select a replacement screw that matches the original in terms of size, material, and thread type. Apply a small amount of lubricant, such as silicone spray or oil, to the screw threads to facilitate smooth installation. Hold the screw in place with one hand, and with the other hand, use a screwdriver to turn the screw clockwise until it is snug against the surrounding material. Be careful not to overtighten, as this can damage the surrounding material or strip the screw head. Finally, double-check that the screw is securely in place and the surrounding material is not damaged. If the screw is not holding securely, consider using a screw anchor or consulting a professional for further assistance.