How To Wire A Relay
Relay wiring is a fundamental concept in electronics and automotive systems, allowing for the control of high-current devices with low-current signals. However, many individuals struggle with the process, leading to frustration and potentially hazardous situations. To overcome these challenges, it's essential to understand the basics of relay wiring, follow a step-by-step guide, and be prepared to troubleshoot common issues. In this article, we'll delve into the world of relay wiring, starting with the fundamentals. We'll explore the basics of relay wiring, including the different types of relays, their components, and how they work. By grasping these concepts, you'll be better equipped to tackle the step-by-step guide to wiring a relay, which will walk you through the process of connecting a relay to a circuit. Finally, we'll discuss common relay wiring issues and provide troubleshooting tips to help you overcome any obstacles. Let's begin by understanding the basics of relay wiring.
Understanding the Basics of Relay Wiring
Relay wiring is a crucial aspect of electrical engineering, and understanding its basics is essential for designing and implementing reliable and efficient electrical systems. A relay is a fundamental component in many electrical circuits, and its proper wiring is critical to ensure safe and optimal operation. In this article, we will delve into the basics of relay wiring, exploring what a relay is and how it works, the different types of relays and their applications, and the key components of a relay and their functions. By grasping these fundamental concepts, readers will gain a solid understanding of relay wiring and be able to design and implement effective electrical systems. So, let's start by understanding the basics of a relay and how it works.
What is a Relay and How Does it Work?
A relay is an electrically operated switch that allows a low-voltage signal to control a high-voltage circuit. It works by using an electromagnet to mechanically move a contact to make or break a connection. When a low-voltage signal is applied to the relay's coil, it generates a magnetic field that attracts a metal armature, which in turn moves a set of contacts to connect or disconnect the high-voltage circuit. This allows a small control signal to switch on or off a much larger load, making relays useful for applications such as automotive systems, industrial control systems, and home automation. Relays can be normally open (NO) or normally closed (NC), depending on the position of the contacts when the relay is not energized. NO relays connect the circuit when the coil is energized, while NC relays disconnect the circuit when the coil is energized. By using a relay, you can control a high-voltage circuit with a low-voltage signal, making it a safe and efficient way to manage electrical systems.
Types of Relays and Their Applications
Relays are versatile control devices that play a crucial role in various applications, including automotive, industrial, and consumer electronics. There are several types of relays, each designed to serve specific purposes. Electromechanical relays (EMRs) are the most common type, using an electromagnet to mechanically move a contact to make or break a circuit. They are widely used in automotive systems, such as headlights, wipers, and fuel pumps. Solid-state relays (SSRs) are another type, which use semiconductors to control the flow of electrical current. They are commonly used in industrial control systems, medical devices, and HVAC systems. Hybrid relays combine the benefits of EMRs and SSRs, offering high reliability and low power consumption. They are often used in aerospace and defense applications. Reed relays are a type of EMR that use a reed switch to control the circuit, commonly used in telecommunications and security systems. Latching relays are designed to maintain their state even after the control signal is removed, often used in applications such as lighting control and alarm systems. Time-delay relays are used to delay the switching action, commonly used in applications such as motor control and HVAC systems. In addition to these types, there are also other specialized relays, such as Buchholz relays used in transformer protection and thermal relays used in motor protection. Each type of relay has its unique characteristics, advantages, and applications, making them an essential component in various industries and systems.
Key Components of a Relay and Their Functions
A relay is an electrically operated switch that consists of several key components, each playing a crucial role in its functioning. The main components of a relay include the coil, armature, contacts, and spring. The coil is the part of the relay that is energized by an external power source, causing the armature to move and activate the contacts. The armature is a metal piece that is attracted to the coil when it is energized, and it is responsible for opening or closing the contacts. The contacts are the metal pieces that actually switch the circuit on or off, and they are typically made of a durable material that can withstand the high currents and voltages that flow through them. The spring is a critical component that helps to return the armature to its original position when the coil is de-energized, ensuring that the contacts return to their normal state. Additionally, some relays may also have a diode or resistor in parallel with the coil to protect it from back electromotive force (EMF) and ensure smooth operation. Understanding the functions of these key components is essential for proper relay wiring and troubleshooting.
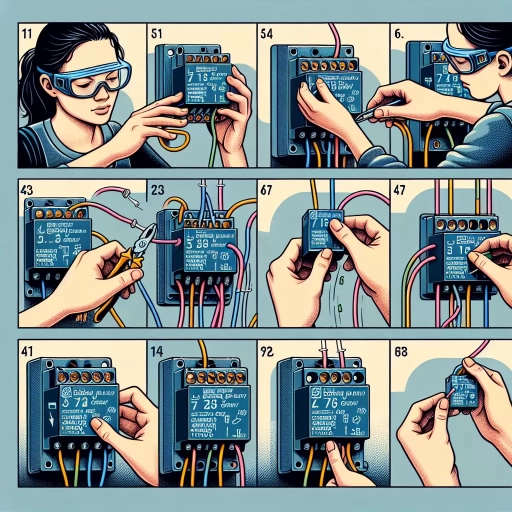
Step-by-Step Guide to Wiring a Relay
Wiring a relay can seem like a daunting task, especially for those who are new to electronics. However, with a step-by-step guide, you can easily learn how to wire a relay and unlock its full potential. In this article, we will walk you through the process of wiring a relay, covering the essential steps to get you started. First, we will discuss preparing the relay and wiring components, including selecting the right relay and gathering the necessary materials. Next, we will explore connecting the relay to a power source, ensuring that it is properly energized and ready for use. Finally, we will delve into configuring the relay's input and output terminals, allowing you to control the flow of electrical current with precision. By following these steps, you will be able to wire a relay with confidence and accuracy. So, let's get started by preparing the relay and wiring components.
Preparing the Relay and Wiring Components
When preparing the relay and wiring components, it's essential to ensure that all parts are compatible and suitable for the specific application. Start by selecting a relay that matches the voltage and current requirements of the circuit. Verify the relay's pin configuration and ensure it aligns with the wiring diagram. Next, gather the necessary wiring components, including the correct gauge and type of wire, connectors, and any additional components such as fuses or circuit breakers. Inspect the relay and wiring components for any signs of damage or wear, and replace them if necessary. Before proceeding, double-check the wiring diagram and relay specifications to ensure a correct and safe connection. It's also crucial to follow proper safety protocols when working with electrical components, including wearing protective gear and ensuring the circuit is de-energized before starting work. By taking the time to properly prepare the relay and wiring components, you can ensure a successful and safe wiring process.
Connecting the Relay to a Power Source
When connecting the relay to a power source, it's essential to ensure that the power source is compatible with the relay's voltage and current ratings. Typically, a relay requires a DC power source, and the voltage rating should match the relay's coil voltage. For example, if the relay has a 12V coil, you should use a 12V power source. The power source can be a battery, a power supply, or a voltage regulator, depending on the application. It's also crucial to consider the current rating of the power source, as it should be able to supply the required current to the relay's coil. A general rule of thumb is to use a power source with a current rating that is at least 10% higher than the relay's coil current rating. Additionally, it's recommended to use a fuse or a circuit breaker to protect the power source and the relay from overcurrent conditions. When connecting the power source to the relay, make sure to follow the correct polarity, as most relays have a specific polarity requirement. Typically, the positive terminal of the power source is connected to the relay's VCC pin, and the negative terminal is connected to the relay's GND pin. By following these guidelines, you can ensure a safe and reliable connection between the relay and the power source.
Configuring the Relay's Input and Output Terminals
Configuring the relay's input and output terminals is a crucial step in wiring a relay. The input terminals, typically labeled as "IN" or "INPUT," are where you connect the low-voltage control signal from your device, such as a microcontroller or a switch. The output terminals, usually marked as "OUT" or "OUTPUT," are where you connect the high-voltage load, such as a light bulb or a motor. To configure the relay's input and output terminals, start by identifying the type of relay you are using, as different relays may have different terminal configurations. Next, consult the relay's datasheet or documentation to determine the correct pinout and wiring scheme. Typically, the input terminals are connected in series with the control signal, while the output terminals are connected in parallel with the load. Make sure to observe the correct polarity when connecting the input and output terminals, as incorrect polarity can damage the relay or the connected devices. Additionally, ensure that the relay is properly rated for the voltage and current of the load you are controlling. By carefully configuring the relay's input and output terminals, you can ensure reliable and safe operation of your relay circuit.
Troubleshooting Common Relay Wiring Issues
Relay wiring issues can be frustrating and challenging to resolve, especially for those without extensive electrical experience. However, with the right approach and knowledge, it's possible to identify and fix common problems efficiently. In this article, we'll explore three key areas to focus on when troubleshooting relay wiring issues: identifying and resolving power supply problems, diagnosing and fixing faulty relay connections, and preventing overheating and electrical noise issues. By understanding these critical aspects, you'll be better equipped to tackle even the most complex relay wiring challenges. Let's start by examining the first crucial step: identifying and resolving power supply problems, which is often the root cause of many relay wiring issues.
Identifying and Resolving Power Supply Problems
When it comes to troubleshooting common relay wiring issues, identifying and resolving power supply problems is a crucial step. A faulty power supply can cause a relay to malfunction or not function at all, leading to a range of issues including overheating, burning, or complete system failure. To identify power supply problems, start by checking the voltage and current ratings of the power supply against the relay's specifications. Ensure that the power supply is capable of providing the required voltage and current to the relay. Next, check the power supply's output for any signs of noise, ripple, or instability, which can affect the relay's performance. Use a multimeter to measure the voltage and current output of the power supply and compare it to the relay's specifications. If the power supply is found to be faulty, replace it with a new one that meets the relay's requirements. Additionally, check the wiring and connections between the power supply and the relay for any signs of damage, corrosion, or wear. Ensure that all connections are secure and not loose, and that the wiring is not damaged or pinched. By identifying and resolving power supply problems, you can ensure that your relay is functioning correctly and prevent a range of issues that can arise from a faulty power supply.
Diagnosing and Fixing Faulty Relay Connections
Diagnosing and fixing faulty relay connections requires a systematic approach to identify and rectify the issue. First, visually inspect the relay and its connections for any signs of physical damage, such as burn marks, corrosion, or loose wires. Next, use a multimeter to measure the voltage and resistance across the relay's terminals to determine if it is functioning correctly. If the relay is not switching on or off as expected, check the wiring diagram to ensure that the connections are correct and that there are no shorts or opens in the circuit. Additionally, verify that the relay is receiving the correct input signal from the control circuit. If the issue persists, try swapping the relay with a known good one to isolate the problem. If the problem is still present, it may be necessary to use a logic analyzer or oscilloscope to troubleshoot the control circuit and identify any issues with the signal being sent to the relay. Once the faulty connection is identified, repair or replace the affected component, and retest the relay to ensure it is functioning correctly. By following this step-by-step approach, you can quickly diagnose and fix faulty relay connections, getting your system back up and running smoothly.
Preventing Overheating and Electrical Noise Issues
When it comes to relay wiring, preventing overheating and electrical noise issues is crucial to ensure the longevity and reliability of the system. Overheating can occur when the relay is not properly sized for the load, or when there is excessive current flowing through the relay contacts. To prevent overheating, it's essential to select a relay that is rated for the specific application, taking into account the load current, voltage, and ambient temperature. Additionally, ensuring good airflow around the relay and using a heat sink if necessary can help to dissipate heat. Electrical noise issues, on the other hand, can be caused by electromagnetic interference (EMI) or radio-frequency interference (RFI) from nearby devices. To mitigate these issues, it's recommended to use shielded cables, keep the relay wiring away from other electrical components, and use noise-suppressing components such as capacitors or ferrite beads. By taking these precautions, you can prevent overheating and electrical noise issues, ensuring a reliable and efficient relay wiring system.