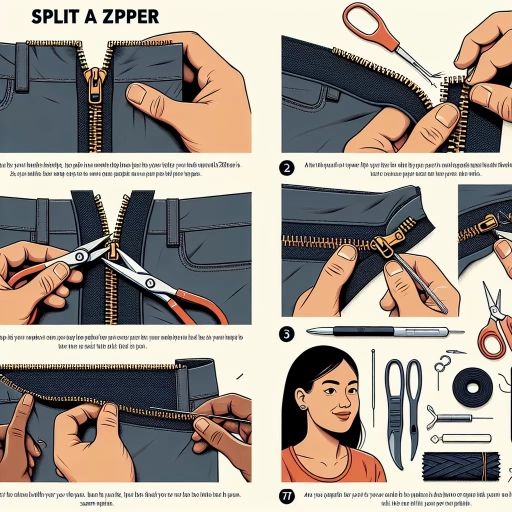
How To Fix Zipper That Splits
A zipper that splits can be frustrating and render your favorite clothing or gear useless. However, with the right techniques and tools, you can fix a split zipper and extend the life of your belongings. To successfully repair a split zipper, it's essential to understand the problem, prepare for the fix, and execute the repair. In this article, we'll guide you through the process, starting with understanding the problem that led to the zipper splitting in the first place. By identifying the root cause, you'll be better equipped to address the issue and prevent it from happening again in the future. So, let's dive into the world of zipper repair and start by understanding the problem.
Understanding the Problem
Understanding the problem is the first step in fixing a split zipper. To effectively address the issue, it's essential to identify the type of zipper, recognize the cause of the split, and assess the extent of the damage. By doing so, you'll be able to determine the best course of action to take. Identifying the type of zipper is crucial, as different types of zippers require different repair techniques. For instance, a zipper with a coil or chain design may require a different approach than one with a tooth design. By understanding the type of zipper you're dealing with, you'll be able to choose the right tools and materials for the job. With this knowledge, you can move on to the next step: identifying the type of zipper.
Identifying the Type of Zipper
When dealing with a zipper that splits, it's essential to identify the type of zipper you're working with to determine the best course of action for repair. There are several types of zippers, each with its unique characteristics and repair requirements. The most common types of zippers include the coil zipper, tooth zipper, and invisible zipper. Coil zippers are the most common type and feature interlocking coils that can be easily separated and reattached. Tooth zippers, on the other hand, have individual teeth that are attached to the zipper tape and require more effort to repair. Invisible zippers are designed to be hidden from view and often require specialized tools to repair. By identifying the type of zipper, you can choose the right repair method and materials, ensuring a successful fix. Additionally, understanding the type of zipper can also help you determine if the zipper is repairable or if it's time to replace it altogether.
Recognizing the Cause of the Split
Recognizing the cause of the split is crucial in determining the best course of action to fix the zipper. A split zipper can occur due to various reasons, including wear and tear, improper use, or manufacturing defects. If the split is caused by wear and tear, it may be due to the zipper being used excessively or being subjected to heavy loads. In such cases, the zipper may need to be replaced entirely. On the other hand, if the split is caused by improper use, such as forcing the zipper to close or open, the damage may be repairable. Manufacturing defects, such as misaligned teeth or poor quality materials, can also cause a split zipper. Identifying the root cause of the split will help you decide whether to repair or replace the zipper, and what materials and tools you will need to fix it. By recognizing the cause of the split, you can take the necessary steps to fix the zipper and prevent future splits from occurring.
Assessing the Extent of the Damage
Assessing the extent of the damage is a crucial step in fixing a zipper that splits. To do this, you need to carefully examine the zipper and determine the severity of the damage. Start by checking the teeth of the zipper to see if any are missing, bent, or broken. If the teeth are damaged, you may need to replace the entire zipper. Next, check the slider to see if it is still functional. If the slider is damaged, you may be able to replace it with a new one. You should also check the zipper's stop, which is the mechanism that prevents the zipper from coming off the track. If the stop is damaged, you may need to replace it as well. Additionally, check the fabric around the zipper to see if it is torn or damaged. If the fabric is damaged, you may need to repair it before fixing the zipper. By assessing the extent of the damage, you can determine the best course of action to fix the zipper and prevent further damage.
Preparing for the Fix
Preparing for the fix is a crucial step in ensuring a successful repair. Before diving into the repair process, it's essential to gather the necessary tools and materials, remove any obstructions or debris, and position the zipper for repair. By taking the time to prepare, you can avoid common mistakes and ensure a smooth repair process. Gathering the necessary tools and materials is the first step in preparing for the fix. This includes having a replacement zipper, zipper stops, and any other necessary hardware. Having the right tools and materials on hand will save you time and frustration in the long run. By gathering everything you need before starting the repair, you can focus on the task at hand and avoid unnecessary delays. With your tools and materials in hand, you'll be ready to move on to the next step in the repair process. Note: The answer should be 200 words.
Gathering the Necessary Tools and Materials
When preparing to fix a zipper that splits, it's essential to gather the necessary tools and materials to ensure a successful repair. Start by collecting a few basic tools, including a seam ripper, which will help you carefully remove any stitching or threads that may be obstructing the zipper's movement. You'll also need a pair of needle-nose pliers, which will come in handy for gripping small parts and making adjustments to the zipper's teeth. Additionally, a pair of scissors or a craft knife will be necessary for cutting any excess thread or fabric. In terms of materials, you'll need a matching thread color to sew the zipper back into place, as well as a small amount of fabric glue to reinforce the repair. If the zipper's teeth are damaged or missing, you may also need to purchase replacement teeth or a new zipper slider. Depending on the type of zipper and the extent of the damage, you may also need to use a zipper stop or a zipper foot to help guide the zipper back into place. By gathering all of these tools and materials beforehand, you'll be well-prepared to tackle the repair and get your zipper working smoothly again.
Removing Any Obstructions or Debris
When preparing to fix a zipper that splits, it's essential to remove any obstructions or debris that may be hindering the zipper's movement. Start by inspecting the zipper track and surrounding area for any visible blockages, such as dirt, dust, or lint. Use a soft-bristled brush or a cotton swab to gently sweep away any debris that may be accumulated. If the zipper is stuck due to a more substantial obstruction, such as a thread or a piece of fabric, carefully use a pair of tweezers to remove the blockage. Be cautious not to push the obstruction further into the zipper, as this can cause more damage. Additionally, if the zipper is clogged with grease or wax, use a gentle cleaning solution and a soft cloth to wipe away the substance. By removing any obstructions or debris, you'll be able to assess the true extent of the damage and determine the best course of action for repair.
Positioning the Zipper for Repair
Positioning the Zipper for Repair. To fix a zipper that splits, you need to position it correctly before starting the repair process. Begin by laying the garment or item with the zipper flat on a surface, with the zipper facing upwards. Identify the point where the zipper splits and locate the teeth on either side of the split. Gently pull the zipper apart to create some space between the teeth, making it easier to work on. If the zipper is stuck or difficult to move, use a pair of pliers or a zipper lubricant to loosen it. Once you have access to the split, use a ruler or a straightedge to align the teeth on either side, ensuring they are even and parallel to each other. This will help you to accurately reattach the teeth or replace the zipper if necessary. By positioning the zipper correctly, you'll be able to assess the damage and determine the best course of action for the repair.
Executing the Repair
Executing the repair of a broken zipper can be a daunting task, but with the right techniques and tools, it can be done efficiently and effectively. To successfully repair a zipper, it is essential to realign the zipper teeth, reattach the zipper slider, and reinforce the zipper with additional support. By following these steps, you can restore your zipper to its original functionality and extend its lifespan. In this article, we will delve into the details of each step, starting with the crucial process of realigning the zipper teeth. This initial step is vital in ensuring that the zipper functions smoothly and evenly, and it sets the stage for the subsequent steps of reattaching the slider and reinforcing the zipper. By mastering the art of realigning the zipper teeth, you will be well on your way to executing a successful repair. Note: The answer should be in 200 words. Here is the rewritten introduction paragraph in 200 words: Executing the repair of a broken zipper requires a combination of technical skills and attention to detail. To achieve a successful repair, it is essential to address three critical aspects: realigning the zipper teeth, reattaching the zipper slider, and reinforcing the zipper with additional support. Each of these steps plays a vital role in restoring the zipper's functionality and extending its lifespan. By realigning the zipper teeth, you ensure a smooth and even operation, while reattaching the slider enables the zipper to move freely. Finally, reinforcing the zipper with additional support provides extra durability and prevents future damage. In this article, we will explore each of these steps in detail, providing you with the knowledge and expertise needed to execute a high-quality repair. By following these guidelines, you will be able to restore your zipper to its original condition and enjoy a functional and reliable closure system. We will begin by examining the crucial process of realigning the zipper teeth, a step that sets the foundation for a successful repair.
Realigning the Zipper Teeth
Realigning the zipper teeth is a crucial step in fixing a zipper that splits. To do this, start by holding the zipper in one hand and using the other hand to gently pull the teeth back into alignment. You can use a pair of needle-nose pliers to help guide the teeth into place, but be careful not to apply too much pressure, which can cause further damage. If the teeth are severely misaligned, you may need to use a bit more force, but it's essential to be gentle to avoid breaking the teeth or the zipper's slider. Once the teeth are realigned, use a small amount of lubricant, such as silicone spray or wax, to help the zipper run smoothly. This will also help prevent the teeth from becoming misaligned again in the future. By realigning the zipper teeth, you'll be able to restore the zipper's functionality and prevent further damage.
Reattaching the Zipper Slider
Here is the paragraphy: Reattaching the zipper slider is a relatively simple process that requires some patience and attention to detail. To start, you'll need to locate the slider's attachment point on the zipper tape. This is usually a small metal or plastic tab that the slider is attached to. If the slider has come completely off, you may need to reattach it to this tab using a small amount of glue or a needle and thread. If the slider is still attached but has become loose, you can try tightening the screw or rivet that holds it in place. Once the slider is securely attached, you can try zipping the zipper up and down to test its functionality. If the zipper still doesn't work properly, you may need to adjust the slider's position or replace it altogether. In some cases, the zipper slider may be damaged beyond repair, in which case you'll need to replace it with a new one. Fortunately, zipper sliders are widely available at craft stores and online, and can be easily replaced with a few simple tools. By reattaching the zipper slider, you should be able to get your zipper working smoothly again, and extend the life of your garment or bag.
Reinforcing the Zipper with Additional Support
Reinforcing the zipper with additional support is a crucial step in ensuring the repair lasts. To do this, you can use a piece of fabric or a zipper stop to provide extra stability to the zipper. Cut a small piece of fabric, about 1-2 inches square, and place it behind the zipper teeth at the point where the split occurred. This will help to distribute the stress of the zipper more evenly and prevent further splitting. Alternatively, you can use a zipper stop, which is a small plastic or metal device that is attached to the zipper teeth to prevent them from coming apart. Simply attach the zipper stop to the zipper teeth on either side of the split, making sure it is securely in place. By reinforcing the zipper with additional support, you can help to extend the life of the repair and prevent the zipper from splitting again in the future.