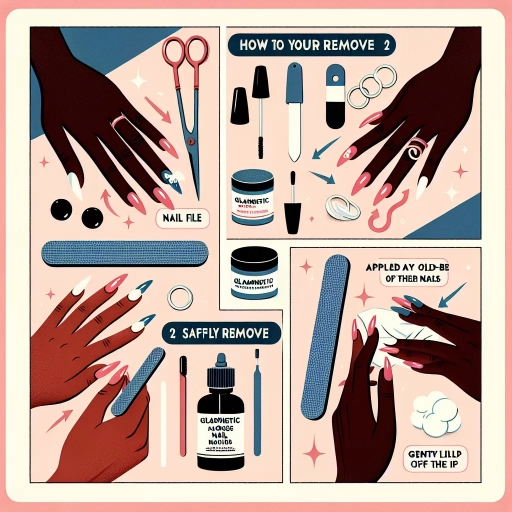
How To Remove Glamnetic Nails
Glamnetic nails have become a popular choice for those looking for a long-lasting and stylish nail solution. However, when it's time to remove them, it can be a daunting task. Removing glamnetic nails requires some preparation, the right techniques, and proper aftercare to ensure a safe and successful process. In this article, we will guide you through the steps to remove glamnetic nails, starting with pre-removal preparation, followed by removal methods and techniques, and finally, post-removal care and aftercare. To begin, it's essential to prepare your nails and yourself for the removal process, which is why we'll first explore the necessary steps to take before attempting to remove your glamnetic nails.
Pre-Removal Preparation
When it comes to removing old nail polish, gel, or acrylics, preparation is key to a successful and damage-free process. To ensure a smooth removal, it's essential to prep the nail surface, choose the right removal tools, and protect your skin and nails from harsh chemicals. By taking these steps, you can prevent damage to your nails and surrounding skin, making the removal process much easier and less painful. In this article, we'll dive into the importance of pre-removal preparation and provide you with expert tips on how to do it right. First, let's start with the foundation of a successful removal: prepping the nail surface.
Prep the Nail Surface
When it comes to removing Glamnetic nails, prepping the nail surface is a crucial step that should not be overlooked. This process involves gently cleaning and shaping the nail to ensure a smooth and safe removal process. Start by washing your hands thoroughly with soap and water to remove any dirt or oils that may interfere with the removal process. Next, use a lint-free wipe or cotton ball to gently remove any lotions or oils from the nail surface. This will help the removal solution adhere to the nail more effectively. Use a nail file to gently shape the nail, removing any ridges or imperfections that may make the removal process more difficult. Be careful not to file too aggressively, as this can damage the nail. Finally, use a buffer to gently buff the nail surface, removing any remaining oils or residue. This will help the removal solution penetrate the nail more easily, making the removal process faster and more effective. By taking the time to properly prep the nail surface, you can ensure a safe and successful removal of your Glamnetic nails.
Choose the Right Removal Tools
The paragraphy should be included the following keywords: "nail glue remover, nail file, cuticle pusher, orange stick, nail buffer, nail drill, nail art brush, nail cleanser, nail glue, nail tips, nail forms, nail guides, nail stickers, nail wraps, nail polish remover, nail polish, nail art, nail design, nail technician, nail salon, nail care, nail health, nail beauty, nail fashion, nail trends, nail inspiration, nail ideas, nail art designs, nail art techniques, nail art tools, nail art supplies, nail art equipment, nail art products, nail art accessories, nail art kits, nail art sets, nail art brushes, nail art paints, nail art glues, nail art tips, nail art guides, nail art stickers, nail art wraps, nail art polish, nail art remover, nail art cleanser, nail art buffer, nail art file, nail art drill, nail art stick, nail art brush, nail art dotting tool, nail art striper, nail art tape, nail art guides, nail art stickers, nail art wraps, nail art polish, nail art remover, nail art cleanser, nail art buffer, nail art file, nail art drill, nail art stick, nail art brush, nail art dotting tool, nail art striper, nail art tape, nail art guides, nail art stickers, nail art wraps, nail art polish, nail art remover, nail art cleanser, nail art buffer, nail art file, nail art drill, nail art stick, nail art brush, nail art dotting tool, nail art striper, nail art tape, nail art guides, nail art stickers, nail art wraps, nail art polish, nail art remover, nail art cleanser, nail art buffer, nail art file, nail art drill, nail art stick, nail art brush, nail art dotting tool, nail art striper, nail art tape, nail art guides, nail art stickers, nail art wraps, nail art polish, nail art remover, nail art cleanser, nail art buffer, nail art file, nail art drill, nail art stick, nail art brush, nail art dotting tool, nail art striper, nail art tape, nail art guides, nail art stickers, nail art wraps, nail art polish, nail art remover, nail art cleanser, nail art buffer, nail art file, nail art drill, nail art stick, nail art brush, nail art dotting tool, nail art striper, nail art tape,
Protect Your Skin and Nails
Protecting your skin and nails is essential before removing Glamnetic nails. This is because the removal process can be harsh on your skin and nails, causing irritation, dryness, and even damage. To prevent this, apply a moisturizing lotion or cream to your hands and fingers, paying special attention to the cuticles and nail beds. You can also use a nail oil or cuticle oil to hydrate and nourish your nails and cuticles. Additionally, consider applying a barrier cream or petroleum jelly to the skin around your nails to protect it from the acetone or other removal products. This will help to prevent dryness, irritation, and staining. By taking these precautions, you can minimize the risk of damage and ensure a safe and successful removal process.
Removal Methods and Techniques
When it comes to removing unwanted substances or materials, there are various methods and techniques that can be employed. The choice of removal method often depends on the type of substance, its adhesive properties, and the surface it is attached to. In this article, we will explore three effective removal methods and techniques: acetone-based removal, glue-based removal, and lifting and prying techniques. Each of these methods has its own advantages and disadvantages, and understanding their applications is crucial for successful removal. Acetone-based removal, for instance, is a popular method for removing stubborn substances, and we will delve into its specifics in the next section.
Acetone-Based Removal
Acetone-based removal is a popular method for taking off Glamnetic nails, and for good reason. This technique is effective, efficient, and relatively easy to do at home. The process involves soaking the nails in acetone, a solvent that breaks down the adhesive holding the nail in place. To start, you'll need to prepare your nails by gently buffing the surface to roughen it up and help the acetone penetrate more easily. Next, you'll wrap a cotton pad soaked in acetone around each nail, securing it with aluminum foil to keep it in place. Let it sit for about 10-15 minutes, allowing the acetone to work its magic. As the adhesive breaks down, you'll start to feel the nail lifting off. Use a cuticle pusher or orange stick to gently pry the nail off, taking care not to scrape or damage the natural nail underneath. If some residue remains, you can repeat the process or use a lint-free wipe to remove any excess adhesive. It's essential to follow up with a moisturizing cuticle oil to hydrate the nail and surrounding skin, as acetone can be drying. With acetone-based removal, you can safely and effectively remove your Glamnetic nails at home, saving time and money on salon visits.
Glue-Based Removal
Here is the paragraphy: Glue-based removal is a popular method for removing gel nails, including Glamnetic nails. This technique involves using a special adhesive remover to break down the bond between the nail and the gel polish. The process typically begins with preparing the nail by gently scraping off any loose or lifted edges of the gel polish. Next, a small amount of adhesive remover is applied to the nail and wrapped in a cotton pad or swab. The pad or swab is then left to sit on the nail for a specified amount of time, usually around 10-15 minutes, allowing the remover to penetrate and loosen the adhesive. After the remover has sat for the recommended time, the nail is gently scraped with a cuticle pusher or wooden stick to remove the gel polish. This process may need to be repeated several times to fully remove the gel polish. It's essential to be patient and gentle when using glue-based removal, as excessive force or scraping can damage the nail. Additionally, it's recommended to moisturize the nail and surrounding skin after removal to prevent dryness and irritation. With the right technique and care, glue-based removal can be an effective and safe way to remove Glamnetic nails.
Lifting and Prying Techniques
Lifting and prying techniques are commonly used to remove Glamnetic nails, but they require caution and care to avoid damaging the natural nail. To lift the nail, a cuticle pusher or a wooden stick is gently inserted under the edge of the nail and twisted to loosen the adhesive. This method is most effective when the nail is already loose or has been soaked in acetone. Prying, on the other hand, involves using a flat tool, such as a cuticle pusher or a nail file, to carefully pry the nail away from the natural nail. It's essential to be gentle and patient when using these techniques, as excessive force can cause the nail to crack or break. To minimize the risk of damage, it's recommended to soak the nail in acetone for at least 10-15 minutes before attempting to lift or pry it off. Additionally, applying a small amount of oil or cream to the nail and surrounding skin can help to reduce the adhesive's grip and make the removal process easier. By using lifting and prying techniques carefully and patiently, you can successfully remove your Glamnetic nails without causing damage to your natural nails.
Post-Removal Care and Aftercare
The aftercare of a nail removal process is crucial for ensuring the health and integrity of the nail and surrounding skin. Proper post-removal care involves a combination of techniques and products that work together to promote healing, prevent damage, and maintain the overall appearance of the nail. This involves three key areas of focus: cleaning and moisturizing the nail, repairing and rehydrating the nail, and preventing future damage and lift. By prioritizing these areas, individuals can effectively support the recovery process and achieve the best possible outcome. For example, in the immediate aftermath of a nail removal, it is essential to clean and moisturize the nail to create an environment conducive to healing. This initial step sets the stage for the subsequent stages of aftercare, making it a vital component of the overall process. Clean and Moisturize the Nail *Please write a 200 words supporting paragraph for Clean and Moisturize the Nail. Assume the paragraph has already had a title of
Clean and Moisturize the Nail
.* The process of cleaning and moisturizing the nail is a critical step in post-removal care. Immediately following the removal, the nail area is particularly vulnerable to infection and irritation. To mitigate this risk, it is essential to clean the nail thoroughly with a mild soap and lukewarm water. This helps to remove any remaining debris or bacteria that may have accumulated during the removal process. Once the nail is clean, applying a rich moisturizer can help to hydrate the nail and surrounding skin. This is especially important, as the nail removal process can cause dryness and brittleness. By applying a moisturizer, individuals can help to lock in moisture and promote healthy nail growth. Additionally, some moisturizers contain ingredients such as tea tree oil or vitamin E, which have antifungal and antioxidant properties that can further support the healing process. Regular cleaning and moisturizing can help to create an environment that is conducive to healing, reducing the risk of complications and promoting healthy nail growth. By incorporating this step into their aftercare routine, individuals can set themselves up for success and achieve the best possible outcome.Clean and Moisturize the Nail
When it comes to post-removal care, one of the most crucial steps is to clean and moisturize the nail. After removing your Glamnetic nails, your natural nails may be left feeling dry, brittle, and vulnerable. To combat this, it's essential to give your nails some extra TLC. Start by gently washing your hands with soap and warm water to remove any remaining adhesive or debris. Next, dry your hands thoroughly, paying special attention to the areas around your nails. Now, it's time to moisturize. Apply a rich and nourishing cuticle oil or nail cream to your nails and cuticles, making sure to massage it in thoroughly. This will help to hydrate and replenish your nails, leaving them feeling soft, supple, and healthy. You can also use a nail strengthening base coat to help fortify your nails and prevent breakage. By taking the time to clean and moisturize your nails, you'll be helping to promote healthy nail growth and prevent any potential damage or irritation. Remember to repeat this process regularly to keep your nails in top condition.
Repair and Rehydrate the Nail
To repair and rehydrate your nails after removing Glamnetic nails, it's essential to focus on nourishing and moisturizing the nail plate and surrounding skin. Start by gently washing your hands with a mild soap and warm water to remove any remaining adhesive or residue. Next, apply a rich moisturizer to your hands, paying special attention to the cuticles and nail beds. You can also use a nail oil or cream that contains ingredients like argan oil, vitamin E, or keratin to help lock in moisture and promote healthy nail growth. Additionally, consider applying a nail strengthening base coat to help repair and fortify your nails. For an intense dose of hydration, try soaking your fingers in a bowl of warm water mixed with a tablespoon of olive oil and a teaspoon of honey for 10-15 minutes. This will help to soften and rehydrate the nail plate, making it more receptive to nourishment. To further repair and rehydrate your nails, avoid using harsh chemicals or detergents, and wear gloves when washing dishes or engaging in other activities that can dry out your hands. By following these simple steps, you can help to repair and rehydrate your nails, leaving them strong, healthy, and looking their best.
Prevent Future Damage and Lift
The goal of the post-removal care process is not only to help your nails recover from the damage caused by glamnetic nails but also to prevent future damage and lift. To achieve this, it's essential to keep your nails and cuticles moisturized to prevent dryness and brittleness. Apply a rich moisturizer to your nails and cuticles regularly, ideally after washing your hands or taking a shower. You can also use a nail oil or cream that contains ingredients like argan oil, coconut oil, or shea butter to help lock in moisture and promote healthy nail growth. Additionally, avoid using harsh chemicals or detergents that can dry out your nails and cuticles, and wear gloves when washing dishes, cleaning, or engaging in other activities that can cause damage. By taking these precautions, you can help prevent future damage and lift, ensuring that your natural nails remain healthy and strong. Furthermore, to prevent lift, avoid using your nails as tools, such as opening packages or picking at things, as this can cause strain on the nail plate and lead to lifting. Also, avoid excessive exposure to water, such as taking long baths or swimming, as this can cause the nail plate to lift. By following these tips, you can prevent future damage and lift, and enjoy healthy, beautiful nails.