How To Flush A Catheter
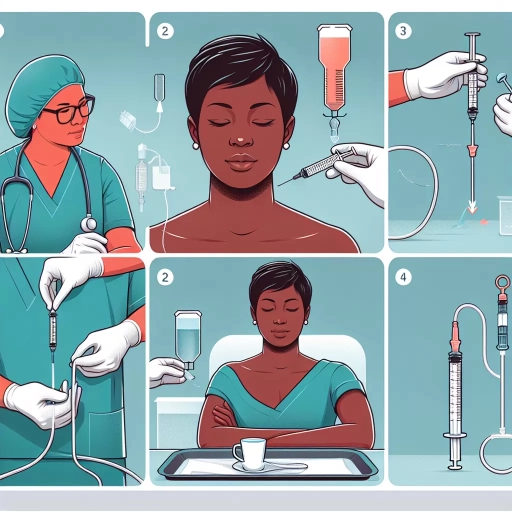
Here is the introduction paragraph: Flushing a catheter is a crucial process that helps maintain the patency of the catheter and prevents blockages. It is essential to perform this process correctly to avoid any complications. In this article, we will guide you through the process of flushing a catheter, including preparation, the step-by-step process, and post-flushing care and maintenance. To start, it is vital to prepare for flushing a catheter by gathering the necessary supplies and understanding the proper technique. This preparation is crucial in ensuring a smooth and successful flushing process. In the next section, we will discuss the preparation for flushing a catheter in more detail.
Preparation for Flushing a Catheter
Proper preparation is key when it comes to flushing a catheter. This process is crucial for maintaining the health and hygiene of the urinary system, especially for individuals who rely on catheters for bladder drainage. To ensure a smooth and safe procedure, it is essential to follow a series of steps. First, one must wash their hands thoroughly to prevent the introduction of bacteria into the urinary tract. Additionally, gathering all necessary supplies beforehand is vital to avoid any interruptions or complications during the process. Lastly, positioning the catheter correctly is critical to ensure the flush is effective and does not cause any discomfort or injury. By following these steps, individuals can minimize the risk of complications and ensure the catheter functions properly. Therefore, the first step in preparing for a catheter flush is to wash your hands thoroughly.
Wash Your Hands Thoroughly
Washing your hands thoroughly is a crucial step in preparing to flush a catheter. It is essential to maintain good hygiene to prevent the risk of infection. Start by turning on the faucet to warm up the water, then wet your hands under running water. Apply enough soap to cover your hands, and rub your palms together to create a lather. Be sure to scrub all surfaces, including the backs of your hands, wrists, between your fingers, and under your fingernails. Pay particular attention to the areas between your fingers and under your fingernails, as these are common areas where bacteria tend to accumulate. Use a gentle circular motion to scrub your hands for at least 20 seconds, making sure to cover all areas. Rinse your hands thoroughly under running water to remove all soap residue. Finally, dry your hands completely with a clean towel or air dryer. It is also a good idea to use hand sanitizer after washing your hands to provide an extra layer of protection against bacteria and other microorganisms. By following these steps, you can ensure that your hands are clean and ready to handle your catheter, reducing the risk of infection and promoting a safe and healthy flushing process.
Gather All Necessary Supplies
When preparing to flush a catheter, it is essential to gather all necessary supplies to ensure a smooth and hygienic process. This includes a sterile saline solution, which is the recommended flushing agent, as it is gentle on the bladder and urinary tract. You will also need a syringe, typically a 60cc syringe, to administer the saline solution. Additionally, have some sterile gloves on hand to prevent the introduction of bacteria into the urinary tract. A drape or towel can be used to create a clean surface for the procedure, and a container or basin should be available to catch any drainage or spills. Furthermore, it is crucial to have a clean and private area to perform the flushing, minimizing distractions and ensuring the individual's comfort. Having all these supplies readily available will help to reduce anxiety and make the process more efficient, allowing for a successful and complication-free flushing of the catheter.
Position the Catheter Correctly
Positioning the catheter correctly is a crucial step in the flushing process. To ensure proper placement, start by locating the catheter's insertion site, usually on the abdomen or leg. Gently grasp the catheter and slowly advance it until you feel resistance, indicating that it has reached the bladder or desired location. If you're using a Foley catheter, you may need to inflate the balloon to secure it in place. For intermittent catheters, ensure the tip is fully inserted into the urethra. It's essential to position the catheter at the correct angle to prevent kinking or bending, which can obstruct the flow of fluid. If you're unsure about the catheter's position or experience any discomfort, consult with a healthcare professional for guidance. Proper positioning is vital to ensure effective flushing and prevent complications.
Step-by-Step Process of Flushing a Catheter
Flushing a catheter is a crucial process that helps maintain its patency and prevent blockages. It involves introducing a saline solution into the catheter to clear any debris or sediment that may have accumulated. To ensure the catheter remains functional and effective, it's essential to follow a step-by-step process when flushing it. This process typically begins with connecting the saline syringe to the catheter, which is a critical step that requires attention to detail to avoid any contamination or damage. Once the syringe is securely attached, the next step is to slowly inject the saline solution into the catheter, taking care not to exert too much pressure. As the solution flows through the catheter, it's vital to monitor for any blockages or resistance, which can indicate a problem that needs to be addressed. By following these steps, healthcare professionals can ensure the catheter remains clear and functional, providing optimal care for their patients. To start the process, the first step is to connect the saline syringe to the catheter.
Connect the Saline Syringe to the Catheter
To connect the saline syringe to the catheter, start by holding the syringe in one hand and the catheter in the other. Locate the luer lock or connector on the end of the catheter, which is usually a small, threaded port. Next, identify the corresponding luer lock or connector on the saline syringe, which is typically located on the tip of the syringe. Align the two connectors, ensuring that they are properly seated and secure. Gently twist the syringe clockwise until it clicks into place, indicating a secure connection. Make sure the connection is snug and not loose, as this can cause the syringe to become dislodged during the flushing process. Once connected, the saline syringe is now ready to be used to flush the catheter.
Slowly Inject the Saline Solution
Slowly inject the saline solution into the catheter using a syringe. Hold the syringe at a 45-degree angle and gently push the plunger to release the solution. Make sure to inject the solution slowly and steadily, as rapid injection can cause discomfort or pain. As you inject the solution, you may feel a slight stinging or burning sensation, but this should subside quickly. If you experience any severe pain or discomfort, stop the injection immediately and consult with your healthcare provider. It's also essential to monitor the solution's flow and adjust the injection rate accordingly. If the solution flows too quickly, it may not effectively flush the catheter, while a slow flow may cause the solution to become stagnant. By injecting the saline solution slowly and steadily, you can ensure that the catheter is properly flushed and maintained.
Monitor for Any Blockages or Resistance
When flushing a catheter, it's essential to monitor for any blockages or resistance. This is crucial to ensure the catheter is functioning properly and to prevent any complications. To do this, pay attention to the flow of the flushing solution as it enters the catheter. If the solution flows easily and smoothly, it's likely that the catheter is clear. However, if you encounter any resistance or the solution doesn't flow freely, it may indicate a blockage. Check the catheter for any kinks or twists that could be causing the obstruction. If the issue persists, try gently rotating the catheter or using a smaller syringe to help dislodge any blockages. It's also important to monitor the patient's discomfort level, as increased pain or discomfort can be a sign of a blockage. If you're unsure or encounter any difficulties, consult with a healthcare professional for guidance. Regularly monitoring for blockages or resistance during the flushing process can help prevent complications and ensure the catheter remains patent and functional.
Post-Flushing Care and Maintenance
Proper post-flushing care and maintenance are crucial to prevent complications and ensure the longevity of the catheter. After flushing, it is essential to secure the catheter properly to prevent it from becoming dislodged or kinked, which can lead to blockages or infections. Additionally, disposing of used supplies safely is vital to prevent the spread of infection and maintain a clean environment. Furthermore, monitoring for signs of infection or complications, such as redness, swelling, or unusual discharge, is critical to address any issues promptly. By following these steps, individuals can minimize the risk of complications and ensure the catheter functions correctly. To start, it is vital to secure the catheter properly to prevent any immediate complications.
Secure the Catheter Properly
Securing the catheter properly is a crucial step in post-flushing care and maintenance. After flushing the catheter, it's essential to ensure that it is securely fastened to the skin to prevent it from becoming dislodged or kinked. This can be achieved by using a catheter securement device, such as a StatLock or a catheter strap, which helps to keep the catheter in place and prevent movement. The device should be applied according to the manufacturer's instructions and should not be too tight, as this can cause discomfort and skin irritation. Additionally, the catheter should be secured in a way that allows for easy access for future flushing and maintenance. It's also important to regularly inspect the catheter securement device to ensure that it is still secure and not causing any skin irritation. By properly securing the catheter, individuals can help to prevent complications, such as catheter dislodgement, kinking, or blockage, and ensure that the catheter continues to function effectively. Furthermore, proper securement can also help to reduce the risk of infection and promote overall catheter health. By following these simple steps, individuals can help to ensure that their catheter is properly secured and functioning optimally.
Dispose of Used Supplies Safely
When it comes to post-flushing care and maintenance, it's essential to dispose of used supplies safely to prevent the risk of infection and maintain a clean environment. Used catheters, gloves, and other supplies should be disposed of in a sealed plastic bag or a designated biohazard container. This will prevent any potential bacteria or other microorganisms from spreading and causing infection. Additionally, it's crucial to wash your hands thoroughly with soap and water after handling used supplies to prevent the transfer of bacteria to other parts of your body. It's also recommended to clean and disinfect any surfaces or equipment that came into contact with the used supplies to prevent the spread of infection. By taking these simple steps, you can ensure a safe and hygienic environment for yourself and others.
Monitor for Signs of Infection or Complications
After flushing your catheter, it's essential to monitor for signs of infection or complications. Keep an eye out for symptoms such as redness, swelling, or increased pain around the catheter site, as these can indicate an infection. Additionally, watch for signs of bleeding, such as blood in your urine or around the catheter site. If you experience any of these symptoms, seek medical attention immediately. It's also crucial to monitor your urine output and color, as changes can indicate a blockage or infection. If your urine is cloudy, dark, or has a strong odor, it may be a sign of a urinary tract infection (UTI). Furthermore, be aware of any changes in your body temperature, as a fever can be a sign of an infection. If you experience any of these symptoms, contact your healthcare provider for guidance on how to proceed. Regular monitoring can help prevent complications and ensure the catheter remains functional and safe to use.