How To Insert A Page Break In Excel
 Excel plays an integral role in data management for individuals and businesses worldwide. However, adequately managing large datasets in this platform can be a chore, especially when it comes to printing or creating legible and well-organized reports. A vital Excel feature that can greatly optimize your spreadsheet management is the 'Page Break' function. This article will delve into demystifying the concept of this function by initially providing a comprehensive grasp of 'Understanding Page Breaks in Excel.' Thereafter, we will spearhead 'Inserting Page Breaks in Excel', showcasing step-by-step procedures to effectively accomplish this task. Finally, we will unravel the art of 'Customizing Page Breaks in Excel' to ensure that your data fits your preferred layout. Armed with these techniques, you'll be able to seamlessly navigate and manipulate your Excel documents with unprecedented ease. Now, let’s delve into understanding page breaks in Excel.
Understanding Page Breaks in Excel
of this article is to delve into the fundamental dimension of MS Excel - Page Breaks. This powerful feature enhances the organization and visual clarity of your spreadsheets, resulting in better print outcomes and interpretability of data. This article allows you to journey through the intricacies of Page Breaks in Excel by first, 'Defining Page Breaks', elaborating on what Page Breaks are and their various functions in Excel. Second, we explore the 'Types of Page Breaks', where we shed light on different varieties of page breaks that exist, their uses, and how they can be utilized effectively. Lastly, we elucidate on the 'Importance of Page Breaks', portraying the value and essential role that page breaks play in formatting and improving the readability and visual presentation of your spreadsheets. Let’s begin by laying some groundwork and unwrapping this feature as we venture into 'Defining Page Breaks'.
Defining Page Breaks
Page breaks in Excel are one of the fundamental features that permit users to manage how their worksheet's content is displayed when it's printed. A page break spells out where one page stops, and another page begins. The main purpose of establishing page breaks is to make sure that your data fit and are arranged coherently on printed pages. The introduction of page breaks significantly elevates the professionalism and aesthetic appeal of your documents, by ensuring that important information isn't arbitrarily cut off, or awkwardly split between pages. They foster better organization, comprehension, and visual appeal, specifically in bulky worksheets with immense volume of data. By default, Excel automatically establishes horizontal and vertical page breaks based on the page size, margin settings, scale options, and the fixed row and column titles. They are automatically employed at certain intervals depending on the size and layout of the paper you're using for print, but this automatic setting may not always give you the desired outcome. Excel also allows you to manually insert page breaks at desired locations to customize how your workbook pages are to be divided. This added flexibility is crucial when preparing report summaries or documents for presentations, as it gives you full control over the layout and flow of your data. It also helps to save paper by judiciously managing the space on each printed page. Equally, you have the authority to modify or delete existing page breaks if they are no longer serving their purpose or if they have been inappropriately placed. Additionally, Excel has a "Page Break Preview" feature which allows you to view and adjust page breaks in a worksheet before giving print commands. This enables you to arrange your data in the best possible layout, diminishing the chance of post-printing surprises. Understanding page breaks helps to elevate your proficiency in document creation by refining the display and flow of information. It increases readability and gives your data worksheets a logically consistent, professional appearance that could be pivotal, especially in a business environment. It puts you in control of the organization of your printed work, thereby maximizing the impact of your presentation.
Types of Page Breaks
of effective spreadsheets management in Excel is the clever use of Page Breaks. Understanding Page Breaks entails knowing the types and their respective functionalities, easing the process of managing and formulating large amounts of data. Firstly, we have Automatic Page Breaks. Excel, by default, determines where a page begins and ends based on your printer settings and worksheet size. Automatic page breaks appear as dashed lines on your worksheet, demarcating where Excel will initiate a new page for printing. However, this automatic feature might not always coincide with your data structure or presentation preference which dwells us into the next type. The next type is Manual Page Breaks, a feature enabling users to dictate where a new page begins when printing. You insert a manual page break by selecting a cell, then implementing the "Insert Page Break" command, and Excel creates a new page starting from the selected cell. Manual page breaks overrule automatic page breaks, offering flexibility to customize your document. Hard Page Breaks and Soft Page Breaks are another two types. Hard Page Breaks represent intentional breaks you insert for a new page to start from a particular row, while Soft Page Breaks are auto-adjustable breaks introduced in response to changing margins, changing a paper size, or adding and deleting columns and rows. A Hard Page Break is shown as a solid line, whereas a Soft Page page break appears as a dashed line on your worksheet. Lastly, we have Page Break Preview, allowing users to manually adjust, insert, or remove all types of page breaks directly from the preview screen, offering a holistic, visual perspective of the layout before printing. Long story short, understanding the types of page breaks can simplify your work, making data management easier and more efficient in the grand scheme of spreadsheet manipulation. This knowledge allows you to gain greater control over how your data appears when printed, making your reports and presentations look professional and neat. Each type of page break serves a unique purpose in formatting and organizing your worksheet, making it an essential Excel feature to master.
Importance of Page Breaks
of any well-structured document or spreadsheet, page breaks play an instrumental role in organizing and streamlining the information presented in a coherent and easy-to-read manner. At their core, page breaks guide the partition of data or content across different pages, thereby avoiding a cluttered or overrun display, especially in large documents such as Excel spreadsheets. Appreciating the significance of page breaks undeniably requires an understanding of their application in Excel. Excel as a tool, is multifaceted, functioning as a database, calculation tool, and also as a data presentation platform. Given its robust capabilities and extensive functionality, Excel users often deal with massive volumes of data consolidated within single worksheets. Consequently, it becomes crucial to bring order into this data jungle, making it digestible for various users. This is where the crucial role of page breaks comes into play - enhancing the efficiency of data navigation and interpretation, thus maximizing the overall utility of Excel. Firstly, page breaks promote enhanced readability by neatly isolating data segments. When presenting complex data like financial reports or sales analytics, it is effortless for bits of information to get lost in the mass. By instituting logical and well-placed page breaks, data segments can be distinguished independently, making it easier for readers to track, comprehend, and correlate the data. Page breaks also play a crucial role in ensuring optimal data visualization. They allow for the reporter to control which sets of data appear together on a printout, bringing a semblance of visual logic to the paper version of your spreadsheet. This prevents awkward split or overflow of data which could distort visualization and lead to inaccurate interpretations. Additionally, controlling where one page ends and the next begins brings us to the often overlooked aspect of aesthetics. Page breaks, particularly in print view, enhance the 'clean look' of the spreadsheet by introducing white spaces which make the data seem less daunting. Put simply, page breaks can make or break the user experience in handling an Excel worksheet. Their intelligent use can refine vast, otherwise overwhelming, swathes of data into logical, manageable units of information, which is entirely the essence of efficient data handling. Therefore, the focus on understanding the application of page breaks in Excel should be viewed not merely as gaining another technical skill but as an investment in enhancing data presentation, manipulation, analysis, and utilization.
Inserting Page Breaks in Excel
Technology continues to revolutionize our office workflows with programs like Microsoft Excel that automate and streamline data processing. Among the plethora of tools available in Excel, a significantly useful one is the ability to insert page breaks. This article aims to shed light on how users can effectively insert page breaks in Excel by taking a comprehensive look at three methods: Using Page Break Preview, inserting manual Page Breaks, and utilizing formulas to insert Page Breaks. Each method offers its unique approach and can be chosen based on the specific requirements of the task. As you continue reading, the first method you'll encounter will thoroughly discuss the Page Break Preview feature. This tool provides a visual representation of where the pages will break and gives you a chance to modify these splits before printing or PDF conversion, saving time and ensuring precise control over document formatting. With a solid understanding of this preliminary method, readers will be well-equipped to explore the more advanced techniques in the subsequent sections of this informative and engaging article. Prepare to take control of your spreadsheet layouts like a pro! The journey begins with Using the Page Break Preview...
Using the Page Break Preview
of successful page break insertion in Excel is understanding how to utilize the Page Break Preview. This feature facilitates the visual mapping of your document and offers you an aerial perspective on where page breaks exist or are potentially necessitated. The Page Break Preview, as the name suggests, provides a preview of your Excel sheet, showcasing precisely how it would appear if printed. It displays the page breaks as blue lines, enabling the effective strategizing of their placements. Firstly, to access this feature, click on the 'View' tab from the Ribbon, then select 'Page Break Preview.' Here, note that the worksheet's outline is divided into pages. Each page is distinctly numbered, which allows for easy tracking and manipulation. In this preview, you can click and drag the blue lines to alter the page breaks manually. By moving the blue dashed lines, you effectively establish where each page starts and ends. Secondly, using the Page Break Preview can help minimize paper wastage resulting from unnecessary prints. For instance, having an isolated row or column spill over into a separate page could be avoided by adjusting the page breaks. This feature also ensures that related data isn't arbitrarily split across pages but remains organized per your preference. The capacity to preview and control page breaks' placement significantly enhances the readability of your printed Excel sheets. For example, it would be unwieldy to have a table's header at the end of one page and the related data on the following page. Through the Page Break Preview, you can ensure that related content stays on the same printed page, thereby improving the document's layout and legibility. However, it's essential to remember that the alterations made in the Page Break Preview are not permanent. They last only for the printing session. Once you close the spreadsheet and reopen it, Excel decides the page breaks automatically unless you manually insert them. To permanently insert a page break, switch to 'Normal’ view, select the row or column right after where you want the break to occur, then choose 'Insert Page Break' from the 'Breaks' dropdown in the 'Page Layout' tab. In conclusion, using the Page Break Preview is a critical step in the process of inserting page breaks in Excel as it enables you to plan your page-break placements tactically, considerate of paper usage and content organization. Despite its temporary nature, the opportunity it affords to visualize the layout and flow of your printed document before actual printing is indispensable. From prevention of clutter to economizing paper usage, this Excel feature undoubtedly adds a qualitative edge to your printouts.
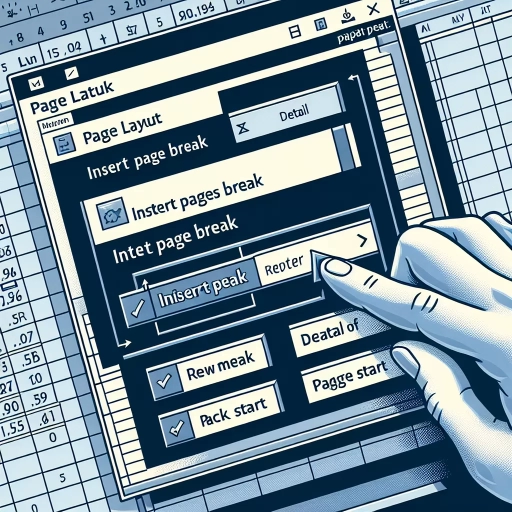
Inserting Manual Page Breaks
In a business context, professional documents organized into pages can be essential for a smooth workflow. One of these important documents is the excel spreadsheet. In dealing with excel sheets, inserting page breaks can be pivotal in maximizing efficiency and enhancing document presentation. Specifically, inserting manual page breaks is a skill that can prove quite useful. For those not familiar, page breaks are markers that dictate where one page ends, and another begins. When you print a document, the page breaks indicate where the new pages start. With manual page breaks in Excel, you can control exactly where each page begins and ends. This boosts the print out accuracy and reduces possible editing post printing. The essential purpose of inserting page breaks manually is to ensure that your information is segmented in a clear, concise and visually appealing manner. To insert a manual page break in Excel, select the cell where you want to start a new page. From there, go to the Page Layout tab, click the Breaks button, and then select Insert Page Break. You may also use the shortcut Alt + P + B + I. Immediately, Excel will insert a page break above the selected cell. It’s worth noting that page breaks are not visible on normal screen view; to view them, switch to Page Break View (on the View tab), or use Print Preview. Your spreadsheet document will follow the page breaks when printing, neatly separating your content exactly where you want. Bear in mind that manual page breaks can override Excel's automatic page breaks. Therefore, if you've inserted a manual page break, Excel won't adjust it even if you change the row height or column width, or hide rows or columns. This stable page-breaking mechanism ensures you maintain full control of your document page layout. To sum up, inserting manual page breaks optimises the way you partition your excel data across pages, giving you flexibility and precision, and enhances readability particularly for printed documents. If you are regularly dealing with large Excel sets, understanding how to insert a manual page break is a fundamental skill that can save you time and resources, and ensure your document presentation is on point. Remember, skill mastery comes with practice - don't be afraid to experiment with different page break placements to find what works best for you.
Using Formulas to Insert Page Breaks
Using Excel's provided formulas to insert page breaks can dramatically increase your productivity, particularly when dealing with voluminous data or complex documents. You see, the beauty of Microsoft Excel lies not only in its ability to store and calculate massive volumes of data, but also in the various ways it can manipulate and present such data in an organized, easy-to-understand manner. One of this ways is through the use of page breaks. But manually inserting these breaks can be laborious and time-consuming, especially for large sheets. This is where the magic of formulas comes in, providing a faster, more streamlined method. First off, it's crucial to understand why you would need to insert page breaks. For one, page breaks significantly enhance the readability of a printed Excel sheet by defining which data should appear on which page. Excel's default page break may not always serve your specific needs, as it may split data in a way that makes it difficult for readers to comprehend. With formulas however, you're afforded increased control, granting you the freedom to define exactly where the page breaks should occur based on your stipulated criteria. For example, you might have a sheet with varying data sets, and you wish to begin each set on a new page when printed. A formula that includes a page break can be created to identify when a new data set begins. You can therefore delegate the task of inserting page breaks to this formula, saving you considerable time you'd otherwise spend scrolling through the document and placing breaks manually. To implement this, first identify the column that differentiates the data sets. Let's say it's column A. You can then create a formula that inserts a page break anytime the value in column A changes. This can be especially useful for sheets with hundreds or even thousands of rows, where inserting page breaks manually would be impractical. So, how exactly do you do this? Well, you create a Visual Basic for Applications (VBA) macro. Don't be alarmed if you're not familiar with VBA. It's merely a version of the popular programming language, VB, incorporated in all MS Office applications. Several guides are available online to help you get the hang of it. Essentially, the macro will scan through all the rows in the designated column (e.g., column A). When it encounters a different value, it will insert a page break. Precise steps to execute this can be found in Excel's dedicated VBA language, with several resources available online to guide you, making it not as daunting as it may initially seem. In summary, Excel's ability to use formulas for inserting page breaks is advantageous for those seeking to enhance their productivity and present their data in a highly organized, professional manner. It allows for a custom layout suitable for printing, thus ensuring the integrity of your data structure and data comprehension for those on the receiving end.
Customizing Page Breaks in Excel
Microsoft Excel, a versatile and powerful tool, offers countless functions to enhance your data handling and presentation - one of which is customizing page breaks. Master this feature and you'll be able to manage your spreadsheets efficiently while presenting information in a polished, reader-friendly manner. The techniques vary from basic to advanced, allowing you to tailor page breaks to your unique needs. This article will guide you through three principal strategies. Firstly, we will explore setting page breaks for specific ranges, a fundamental method perfect for reports with standardized formatting. Next, we will delve into taking this a step further with conditional formatting to highlight page breaks, an excellent option for dynamic, color-coded reports. Lastly, we dig deeper for advanced users and show how to create custom page breaks with Visual Basic for Applications (VBA). These methods will expedite your spreadsheet creation process and grant you a newfound portrayal symmetry. Let's start our odyssey with setting page breaks for specific ranges, a function catering to users who want to delineate data sections meticulously.
Setting Page Breaks for Specific Ranges
Setting Page Breaks for specific ranges in Excel is a straightforward yet impactful process that allows you to manage how data is displayed when printed. This handy customization technique helps you make the most out of your spreadsheets by making them more readable and professionally organized. To set page breaks for specific ranges, first, you'll have to select the set of cells that mark the range after which you'd like a page break. For instance, if you want one after row 10, select cell A11. Once you've selected the cell, navigate to the top Ribbon, find the 'Page Layout' tab, and under the 'Page Setup' section, choose 'Breaks'. Click on 'Insert Page Break', and voila! The page break will be set after your specified range, and each time you print this spreadsheet, the data before cell A11 will be on one page and the data after A11 will start on the next. However, it's essential to know the difference between a manual page break and an automatic page break. Excel generates automatic page breaks based on the print area, scale settings, and physical page size. However, these automatic page breaks may not always line up neatly with your data, leading to poorly organized printouts. This is why setting manual page breaks can be vital. These breaks override Excel's automatic page breaks, giving you complete control over what data sits on what page. Moreover, Excel displays 'Page Break Preview' to give you an overview of your designated page breaks. Click 'Page Break Preview' on the 'View' tab to enter the preview mode, where you'll notice dotted lines indicating automatic page breaks and solid lines for manual ones. This visualization enables you to easily adjust your page breaks as needed by clicking and dragging the solid line to your desired position. Remember, while page breaks are typically inserted to enhance the print layout, they're not visible in default standard views. You will have to switch to 'Page Break Preview' or 'Page Layout View' to see them. Above all, mastering the Page Break function allows for greater readability, professionalism, and efficient use of space, transforming your data into a more digestible format. Whether you need to print a financial report, a school project, or a data analysis, knowing how to set specific page breaks is instrumental in achieving impressive and effective hardcopies of your spreadsheets.
Using Conditional Formatting to Highlight Page Breaks
Conditional formatting is an extremely useful tool that can help you better understand and visualize data in Excel. In the context of customizing page breaks, conditional formatting can be used to highlight the cells where page breaks are located, thereby making the breaks more noticeable. By doing so, one enables a quick and efficient navigation through the data, ensuring a more practical utilization of the worksheet space, hence, creating a more organized Excel environment. Firstly, we need to understand that Excel automatically determines where page breaks will occur based on the paper size, scale settings, and the amount of print content. These automatic breaks may not always meet the needs and you may want to move them to more appropriate locations for a cleaner print view. This is where the need to customize page breaks comes in. However, Excel does not provide a direct way to visually mark these breaks in the worksheet. This is where conditional formatting enters the picture. Conditional formatting is a feature in Excel that allows you to apply specific formatting to cells that meet certain criteria. It’s a very handy tool that makes it easier to visually highlight important data at the glance. By using conditional formatting, we can subtly or overtly highlight the rows or columns that contain a page break, making it easier to identify where they are. To do this, select a row or a column where you wish to insert a page break and apply a rule in the conditional formatting options. Excel then applies the formatting only to the cells that meet the specified conditions or in our case, that contains a page break. You can choose the type of formatting such as changing the font color, cell color, adding borders, and more. While Excel does not provide a built-in feature to highlight page breaks specifically, a savvy user can utilize this functionality of conditional formatting to create a workaround solution. It not only aids in visual comprehension but also adds more control over the way you manipulate your data for print formatting. Remember, understanding and customizing page breaks can significantly impact the look and feel of both the digital and printed Excel report, making it easier for analysis and presentation. Therefore, the creative use of conditional formatting to highlight page breaks honours the fundamental principle of efficient data handling, further enhancing your Excel skills. With practice, this tool can become an integral part of your data presentation, improving the overall narrative of your spreadsheets, and helping you deliver a more effective and comprehensive Excel experience.
Creating Custom Page Breaks with VBA
Creating Custom Page Breaks with VBA is a sophisticated feature to introduce an advanced level of control over your Excel documents. Visual Basic for Applications, or VBA as it is commonly known, is a powerful programming language integrated into all MS Office applications. In Excel, users may dynamically manage page breaks using VBA, which can significantly streamline tasks like creating reports, or formatting intricate documents. In an excel worksheet, page breaks are inserted automatically based on the paper size, margin settings, scale options, and the positions of any manual page breaks that you insert. However, this automated system may not always align with your specific needs for a document. That's where VBA's role becomes crucial; its ability to customize page breaks helps create documents fitting precise specifications. Page breaks in the excel worksheet view are indicated by dashed lines. The terminology consists of vertical page breaks (column breaks) and horizontal page breaks (row breaks). They can be manually inserted by selecting 'Insert Page Break' from the 'Breaks' option in the 'Pages Setup' group on the page layout.tab. But when it comes to performing an operation over multiple worksheets or performing the operation frequently, manual efforts become tedious. This is where VBA proves resourceful. By writing a simple VBA code in the back end, you can predetermine your page breaks at row or column intervals based on your requirements. This may be especially useful in instances such as creating segmented reports or distinct printable sections. The automation offered by VBA simplifies the operation and saves valuable time. It is important to note that while handling page breaks using VBA, you should have familiarity with the syntax and an understanding of how to run the scripts since incorrect usage could result in data failures or errors. However, once mastered, VBA's capability to customize page breaks in Excel offers a remarkable leap in efficiency and productivity. With the use of VBA, you can not only insert or remove page breaks but also control their location and check whether a cell is located within a page break. So, it can be said that with a good knowledge of VBA, Excel's page breaks fully fall under users' control, and you can dictate how and when they should appear in your worksheet. Furthermore, it’s essential to remember the importance of thoroughly checking your VBA scripts’ functionality to ensure they’re operating as intended. A small mistake might lead to a series of wrong page breaks, which wouldn't be an issue when you’re dealing with a small data set but could become a serious problem with larger datasets. Therefore, using automated page breaks through VBA should be undertaken with precision and care, ensuring strict quality controls. Overall, creating custom page breaks using VBA presents an excellent opportunity for Excel users to tailor their worksheets precisely to their needs. Its automation capability helps to streamline repetitive tasks and remove the potential for human error. So while the initial learning curve may be steep, the efficiency and accuracy of utilizing VBA to manage page breaks can ultimately prove to be an invaluable tool for any Excel user.