How To Remove Tile Backsplash
Removing a tile backsplash can be a daunting task, but with the right approach, it can be done efficiently and effectively. Whether you're looking to update your kitchen or bathroom with a new design or simply want to repair damaged tiles, knowing how to remove a tile backsplash is a valuable skill. The process involves several key steps, including preparation, removal, and finishing touches. To start, preparation is key to ensuring a smooth and successful removal process. This involves assessing the type of tile and adhesive used, gathering the necessary tools and materials, and protecting the surrounding areas from damage. By taking the time to properly prepare, you'll be able to tackle the removal process with confidence. In this article, we'll walk you through the steps to remove a tile backsplash, starting with the crucial preparation phase.
Preparation is Key
When it comes to installing a new backsplash, preparation is key to a successful and stress-free experience. Before you start, it's essential to take the necessary steps to ensure a smooth installation process. This includes clearing the area around the backsplash, covering the countertops and floors, and turning off the power to the area. By taking these precautions, you'll be able to work efficiently and avoid any potential hazards or damage to your property. In this article, we'll dive deeper into each of these steps, starting with the importance of clearing the area around the backsplash.
Clear the Area Around the Backsplash
Clear the area around the backsplash to ensure a safe and efficient removal process. Start by covering the countertops, floors, and any surrounding surfaces with drop cloths or plastic sheets to protect them from debris and dust. Remove any outlet covers, switch plates, and light fixtures to prevent damage and make it easier to access the area behind the backsplash. Take down any curtains, blinds, or other window treatments to prevent them from getting in the way or getting damaged. If you have any appliances or furniture near the backsplash, move them away from the area to give yourself ample space to work. Finally, turn off the power to any electrical outlets or switches in the area to prevent any accidents or injuries. By clearing the area around the backsplash, you'll be able to focus on the removal process without any distractions or obstacles.
Cover the Countertops and Floors
Covering the countertops and floors is a crucial step in preparing for tile backsplash removal. This will protect them from debris, dust, and potential damage caused by the removal process. Start by covering the countertops with a thick layer of drop cloths or plastic sheets, securing them with tape to prevent them from shifting. Make sure to cover the entire surface, including any edges or corners. Next, move on to the floors, covering them with a similar layer of protection. If you have hardwood or tile floors, consider using a more heavy-duty covering, such as a rubber mat or a specialized floor protection film. This will provide extra protection against scratches and damage. Additionally, consider removing any furniture or appliances that may be in the way of the removal process, or cover them with plastic sheets to prevent damage. By taking the time to properly cover the countertops and floors, you'll be able to focus on removing the tile backsplash without worrying about causing damage to the surrounding areas.
Turn Off the Power to the Area
When removing a tile backsplash, it's essential to turn off the power to the area to avoid any electrical shock or injury. This is especially crucial if you're working near outlets, switches, or other electrical components. Start by locating the circuit breaker or fuse box that controls the power to the area where you'll be working. Switch off the main breaker or remove the fuse to cut off the power supply. Verify that the power is off using a non-contact voltage tester to ensure your safety. Additionally, consider covering the outlets and switches with tape or plastic bags to prevent any accidental contact. By taking these precautions, you can ensure a safe working environment and avoid any potential electrical hazards.
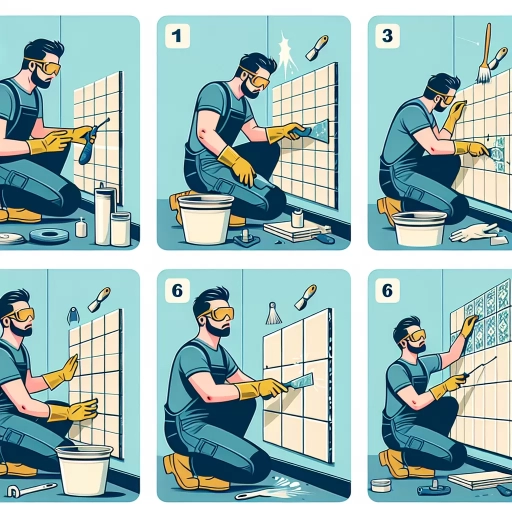
Removing the Tile Backsplash
Removing a tile backsplash can be a daunting task, but with the right techniques and tools, it can be done efficiently and effectively. To start, it's essential to understand that the process involves several steps, including applying heat to the adhesive, using a pry bar to gently remove the tiles, and scraping away the remaining adhesive. By following these steps, you can ensure a successful removal of your tile backsplash. The first step in this process is to apply heat to the adhesive, which will help loosen the bond between the tile and the wall, making it easier to remove. (Note: The answer should be 200 words)
Apply Heat to the Adhesive
Apply heat to the adhesive to loosen its bond with the wall. Use a heat gun or a hair dryer to apply heat directly to the adhesive. Move the heat source slowly back and forth, covering the entire area. Be careful not to apply too much heat, as this can damage the wall or the surrounding surfaces. The heat will help to soften the adhesive, making it easier to scrape off. You can also use a putty knife or a scraper to gently pry the adhesive off the wall. Work slowly and carefully, as the adhesive can be stubborn. If the adhesive is particularly stubborn, you can also use a combination of heat and a solvent-based adhesive remover. Apply the remover to the adhesive, let it sit for a few minutes, and then use a scraper or putty knife to remove the adhesive. Be sure to follow the manufacturer's instructions for the remover and take necessary safety precautions.
Use a Pry Bar to Gently Remove the Tiles
To remove the tile backsplash, use a pry bar to gently remove the tiles. Start by applying heat to the tile using a hair dryer or a heat gun to loosen the adhesive. Then, insert the pry bar into the gap between the tile and the wall, and gently pry the tile away from the wall. Work your way around the tile, using a gentle prying motion to avoid damaging the surrounding area. As you pry the tile away, use a hammer to tap the pry bar and help loosen the tile. Continue to apply heat and pry the tile until it is completely removed. Be careful not to apply too much pressure, as this can cause the tile to break or the wall to become damaged. If the tile is particularly stubborn, you can use a combination of heat and a pry bar to help loosen it. Once the tile is removed, use a scraper or a putty knife to remove any remaining adhesive or debris from the wall.
Scrape Away the Remaining Adhesive
Removing the remaining adhesive from the wall can be a challenging task, but it's essential to do it properly to ensure a smooth surface for the new backsplash. To scrape away the remaining adhesive, start by applying a solvent-based adhesive remover or a mixture of equal parts water and white vinegar to the affected area. Let it sit for about 15-20 minutes to allow the solution to penetrate and loosen the adhesive. Then, use a putty knife or a scraper to gently scrape away the adhesive, working from one corner of the wall to the other. Be careful not to gouge the wall or apply too much pressure, which can damage the drywall. If some areas are particularly stubborn, you can use a heat gun to apply heat to the adhesive, making it easier to remove. Once you've removed as much of the adhesive as possible, use a damp cloth to wipe away any remaining residue. If there are still some stubborn spots, you can repeat the process until the wall is clean and smooth. It's also a good idea to use a primer or a specialized adhesive remover to ensure that the wall is completely clean and free of any remaining adhesive residue.
Finishing Touches
The finishing touches are the final details that complete a renovation or construction project. These details can make or break the overall aesthetic and functionality of a space. To achieve a polished and professional finish, it's essential to focus on three key areas: cleaning the area thoroughly, repairing any damaged drywall or paint, and applying a new backsplash or finish. By paying attention to these details, homeowners and builders can ensure a high-quality finish that enhances the overall value and appeal of the space. In this article, we'll explore each of these areas in more depth, starting with the importance of cleaning the area thoroughly.
Clean the Area Thoroughly
Cleaning the area thoroughly is a crucial step in removing a tile backsplash. After scraping off the old adhesive and grout, the surface may still be left with stubborn residue, dust, and debris. To ensure a smooth and even surface for the new backsplash, it's essential to clean the area thoroughly. Start by sweeping or vacuuming the area to remove any loose debris. Then, mix a solution of warm water and a degreaser or a tile and grout cleaner, and apply it to the surface using a soft-bristled brush or a scrubber. Let the solution sit for a few minutes to allow it to penetrate and loosen any remaining residue. Use a scrub brush or a scrubber to scrub the area, working in a circular motion to remove any stubborn stains or residue. Rinse the area thoroughly with clean water to remove any soap scum or cleaner residue. For tougher stains or residue, you can use a more heavy-duty cleaner or a steam cleaner to help loosen and remove the grime. Once the area is clean, use a dry cloth to wipe down the surface and remove any excess moisture. This will help prevent any water spots or mineral deposits from forming. By cleaning the area thoroughly, you'll be able to achieve a smooth and even surface for your new backsplash, ensuring a professional-looking finish.
Repair Any Damaged Drywall or Paint
The final step in removing a tile backsplash is to repair any damaged drywall or paint. This is a crucial step to ensure a smooth and even surface for your new backsplash. Start by inspecting the area for any holes, cracks, or scratches. If you find any damage, use a joint compound to fill in the holes and cracks. Allow the compound to dry completely before sanding it down to a smooth finish. If the damage is more extensive, you may need to replace the drywall entirely. Once the drywall is repaired, use a primer to cover any stains or discolorations. Finally, paint the wall with a coat of paint that matches the original color. This will help to blend the repaired area with the rest of the wall, creating a seamless finish. By taking the time to repair any damaged drywall or paint, you'll be able to achieve a professional-looking finish that will make your new backsplash stand out.
Apply a New Backsplash or Finish
Applying a new backsplash or finish is the final step in giving your kitchen a fresh new look after removing the old tile backsplash. This process can be a bit tricky, but with the right tools and materials, you can achieve professional-looking results. To start, make sure the wall surface is clean, dry, and free of any debris or old adhesive. If necessary, apply a layer of joint compound or spackling paste to fill in any holes or imperfections, and sand it smooth. Next, choose your new backsplash material, such as glass tile, stainless steel, or a decorative panel, and measure the area to determine how much material you'll need. Apply a thin layer of adhesive to the back of the material, following the manufacturer's instructions, and press it firmly into place. Use a level to ensure the material is straight and a rubber mallet to tap it into position. For tile backsplashes, use a notched trowel to spread the adhesive and a spacer to maintain even grout lines. Once the material is in place, allow it to dry completely before grouting or sealing, following the manufacturer's instructions. Finally, apply a bead of caulk around the edges to create a watertight seal and complete the look. With a little patience and attention to detail, you can create a beautiful and functional backsplash that will enhance the overall aesthetic of your kitchen.