How To Remove Someone From A Picture
 Photos are often more than just simple images; they encapsulate moments, memories, and experiences that are precious to us. However, there are times when a picture is near-perfect apart from that one unwanted individual unintentionally caught in the shot. Learning to remove someone from a picture can prove to be a priceless skill, salvaging an otherwise splendid photo. This article is designed to guide you through the process of removing someone from a picture, offering a simplified step-by-step guide, exploring how photo editing software can aid, and diving into some advanced techniques for the more complex scenarios. This journey of enhancing your photo-editing abilities begins with our first segment: "Removing Someone from a Picture: A Step-by-Step Guide."
Removing Someone from a Picture: A Step-by-Step Guide
In today's digital age, it's all too common to desire altering a photograph. Whether it's because someone unintentionally photobombed your perfect shot or due to a sour relationship, the fact remains that erasing someone from a photo can seem a daunting task if you're unsure where to start. This article seeks to guide you through this process step-by-step. The key aspects involved in this process include choosing the right method for your specific needs, gaining a basic understanding of the image-editing tools and software that can aid you in this task, and adeptly preparing the image for the editing process. To ensure efficiency and effectiveness, these three crucial aspects of the process must be comprehensively understood. By doing so, anyone from a rookie to a professional editor can remove an unwanted figure from a photograph effortlessly. To embark on this journey, let’s begin by exploring how to choose the right method to achieve your picture-perfection goals.
Choosing the Right Method
When it comes to removing a person from a picture, it is crucial to choose the right method. According to the image's quality, complexity, and the tools or software at hand, the choice may vary. The sine qua non here is maintaining the integrity and realistic essence of the photograph. You may want to use the 'Clone' or 'Heal' tools if the background is relatively simple like a solid color wall or a eternal sky. They work by replicating pixels from one area (the source) and drawing them onto another (the target). This is great for covering up the person you want to remove. If the backdrop is more complicated, with different colors, contours, or details, you might want to consider different techniques like the 'Patch' tool or 'Content-Aware' fill. That said, choosing the right method also significantly depends on the photo editing software you're using. Whereas Photoshop offers an extensive range of tools for photo retouching, more straightforward software like Paint doesn't offer as much flexibility. Online platforms are also available, which provide straightforward solutions for the purpose; however, they might not ensure the quality as more superior software can do. Lastly, consider your expertise and comprehension in handling the chosen software or platform. If you're a novice, using advanced programs may lead to undesired results, while basic software may not suffice for pros looking for perfection in details. Therefore, understanding your proficiency level coupled with the requirements of the picture will guide you in choosing the right method.
Understanding the Tools and Software
Understanding the tools and software available for photo manipulation is a critical step in the process of removing someone from a picture. Among the host of photo editing tools available, Adobe Photoshop stands out as the most comprehensive and powerful. A benchmark for digital imaging excellence, it provides an array of tools designed to accomplish advanced tasks like removing an individual from a photograph. This includes tools like the Healing Brush, Patch Tool, and Clone Stamp, each offering a different approach to erase unwanted elements. For more simplicity, software like Adobe's Lightroom or even mobile apps like TouchRetouch and Snapseed provide intuitive user interfaces, making the task less intimidating for beginners. In addition to these dedicated photo editing tools, many online platforms, like Pixlr and Fotor, make it possible to erase elements from images without having to download any software. These online platforms offer free, basic versions or more advanced features for a small fee, providing the flexibility necessary to meet a variety of needs. Beyond knowing what tools are available, it’s equally important to understand how they function. For example, the Healing Brush tool in Photoshop works by replacing unwanted elements with textures from surrounding areas, while the Patch tool functions by allowing you to choose your own source area for texture. The Clone Stamp tool can be a bit more complex, allowing you to copy an area of an image and use it to 'paint' over another. Effectively utilizing these tools requires practice, patience, and a sound understanding of their potential and limitations. In summary, having a broad understanding of the various software and tools available for photo editing can significantly streamline the process of removing someone from a picture. Equipping yourself with the right tool for your skill level and the task at hand will not only enhance the finished product but also make the process more enjoyable and fulfilling. Whether using a high-powered program like Adobe Photoshop, a user-friendly mobile app, or a straightforward online platform, the key is to understand the tool’s capabilities and use them effectively to bring your vision to life.
Preparing the Image for Editing
of any successful image editing task is the initial preparation. Before you dive into the process of removing someone from a picture, ensure that the image itself is ready for editing. This is a critical step because it guarantees that the image's integrity will be preserved, resulting in a more natural and visually appealing end product. Start by creating a copy of the original image. This is crucial because it allows you to rollback to the original picture if anything goes wrong during the editing process. The original picture serves as your safety net, ensuring that you would not lose your original work. Once you have your copy, inspect it carefully. Look for visible dust, scratches, or any other imperfections that might hinder the editing process. If found, use the healing and clone tools available in most photo editing software to clean up these imperfections. This preparation helps to make the process of removing someone from the picture smoother, without any disturbances to limit your editing competence. Another solid tip is to always work in the highest resolution available. The higher the resolution, the more detail is available, which can greatly facilitate precise editing. Performing an overall image correction is a good idea before you start with the finer details. This correction should be done by adjusting the brightness, contrast, color balance, and levels of the image. These adjustments help to make sure that any areas you work on during the removal process won't stand out from the rest of the image due to differences in lighting or color. Lastly, consider if cropping the picture could simplify the job. For instance, if the person you want to remove from the image is towards the edge, you could crop them out instead of editing them out, significantly saving time. However, bear in mind that this solution could only work in cases where cropping would not compromise the overall composition of the image. The task of preparing the image for editing is more than just a preparatory step, it ensures that you're starting with the best possible version of your picture. It mitigates potential issues down the line, and sets you up for successful and efficient editing. Skipping or rushing through this step could lead to an end product that is visually inconsistent, so take the times to make sure your image is completely ready for the editing process.
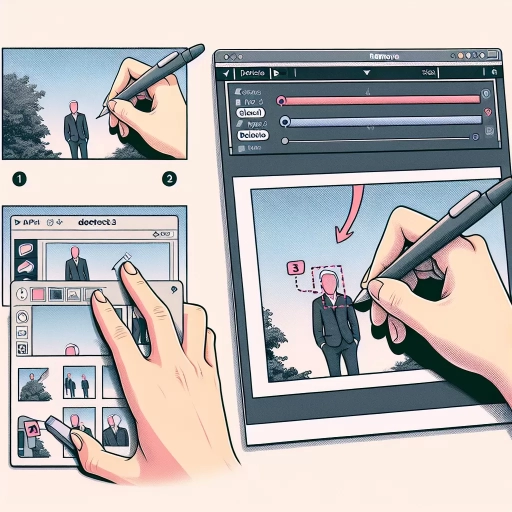
Using Photo Editing Software to Remove Someone from a Picture
In this digital era, where imagery plays a pivotal role in storytelling and communication, mastering the art of photo editing can potentially add a new feather in your cap. In various instances, it might be required to remove someone from a picture, for one reason or another. Whether it's an ex-lover or an unwanted photobomber, among others in the frame, removing these subjects has never been so simple, thanks to photo editing software tools at our disposal. Three notable tools stand out when discussing this photo manipulation: The Clone Stamp Tool, the Content-Aware Fill Feature, and the Healing Brush Tool. These tools found in software like Adobe Photoshop or GIMP, are irreplaceable aids for users seeking to remove persons from their images while maintaining the integrity of the background. Let's start our journey into the world of digital photo editing by learning the ins and outs of the first tool on our list: The Clone Stamp Tool.
Using the Clone Stamp Tool
Using the clone stamp tool in photo editing software plays a vital role in removing someone from a picture. The tool, as suggested by its name, works by 'cloning' a specific portion of the image to use as a pattern for covering unwanted elements. You may think of it as digital copy-pasting for images where pieces of the image background are spliced and reorganized to form a clean, undisturbed backdrop. To use the clone stamp tool effectively, you first need to select an appropriate 'source point.' This source point should be an area in the image that closely resembles the background of the person you intend to remove. Once the right source point gets selected, clone stamp tool copies the look and feel of your source point and uses it to paint over the unwanted elements in the picture. The software smooths transitions, blends the colors, and integrates the added patches seamlessly into the overall image. However, the success of using the clone stamp tool relies heavily on the user's precision and patience. It is not a one-click solution but a method that requires time, skill, and an eye for detail to convincingly retouch an image. The trick is to select small portions at a time, gradually building upon the background until the individual's presence is completely erased. Additionally, it's essential to adjust the brush's size and hardness levels based on the area you're working on. Using a soft brush at lower opacity levels often results in more natural-looking outcomes, especially when working with intricate or varying backgrounds. Furthermore, you should regularly update the clone source to mitigate the risk of creating noticeable, repeating patterns in your image. Remember, using photo editing software and, more specifically, the clone stamp tool, is an art that improves with practice. There could be times when the usage of clone stamp tool might seem tedious or complex, but with persistent attempts, you'll eventually gain skills to perform efficient and flawless edits. In conclusion, removing someone from a picture by using the clone stamp tool is a highly effective method that offers precise and natural results, provided it's used with patience and careful attention to detail. It's an invaluable tool in the arsenal of photo editing that can make the composition of your pictures adjust to your desire, thus affirming the age-old adage; a picture is worth a thousand words.
Utilizing the Content-Aware Fill Feature
Utilizing the Content-Aware Fill feature is an incredibly important step in the process of removing someone from a picture. This tool, particularly handy in editing software such as Adobe Photoshop, accurately and efficiently eliminates the unwanted area or person from the image, replacing it harmoniously with the surrounding environment or backdrop. When it comes to removing someone from a photo, with the help of this feature, the task becomes simplified and efficient, letting the technology do the hard work. Here’s how it works. With the high-tech computational properties, the Content-Aware fill feature reviews the unnecessary parts in the photo, enabling the editor to create a selection around the unwanted person or object. The algorithm behind this powerful feature then studies the surrounding pixels of the selected area. It takes into consideration the textures, colors, lights, shadows, and other intricate details of the backdrop. The software then generates simulative pixels that match these numerous elements extracted from the surroundings, creating a flawless blend. What makes the Content-Aware Fill feature distinct is its intelligent filling mechanism. Unlike other filling methods that might inaccurately overflow the area with one pattern, color or texture, the Content-Aware Fill is truly 'aware' of the 'content' that it needs to generate. This prevents a robotic or noticeable patchwork, creating a natural, human-like effect. A crucial part of using the feature is to understand how to make proper selections. A rough or inaccurate selection may result in an unappealing and noticeably edited image. Using selection tools with subtlety and attention, combined with the flexible customizability of the Content-Aware Fill feature, can ensure a polished and satisfying result. Options to further tweak the output also exist within this feature. Editors can determine the color adaptation, rotation, scaling, mirror flipping, and other detailed setting preferences. What's enchanting about working with the Content-Aware Fill feature is that it doesn't simply erase the unwanted areas, it effectively replaces them with what we could expect to be there in reality. With its advanced technology, photo-editing transcends from being a simple object removal process to a creative art act, adding the essence of realism and undisturbed continuity to the edited image. With tools like these, one can magically erase elements from an image, without leaving behind any sign of editing, resulting in a picture-perfect snapshot every single time. In the world of photo editing, it's a game-changing feature that has empowered editors with immense flexibility and control over their creations.
Employing the Healing Brush Tool
Understanding how the Healing Brush Tool functions in photo editing software is fundamental in achieving a perfect picture. Specifically, when it comes to removing someone from a picture, this tool plays an indispensable role. Essentially, the Healing Brush Tool allows the editor to replace unwanted parts of an image with other parts. For this purpose, it collects data from a sampled area and superimposes it on an undesired section, typically in a seamless manner that maintains the surrounding texture, lighting, and shading. Consider this scenario; perhaps, while taking an idyllic picture at the beach, a stranger accidentally strays into the frame, detracting from your desired image composition. In such an instance, employing the Healing Brush Tool would be a practical solution. Using this tool, you can simply sample a section of the image void of the intruder — such as an empty part of the beach or sea — then artfully brush over the person you want to erase from the photo. The Healing Brush is more sophisticated than its Clone Stamp counterpart, which indiscriminately duplicates the pixels from one part of an image to another. On the contrary, the Healing Brush tool goes a step further by blending the characteristics of both the targeted and source pixels. As a result, it mirrors the texture, tone, and color of the sampled area to the spot you brush, ensuring uniformity and rendering the unwanted subject virtually invisible. To utilize this tool, typically, you need to select it from the tool palette, often characterized by a band-aid icon. You then have to choose a source point by clicking a particular area while holding down the Alt (Option on Mac) key. This is your 'healthy' specimen that will be used to 'heal' the undesired portion. With the source point set, you can now brush over the area with the unwanted subject. It's crucial to brush carefully and continuously adjust your brush size to match different details of the image. Ultimately, the effectiveness of the Healing Brush Tool dramatically depends on the complexity of the image and the user's skill level. Removing someone from a photo filled with intricate details and variants of lighting, shadows, and texture might be more challenging than an image with a simple, uniform background. Hence, practice and familiarization with the tool's functionalities are essential. When used correctly, the Healing Brush Tool can perform miracles on an image, even going as far as successfully removing a person without leaving an inkling of their prior presence. It's indeed a staple in the photo editing world and a vital skill every aspiring photographer or graphic designer should master.
Advanced Techniques for Removing Someone from a Picture
In the digital age, the ability to remove someone from a photograph is a highly sought-after skill among photographers and graphic designers. This advanced feat can be achieved effectively using modern software tools in conjunction with time-honed manual techniques. Our thorough guide explores the three crucial steps in successfully executing this task while preserving the natural aesthetics of the image. We begin by discussing the use of layer masks and blending modes, which is instrumental in the partial hiding or revealing of elements. This is followed by an in-depth tutorial on creating a seamless background, to fill the void left by the removed figure leaving no apparent traces of alteration. Lastly, we delve into refining the edges and details of the edited area to achieve a flawless finish, thus ensuring that removed elements do not leave behind jagged or blurred edges. Now, let's take a closer look at the first step: using layer masks and blending modes to effortlessly remove unwanted elements from your pictures.
Using Layer Masks and Blending Modes
A key technique in advanced photo editing involves the use of layer masks and blending modes when removing someone from a picture. This method allows you to edit your image non-destructively by creating a layer above your original image that can be adjusted and edited without impacting the underlying original. Layer masks provide precision in editing by selectively hiding or displaying parts of the layer. An incredible feature of layer masks is their non-permanence – you can always change the areas of concealment or display as required, making it a highly flexible tool with room for multiple adjustments. Once your layer mask is set, blending modes come into play to ensure the overall image looks cohesive. The strength of blending modes lies in their ability to dictate how the colors and pixels in your upper layer interact with those in layers beneath it. For instance, imagine painting on a transparent sheet of plastic placed on top of a photograph - the way the paint blends or doesn't blend with the colors of the photograph (whether it’s transparent, translucent or opaque) is equivalent to what blending modes can achieve digitally. This helps to create a unified final image where the removal of a person is not detectable. Depending on the specific tones and colors in your image, various blending modes, such as 'Multiply', 'Screen', 'Overlay', or 'Soft light', can be employed for most refined and natural results. Another stunning application of blending modes is the ability to create detailed textures and overlays. You can use a texture image (like an old paper texture) in a layer above your primary image, then apply a blending mode that combines the two in a visually interesting way. This can create vintage looks, atmospheric effects or even surreal landscapes. In combination, the use of layer masks and blending modes brings a lot of control and capability, empowering you to make nuanced adjustments that revamp your image in a rich and authentic fashion. It might sound a little complex, but once you get the hang of it, it becomes an essential part of your editing toolkit. As such, mastering these techniques is crucial for every budding graphic designer or photo editor. Remember, the goal of this editing process is not just to remove someone from a photograph, but to do so seamlessly while enhancing the image's overall aesthetic appeal.
Creating a Seamless Background
of image manipulation techniques is the ability to create a seamless background. This process is critical when it comes to expertly removing someone from a picture. Seamless backgrounds reflect a flawless continuation of patterns, colors, and textures that make the image look naturally untouched. Effortlessly achieved through advanced image editing applications like Adobe Photoshop, creating a seamless background involves different steps. The first step is selecting and isolating the person or object you wish to remove. Technological advancements in digital imaging have optimized this initial process. Sophisticated selection tools like 'Magnetic Lasso', 'Quick Selection', and 'Magic Wand' can accurately define the boundaries of the element to be removed. Once the selection is made, the next step is to eradicate the selected portion by utilising the 'Content-Aware Fill' option. This tool synthesizes the surrounding patterns, texture, and lighting to predict and generate a suitable gap filler. Fine-tuning can be done using the clone stamp and healing brush tools, which can replicate parts of the image to smooth out any discrepancies in the photographs. However, if the background behind the removed person had a complex design or intricate detail, manual intervention might be necessary. This would require the user to artistically replicate the missing details, making this step more complex and time-consuming. As for the case of removing someone against a backdrop with a consistent pattern or single color gradient-- like a blue sky or a painted wall -- the procedure is relatively straightforward. Digital tools like gradient fill, paint bucket, spot healing brush can easily accomplish the task in a short amount of time. The art of creating a seamless background representative of an undisturbed natural context is no easy feat. To achieve professional-like results, one needs to practice, experiment with different tools, and develop an eye for detail. Often, slight variations in gradient, irregular texture repeats, or mismatched lighting can shatter the illusion and reveal the manipulations made. Additionally, it's not just about the tools but how effectively they are utilized. The manipulation has to be meticulously done, ensuring every pixel perfectly merges with the adjacent ones, not leaving behind any evident traces of alteration. In the evolving era of digital photography, E-commerce, and social media influencers, the ability to create a seamless background in image manipulation is not just a skill but an art that holds immense potential. Now, with the widespread availability of advanced imaging tools, anyone with a keen interest and an eye for detail can master this art.
Refining the Edges and Details
The effectiveness of completely removing a person from a photo lies in the delicate, yet complex step of refining the edges and details. Once the main process of replacement, either by cloning or patching, is performed, what remains is the equally important role of refining and blending the edited part. The edges, once refined, blend seamlessly with the rest of the photo, eliminating any traces of alteration. This is the point at which patience, proper tools, and technique come into play. Firstly, the challenge of refining edges should be approached with a zoomed-in view. This enhanced perspective provides an invaluable level of detail, which can reveal inconsistencies often overlooked in a zoomed-out view. Here, you'll be able to work meticulously and with high precision, perfecting every pixel along your borders. Using feathering or soft-brush tools assist in smoothening the hard lines, gradually blending the replaced area with the surrounding image seamlessly. Secondly, the concern of matching the light, color, texture, and noise of the replaced area with the rest of the picture arises. Here, tools like curves, hue/saturation sliders, or gradient maps come in handy. They help to maintain uniformity throughout the image by adjusting these aspects until they match the rest of the photo. This in-depth level of detail is what separates a good photoshop job from a poor one. Any discoloration, contrast differences, or light reflections that appear unnatural can be a telltale sign of editing and make the finish less believable. Another aspect of refining entails recreating the depth of the original image. Edits can flatten the picture or make certain areas appear out of focus. A technique such as dodge & burn can be used to mimic realistic light and shadow, reinstating any lost depth in the image. This step is typically time-consuming but fundamentally essential to achieving a natural-looking result. Lastly, preserve the natural imperfections of the original photo for a believable finish. The urge to over-smooth or over-correct the photo can make it seem artificial. Any slight blemishes, grain, or noise present in the original image can be deliberately replicated or maintained in the edited part to present an undetectably refined photo. In conclusion, refining the edges and details pushes beyond the mere replacement task; it delves into cultivating an advanced level of authenticity. It's about maintaining the essence, texture, lighting, and depth of the original photo, making the edited portion seem just as real. Hence, mastering this skill warrants hours of practice, technical knowledge, and an eye for detail—indeed a cornerstone of advanced techniques for removing someone from a picture.