How To Build A Deck Step By Step With Pictures
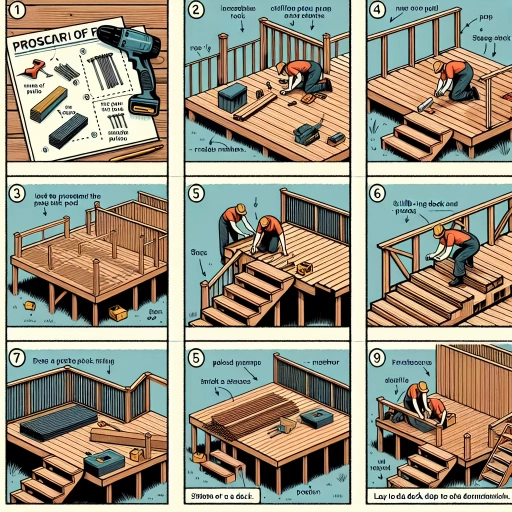
Building a deck can be a rewarding DIY project that adds value and beauty to your home. With the right tools and a little bit of know-how, you can create a stunning outdoor space that's perfect for entertaining, relaxing, or simply enjoying the fresh air. In this article, we'll take you through the process of building a deck step by step, with pictures to help guide you along the way. We'll cover everything from planning and preparation to building the deck frame and adding decking and railings. Whether you're a seasoned DIYer or a beginner, this guide will provide you with the confidence and knowledge you need to tackle this project. So, let's get started with the first step: planning and preparation.
Planning and Preparation
Planning and preparation are crucial steps in building a deck that is both safe and aesthetically pleasing. Before breaking ground, it's essential to assess the site and local building codes to ensure compliance and avoid costly mistakes. Additionally, determining the deck's size and layout is vital to create a functional and comfortable outdoor space. Furthermore, choosing the right materials and tools is necessary to ensure the deck's durability and longevity. By carefully considering these factors, homeowners can create a beautiful and functional deck that enhances their outdoor living experience. Assessing the site and local building codes is the first step in this process, and it's essential to get it right to set the foundation for a successful deck-building project.
Assessing the Site and Local Building Codes
When assessing the site and local building codes, it's essential to consider several factors to ensure a safe and compliant deck building project. Start by evaluating the site conditions, including the slope and drainage of the yard, as well as the location of any nearby utilities, such as electric, gas, and water lines. Check for any environmental concerns, like wetlands or endangered species habitats, that may impact your project. Next, research local building codes and regulations, which can vary significantly depending on your location. Familiarize yourself with the International Residential Code (IRC) and the International Building Code (IBC), as well as any local amendments or ordinances. Verify the required permits and inspections needed for your project, and ensure you understand the specific requirements for deck design, construction, and safety features, such as railings, guards, and footings. Additionally, check with your local government for any specific regulations regarding deck size, height, and location, as well as any homeowners association (HOA) rules or covenants that may apply. By carefully assessing the site and local building codes, you can avoid costly mistakes, ensure a safe and functional deck, and prevent potential fines or penalties.
Determining the Deck's Size and Layout
When determining the deck's size and layout, consider the space available, the purpose of the deck, and the style of your home. Start by measuring the area where you plan to build the deck, taking into account any obstacles such as trees, gardens, or slopes. Decide on the shape of your deck, whether it's a simple rectangle, a wraparound, or a multi-level design. Consider the size of the deck in relation to your home, ensuring it's proportional and visually appealing. Think about the flow of traffic and the placement of doors, windows, and stairs. A well-designed deck should have a clear path for movement and adequate space for furniture and decorations. Additionally, consider the direction of sunlight and wind to ensure your deck is comfortable and functional. You may also want to consult with local building codes and regulations to ensure your deck complies with safety standards. By carefully planning the size and layout of your deck, you can create a functional and enjoyable outdoor space that enhances your home's value and beauty.
Choosing the Right Materials and Tools
When it comes to building a deck, choosing the right materials and tools is crucial for a successful and long-lasting project. For the deck's structure, pressure-treated lumber is a popular choice due to its durability and resistance to rot and insect damage. However, it's essential to consider the type of wood and its grade, as it affects the overall appearance and stability of the deck. For the decking boards, options like cedar, redwood, and composite materials are popular for their natural beauty and low maintenance requirements. Additionally, consider the type of fasteners, such as screws or nails, and the type of decking hardware, like post anchors and joist hangers, to ensure a secure and sturdy structure. In terms of tools, a circular saw, drill, and impact driver are must-haves for cutting and assembling the deck's components. A tape measure, level, and square are also essential for ensuring accurate measurements and proper alignment. Furthermore, consider investing in a miter saw or a jigsaw for making precise angled cuts and curved cuts, respectively. A safety harness and a ladder or scaffolding system are also necessary for working at heights. By selecting the right materials and tools, you'll be well-prepared to tackle the deck-building process and achieve a professional-looking result.
Building the Deck Frame
Building a deck frame is a crucial step in creating a safe and sturdy outdoor living space. A well-constructed deck frame provides the foundation for the entire structure, supporting the weight of people, furniture, and other elements. To build a high-quality deck frame, it's essential to follow a series of steps that ensure stability, durability, and compliance with local building codes. The process begins with preparing the footings and piers, which provide the base for the deck's foundation. Next, the ledger board and rim joists are constructed to create the perimeter of the deck. Finally, the joists and beams are installed to provide additional support and structure. By following these steps, homeowners can create a deck frame that is both functional and aesthetically pleasing. In this article, we will explore each of these steps in detail, starting with preparing the footings and piers.
Preparing the Footings and Piers
Preparing the footings and piers is a crucial step in building a deck, as it provides a solid foundation for the entire structure. The footings are the concrete bases that transfer the weight of the deck to the ground, while the piers are the vertical columns that connect the footings to the deck frame. To prepare the footings and piers, start by marking the location of each footing and pier on the ground using a string and stakes. Then, dig holes for the footings, making sure they are deep enough to extend below the frost line in your area. Next, pour concrete into the holes, using a level to ensure the footings are perfectly level. Allow the concrete to set, then use a post anchor to secure the pier to the footing. Finally, fill in the holes around the piers with soil and compact it to create a solid base for the deck. It's essential to follow local building codes and regulations when preparing the footings and piers, as they may vary depending on your location and the type of deck you're building. By taking the time to properly prepare the footings and piers, you'll ensure a safe and sturdy deck that will last for years to come.
Constructing the Ledger Board and Rim Joists
Constructing the ledger board and rim joists is a crucial step in building a deck frame. The ledger board is a horizontal board that is attached to the house, providing a nailing surface for the deck's joists. To construct the ledger board, start by determining the location of the deck's ledger board in relation to the house's wall. Typically, the ledger board is installed about 1 inch below the top of the house's wall sheathing. Next, mark the location of the ledger board on the house's wall, using a level to ensure it is straight. Then, cut a piece of lumber to the required length, usually a 2x6 or 2x8 pressure-treated board. Attach the ledger board to the house's wall using 1/2-inch lag screws, spaced 16 inches on center. Make sure the ledger board is level and securely attached to the house. The rim joists are the vertical boards that run along the outside of the deck, providing additional support to the deck's frame. To construct the rim joists, cut two pieces of lumber to the required length, usually 2x6 or 2x8 pressure-treated boards. Attach the rim joists to the ledger board using 3-inch galvanized lag screws, spaced 16 inches on center. Make sure the rim joists are level and securely attached to the ledger board. The rim joists should be installed so that they are flush with the top of the ledger board. Finally, use a string line to ensure the rim joists are straight and level, and make any necessary adjustments. By constructing the ledger board and rim joists correctly, you will have a solid foundation for your deck's frame, ensuring a safe and sturdy structure for years to come.
Installing the Joists and Beams
Installing the joists and beams is a crucial step in building a deck frame. The joists are the horizontal beams that run between the ledger board and the rim joist, providing support for the decking boards. The beams, on the other hand, are the vertical posts that connect the joists to the footings, providing additional support and stability to the deck. To install the joists and beams, start by marking the location of the joists on the ledger board and the rim joist, using a chalk line to ensure accuracy. Next, cut the joists to the required length, using a miter saw or a circular saw. Install the joists by screwing them to the ledger board and the rim joist, using 3-inch screws. Make sure to space the joists evenly, typically 16 inches on center. Once the joists are installed, cut the beams to the required length and install them between the joists, using post base anchors to secure them to the footings. Use a level to ensure the beams are plumb and the joists are level. Finally, use a string line to check the alignment of the joists and beams, making any necessary adjustments before proceeding to the next step. By following these steps, you can ensure a sturdy and level deck frame that will support your decking boards and provide years of enjoyment.
Adding Decking and Railings
Adding decking and railings to your outdoor space can be a fantastic way to enhance its functionality and aesthetic appeal. Not only can it provide a comfortable area for relaxation and entertainment, but it can also increase the value of your property. When it comes to adding decking and railings, there are several key components to consider. First, you'll need to install the decking boards and fasteners, which will provide the foundation for your outdoor space. Next, you'll need to build the railings and guardrails, which will not only add a decorative touch but also ensure safety and security. Finally, if your deck is elevated, you'll need to add stairs and landings to provide easy access. In this article, we'll take a closer look at each of these components, starting with the installation of decking boards and fasteners.
Installing the Decking Boards and Fasteners
Installing the decking boards and fasteners is a crucial step in building a deck. Start by laying the first board along the house, ensuring it is aligned with the joists and securely fastened with screws or nails. Use a chalk line to mark the location of the remaining boards, spacing them evenly apart, typically 1/4 inch. Begin installing the boards from the outside edge of the deck, working your way inwards. Use a level to ensure the boards are properly aligned and a tape measure to maintain consistent spacing. For a more secure hold, use 2-1/2 inch screws or 3-1/2 inch nails, spaced 16 inches on center. When installing the fasteners, make sure to countersink them to avoid splitting the wood. To add extra stability, consider using hidden fasteners, such as deck clips or screws with a hidden head. As you install the decking boards, use a rubber mallet to tap them into place, ensuring a snug fit. Finally, use a circular saw or a jigsaw to cut the boards to fit around any obstructions, such as posts or stairs. By following these steps, you can create a sturdy and visually appealing deck that will provide years of enjoyment.
Building the Railings and Guardrails
Building the railings and guardrails is a crucial step in the deck-building process, as it provides safety and security for users. To start, you'll need to determine the height and style of your railings, taking into account local building codes and regulations. Typically, railings should be at least 36 inches high, with balusters spaced no more than 4 inches apart. You can choose from a variety of materials, such as wood, metal, or composite, and select a style that complements your deck's design. Once you've decided on the design, begin by installing the railing posts, which should be securely attached to the deck's frame. Next, attach the railing infill, such as balusters or glass panels, to the posts, making sure to space them evenly and securely. Finally, add the railing cap, which provides a finished look and helps to protect the railings from the elements. For guardrails, which are typically required for decks that are 30 inches or higher off the ground, you'll need to install a sturdy railing system that can withstand a certain amount of weight and pressure. This may involve using heavier-duty materials and more robust construction methods. Throughout the process, be sure to follow all safety guidelines and building codes, and consider consulting with a professional if you're unsure about any aspect of the process. By building sturdy and attractive railings and guardrails, you can create a safe and enjoyable outdoor space that you and your family can enjoy for years to come.
Adding Stairs and Landings (if applicable)
Adding stairs and landings to your deck can be a complex process, but with careful planning and execution, it can be a safe and functional addition to your outdoor space. When adding stairs, it's essential to consider the height of your deck and the number of risers needed to ensure a comfortable and safe climb. A general rule of thumb is to have one riser for every 7-8 inches of vertical rise, with a maximum of 7.75 inches between risers. Additionally, the tread depth should be at least 11 inches to provide ample space for foot placement. Landings, on the other hand, should be at least 36 inches deep and 36 inches wide to provide a safe and stable platform for users to rest or change direction. When building stairs and landings, it's crucial to use proper materials and construction techniques to ensure stability and durability. This includes using pressure-treated lumber for the stringers and treads, and securing the stairs to the deck frame with galvanized or stainless steel fasteners. Furthermore, it's essential to check local building codes and regulations for specific requirements and guidelines for adding stairs and landings to your deck. By following these guidelines and taking the necessary precautions, you can create a safe and functional staircase that complements your deck and enhances your outdoor living experience.