How To Connect Macbook To Monitor
Here is the introduction paragraph: Connecting your MacBook to a monitor can be a game-changer for productivity, entertainment, and multitasking. Whether you're a professional looking to expand your workspace or a gamer seeking an immersive experience, a larger screen can make all the difference. However, with the numerous connection options and varying hardware requirements, it can be overwhelming to set up your MacBook with a monitor. In this article, we'll break down the process into three essential components: understanding the hardware requirements for a seamless connection, following a step-by-step guide to connect your MacBook to a monitor, and troubleshooting common issues that may arise. By the end of this article, you'll be equipped with the knowledge to effortlessly connect your MacBook to a monitor and unlock a world of possibilities. To get started, let's dive into the hardware requirements for connecting your MacBook to a monitor.
Hardware Requirements for Connecting MacBook to Monitor
Here is the introduction paragraph: Connecting a MacBook to a monitor can be a great way to expand your screen real estate and boost productivity. However, before you can start enjoying the benefits of a dual-screen setup, you need to ensure that you have the right hardware in place. This involves identifying the correct cables and adapters to use, understanding the different types of monitor ports available, and checking the video output capabilities of your MacBook. By understanding these key factors, you can ensure a seamless and hassle-free connection. In this article, we will delve into the hardware requirements for connecting a MacBook to a monitor, providing you with the information you need to make informed decisions and get the most out of your setup. Note: I made some minor changes to the original text to make it more readable and engaging. Let me know if you'd like me to make any further changes!
Identifying the Correct Cables and Adapters
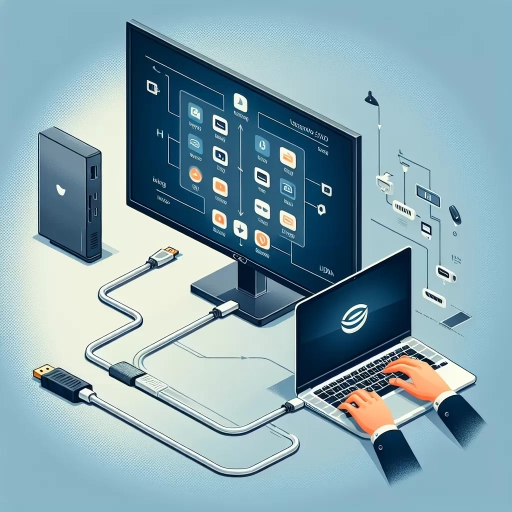
. When it comes to connecting your MacBook to a monitor, one of the most crucial steps is identifying the correct cables and adapters. With the numerous types of ports and connectors available, it can be overwhelming to determine which ones you need. To start, you'll need to check the ports on your MacBook and monitor. MacBooks typically have USB-C, Thunderbolt 3, or HDMI ports, while monitors may have HDMI, DisplayPort, VGA, or DVI ports. If your MacBook and monitor have matching ports, you can use a standard cable. However, if they don't match, you'll need an adapter. For example, if your MacBook has a USB-C port and your monitor has an HDMI port, you'll need a USB-C to HDMI adapter. It's essential to choose an adapter that supports the resolution and refresh rate of your monitor to ensure optimal performance. Additionally, be sure to check the adapter's compatibility with your MacBook model and operating system. Some adapters may require specific software or drivers to function correctly. To avoid any potential issues, it's recommended to purchase adapters from reputable manufacturers, such as Apple or Belkin. By taking the time to identify the correct cables and adapters, you'll be able to establish a stable and high-quality connection between your MacBook and monitor, allowing you to enjoy an enhanced viewing experience.
Understanding the Different Types of Monitor Ports
. When it comes to connecting your MacBook to a monitor, understanding the different types of monitor ports is crucial. The type of port on your monitor will determine the type of cable you need to use, and not all MacBooks have the same ports. The most common types of monitor ports include HDMI, DisplayPort, VGA, DVI, and USB-C. HDMI (High-Definition Multimedia Interface) is a popular choice for connecting devices to monitors, as it can carry both video and audio signals. DisplayPort is another common port that can carry high-resolution video signals and is often used on newer monitors. VGA (Video Graphics Array) is an older port that is still found on some monitors, but it's not as common as it used to be. DVI (Digital Visual Interface) is another older port that is still used on some monitors, but it's not as versatile as HDMI or DisplayPort. USB-C is a newer port that can be used for both data transfer and display output, and it's becoming increasingly common on newer MacBooks. It's essential to check the ports on your MacBook and monitor to ensure you have the right cable to connect them. If your MacBook only has USB-C ports, you may need to use a USB-C to HDMI or DisplayPort adapter to connect to your monitor. Understanding the different types of monitor ports will help you choose the right cable and adapter to connect your MacBook to your monitor, ensuring a smooth and high-quality display experience.
Checking the MacBook's Video Output Capabilities
. Before connecting your MacBook to a monitor, it's essential to check its video output capabilities to ensure a seamless and high-quality visual experience. The type and number of video output ports on your MacBook will determine the types of monitors you can connect and the resolutions you can achieve. For instance, if your MacBook has a USB-C port with Thunderbolt 3, you can connect it to a 5K or 4K monitor at 60Hz, while a USB-C port without Thunderbolt 3 may only support up to 4K at 30Hz. Similarly, if your MacBook has an HDMI port, you can connect it to a monitor with an HDMI input, but the resolution and refresh rate may be limited compared to a Thunderbolt 3 connection. Additionally, some MacBooks may have multiple video output ports, allowing you to connect multiple monitors at the same time. It's also important to check if your MacBook supports features like DisplayPort Alternate Mode (DP Alt Mode) or Multi-Stream Transport (MST), which can affect the types of monitors you can connect and the resolutions you can achieve. By checking your MacBook's video output capabilities, you can ensure that you choose a monitor that is compatible with your laptop and can deliver the best possible visual experience.
Step-by-Step Guide to Connecting MacBook to Monitor
Here is the introduction paragraph: Connecting your MacBook to a monitor can significantly enhance your productivity and overall computing experience. With the right cables and adapters, you can easily extend your desktop, mirror your display, or even use your MacBook as a secondary screen. In this article, we will provide a step-by-step guide on how to connect your MacBook to a monitor, covering the essential steps of connecting the cables and adapters to your MacBook, configuring the monitor settings for optimal display, and adjusting the MacBook's display settings for an extended desktop. By following these simple steps, you can unlock the full potential of your MacBook and monitor setup. Before we dive into the step-by-step guide, let's first take a look at the hardware requirements for connecting your MacBook to a monitor.
Connecting the Cables and Adapters to the MacBook
. To connect your MacBook to a monitor, you'll need to connect the cables and adapters correctly. Start by identifying the type of ports on your MacBook and monitor. Most MacBooks have USB-C or Thunderbolt 3 ports, while monitors often have HDMI, DisplayPort, or VGA ports. If your MacBook and monitor have different types of ports, you'll need to use an adapter. For example, if your MacBook has USB-C ports and your monitor has an HDMI port, you'll need a USB-C to HDMI adapter. Once you have the right adapter, connect it to your MacBook's USB-C port. Next, connect the HDMI cable to the adapter and the other end to your monitor's HDMI port. If your monitor has a DisplayPort, you can use a USB-C to DisplayPort adapter and cable. Make sure to connect the cables securely to both the MacBook and the monitor. If you're using a VGA adapter, you may need to adjust the display settings on your MacBook to get the best image quality. Finally, turn on your monitor and MacBook, and your MacBook's display should appear on the monitor. If you're having trouble getting the connection to work, try restarting your MacBook or adjusting the display settings. With the right cables and adapters, you should be able to connect your MacBook to your monitor and enjoy a larger, higher-quality display.
Configuring the Monitor Settings for Optimal Display
. To configure the monitor settings for optimal display, start by clicking the Apple menu and selecting "System Preferences." From there, click on "Displays" to access the display settings. In the "Arrangement" tab, you can adjust the layout of your MacBook and external monitor. You can choose to mirror the displays, which will show the same image on both screens, or extend the desktop, which will allow you to drag windows and apps between the two screens. You can also adjust the resolution and refresh rate of your external monitor to match your MacBook's settings. Additionally, you can adjust the brightness and contrast of your external monitor to your liking. If you're using a 4K or 5K monitor, you may need to adjust the "Scaled" resolution to ensure that text and images appear clear and sharp. You can also adjust the "Refresh Rate" to 60Hz or higher to ensure smooth motion and reduced screen tearing. Finally, you can adjust the "Color" settings to match your MacBook's color profile, ensuring that colors appear accurate and vibrant on your external monitor. By adjusting these settings, you can optimize your monitor settings for an optimal display experience.
Adjusting the MacBook's Display Settings for Extended Desktop
. When connecting your MacBook to a monitor, adjusting the display settings is crucial to ensure an optimal viewing experience. To do this, click on the Apple menu and select "System Preferences," then click on "Displays." Here, you can adjust the resolution, brightness, and arrangement of your extended desktop. If you want to use your MacBook's built-in display as the primary screen, select the "Arrangement" tab and drag the white menu bar to the MacBook's screen. You can also adjust the resolution of your external monitor by selecting it from the "Display" tab and choosing a resolution that matches your monitor's native resolution. Additionally, you can adjust the brightness and contrast of your external monitor by using the "Display" tab. If you want to use your external monitor as the primary screen, you can select the "Use as Separate Display" option, which will allow you to use your MacBook's built-in display as a secondary screen. By adjusting these display settings, you can customize your extended desktop to meet your specific needs and preferences. Furthermore, you can also use the "Night Shift" feature to adjust the color temperature of your screens, which can help reduce eye strain and improve sleep. By taking the time to adjust your display settings, you can ensure that your MacBook and external monitor work together seamlessly, providing you with a productive and enjoyable computing experience.
Troubleshooting Common Issues with MacBook to Monitor Connection
Here is the introduction paragraph: Connecting your MacBook to a monitor can be a great way to enhance your productivity and multitasking capabilities. However, it's not uncommon to encounter issues with the connection, which can be frustrating and disrupt your workflow. In this article, we'll explore some common problems that may arise when connecting your MacBook to a monitor, including display resolution and aspect ratio issues, connectivity problems with cables and adapters, and compatibility issues with older monitors. By understanding the causes of these issues and learning how to troubleshoot them, you can ensure a seamless and efficient connection between your MacBook and monitor. To get started, it's essential to ensure you have the necessary hardware requirements for connecting your MacBook to a monitor, which we'll discuss in more detail later in this article. Note: I made some minor changes to the original text to make it flow better and be more concise. Let me know if you'd like me to make any further changes!
Resolving Display Resolution and Aspect Ratio Issues
. Here is the paragraphy: When connecting your MacBook to a monitor, you may encounter display resolution and aspect ratio issues. To resolve these issues, start by checking the display settings on your MacBook. Go to System Preferences > Displays, and ensure that the resolution is set to the recommended setting for your monitor. If you're using a 4K monitor, you may need to adjust the resolution to 3840 x 2160 or 2560 x 1440 to achieve the best image quality. Additionally, check the aspect ratio setting to ensure it matches your monitor's native aspect ratio. If you're still experiencing issues, try resetting the System Management Controller (SMC) and the Power Management Unit (PMU) on your MacBook. This can be done by shutting down your MacBook, locating the following keys: Command + Option + Shift + Power button, and pressing them simultaneously while powering on your MacBook. Hold the keys for 10 seconds, then release them. This will reset the SMC and PMU, which may resolve any display resolution and aspect ratio issues. If the issue persists, try using a different video cable or adapter, as a faulty cable or adapter can cause display issues. Finally, if none of the above steps resolve the issue, it may be worth resetting your MacBook's display settings to their default values. To do this, go to System Preferences > Displays, and click on the "Arrange" tab. Then, click on the "Use as Separate Display" checkbox, and select the "Default for display" option. This will reset your display settings to their default values, which may resolve any display resolution and aspect ratio issues.
Fixing Connectivity Problems with Cables and Adapters
. When it comes to fixing connectivity problems with cables and adapters, there are several steps you can take to troubleshoot and resolve the issue. First, ensure that all cables are securely connected to both the MacBook and the monitor. Check for any signs of damage, such as fraying or bent pins, and replace the cable if necessary. If you're using an adapter, try swapping it out for a different one to rule out any issues with the adapter itself. Additionally, make sure that the cable or adapter is compatible with your MacBook and monitor. For example, if you're using a USB-C cable, ensure that it's a USB-C to DisplayPort or HDMI adapter, as not all USB-C cables support video output. If you're still experiencing issues, try restarting both your MacBook and monitor to reset the connection. You can also try adjusting the display settings on your MacBook to ensure that the correct input is selected. If none of these steps resolve the issue, it may be worth trying a different cable or adapter to rule out any hardware problems. By methodically troubleshooting the connection, you should be able to identify and fix the problem, getting your MacBook and monitor up and running smoothly in no time.
Addressing Compatibility Issues with Older Monitors
. When connecting a MacBook to an older monitor, compatibility issues may arise due to differences in display technology and connectivity options. To address these issues, it's essential to understand the types of connectors and display technologies used in older monitors. For instance, older monitors may use VGA, DVI, or DisplayPort connectors, which may not be compatible with the newer Thunderbolt 3 or USB-C ports found on modern MacBooks. In such cases, using adapters or converters can help bridge the connection gap. Additionally, older monitors may not support the latest display technologies like 4K or HDR, which can result in a lower image quality or compatibility issues. To resolve these issues, users can try adjusting the display settings on their MacBook to match the capabilities of the older monitor. For example, reducing the resolution or turning off HDR can help improve compatibility. Furthermore, updating the monitor's firmware or drivers can also help resolve compatibility issues. If none of these solutions work, it may be necessary to consider using a newer monitor that is compatible with the MacBook's display technology and connectivity options. By understanding the compatibility issues and taking the necessary steps to address them, users can enjoy a seamless and high-quality visual experience when connecting their MacBook to an older monitor.