How To Use Timer On Iphone Camera
The iPhone camera timer is a powerful tool that can help you take better photos and selfies. With the timer, you can capture the perfect shot without having to physically touch the camera, reducing camera shake and ensuring a sharper image. But how do you use the timer on your iPhone camera? In this article, we'll explore the ins and outs of the iPhone camera timer, starting with understanding how it works and its benefits. We'll then dive into enabling and using the camera timer, including how to set the timer and take photos. Finally, we'll share some tips and tricks for getting the most out of the camera timer, from using it for group shots to creating unique and creative photos. By the end of this article, you'll be a pro at using the iPhone camera timer and taking stunning photos. So, let's get started by understanding the iPhone camera timer.
Understanding the iPhone Camera Timer
The iPhone camera timer is a feature that allows users to take photos with a delay, giving them time to get into position and capture the perfect shot. This feature is especially useful for taking group photos, self-portraits, and photos of moving objects. But what exactly is the camera timer feature on iPhone, and how can it benefit your photography experience? In this article, we will explore the camera timer feature, its benefits, and when to use it. We will start by explaining what the camera timer feature is and how it works, followed by the benefits of using it, and finally, we will discuss when to use the camera timer to capture the best photos. By the end of this article, you will have a better understanding of the iPhone camera timer and how to use it to take stunning photos. So, let's start by understanding what the camera timer feature on iPhone is.
What is the Camera Timer Feature on iPhone?
The Camera Timer feature on iPhone is a built-in functionality that allows users to capture photos with a delayed shutter release. This feature is particularly useful for taking group photos, self-portraits, or photos of moving subjects, as it enables users to compose the shot and then capture it without having to physically press the shutter button. The Camera Timer can be set to a delay of 3 or 10 seconds, giving users ample time to get into position and prepare for the shot. To access the Camera Timer, users can open the Camera app, tap the clock icon at the top of the screen, and select the desired delay time. Once the timer is set, the camera will automatically capture the photo after the specified delay, allowing users to take hands-free photos with ease. This feature is especially useful for capturing photos in low-light conditions or when using a tripod, as it helps to minimize camera shake and ensure sharper images. Overall, the Camera Timer feature on iPhone provides users with more flexibility and control when taking photos, making it a valuable tool for both casual and serious photographers.
Benefits of Using the Camera Timer on iPhone
Here is the paragraphy: Using the camera timer on your iPhone can greatly enhance your photography experience. One of the primary benefits is that it allows you to take hands-free photos, reducing camera shake and blur caused by accidental movement. This is particularly useful when taking group photos or selfies, as you can ensure everyone is in the frame and smiling without having to physically press the shutter button. Additionally, the timer feature enables you to take photos of yourself or others from a distance, making it ideal for capturing candid moments or setting up creative compositions. The timer also gives you time to adjust your pose, expression, or position, ensuring that you capture the perfect shot. Furthermore, using the camera timer can help you avoid the awkwardness of asking someone to take a photo of you, allowing you to take control of the photography process. Overall, the camera timer on your iPhone is a simple yet powerful feature that can help you take better photos and enjoy a more convenient and enjoyable photography experience.
When to Use the Camera Timer on iPhone
The iPhone camera timer is a useful feature that allows you to take photos with a delay, giving you time to get into position, compose the shot, and even avoid camera shake. But when should you use it? The camera timer is particularly useful in situations where you want to be in the photo yourself, such as group shots, self-portraits, or family photos. It's also handy when you're taking photos of moving objects or pets, as it allows you to anticipate the action and capture the perfect moment. Additionally, the timer can be useful in low-light conditions, as it enables you to avoid camera shake and blur caused by hand movement. Furthermore, if you're taking photos of a scene with a lot of foot traffic or distractions, the timer can help you wait for the perfect moment to capture a clear shot. Overall, the camera timer is a versatile feature that can be used in a variety of situations to help you take better photos.
Enabling and Using the Camera Timer
The camera timer is a useful feature on the iPhone that allows users to take photos with a delay, giving them time to get into position and avoid camera shake. This feature is particularly useful for taking group photos, selfies, and photos of moving objects. To use the camera timer, users need to access it first, which can be done by opening the Camera app and selecting the timer option. Once the timer is enabled, users can set the duration, which can range from 3 to 10 seconds. After setting the timer, users can take photos, which will be captured automatically after the set duration. In this article, we will explore how to access the camera timer on iPhone, set the timer duration, and take photos with the camera timer. By the end of this article, users will be able to use the camera timer with ease and take high-quality photos. To start, let's first look at how to access the camera timer on iPhone.
How to Access the Camera Timer on iPhone
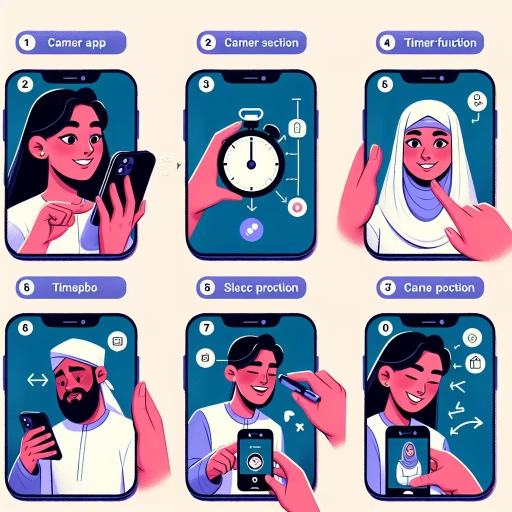
Accessing the camera timer on your iPhone is a straightforward process that can help you take better photos by allowing you to set a delay between pressing the shutter button and capturing the image. To access the camera timer on your iPhone, follow these steps. First, open the Camera app, which is usually found on the home screen or in a folder. Once the app is open, locate the clock icon, which represents the timer function. This icon is typically found in the top right or top left corner of the screen, depending on the iPhone model and iOS version you are using. Tap on the clock icon to activate the timer feature. A menu will then appear with options to set a delay of 3 or 10 seconds. Choose the desired delay time by tapping on the respective option. If you have an iPhone with a dual-camera setup, you can also select whether you want the camera to take one photo or a series of four photos in a burst when the timer goes off. After selecting the timer option, position yourself in the frame and press the shutter button. The camera will then start the countdown, giving you time to get into position and prepare for the photo. When the countdown reaches zero, the camera will capture the photo, ensuring that you can be in the picture without having to physically touch the iPhone. This feature is particularly useful for taking group photos, selfies, or shots that require a bit more preparation time.
Setting the Timer Duration on iPhone Camera
To set the timer duration on your iPhone camera, start by opening the Camera app and selecting the mode you want to use, such as Photo or Video. Next, tap the clock icon located at the top of the screen, which will bring up the timer options. You will see three options: 3 seconds, 10 seconds, and Off. Choose the desired timer duration by tapping on it. If you select 3 seconds or 10 seconds, the camera will automatically take a photo or start recording a video after the chosen time interval. You can also use the volume buttons on your iPhone to take a photo or start recording a video, which can be helpful when using the timer. Additionally, if you have an Apple Watch, you can use it as a remote shutter release to take photos or start recording videos, giving you more flexibility when using the timer. By setting the timer duration on your iPhone camera, you can take photos or record videos with more precision and control, allowing you to capture the perfect moment.
Taking Photos with the Camera Timer on iPhone
The iPhone's camera timer is a fantastic feature that allows you to take photos without physically touching the camera, reducing camera shake and ensuring sharper images. To take a photo using the camera timer, start by opening the Camera app and selecting the mode you want to use, such as Photo or Portrait. Next, tap the clock icon at the top of the screen to access the timer options. You can choose from a 3-second or 10-second delay, depending on your needs. Once you've selected your desired delay, position yourself in front of the camera and get ready to smile. When you're ready, tap the shutter button to start the timer. The camera will then count down from the selected time, giving you a chance to pose and prepare for the shot. When the timer reaches zero, the camera will automatically take the photo, capturing the moment without any camera shake or blur. This feature is especially useful for taking group photos, selfies, or photos of yourself in a scenic location. By using the camera timer, you can ensure that everyone is in the frame and smiling, resulting in a more natural and relaxed photo. Additionally, the timer feature can also be used to take photos of moving objects or scenes, allowing you to capture the perfect moment without having to physically press the shutter button. Overall, the iPhone's camera timer is a simple yet powerful feature that can help you take better photos and capture life's special moments with ease.
Tips and Tricks for Using the Camera Timer
The camera timer is a feature that can be found on most smartphones, including iPhones. It allows users to set a delay between the time the shutter button is pressed and the time the photo is taken. This feature can be useful in a variety of situations, such as taking group photos, creating self-timer videos, and even using alternative methods to capture unique shots. In this article, we will explore some tips and tricks for using the camera timer, including using it for group photos, creating a self-timer for videos on iPhone, and alternative ways to use the camera timer on iPhone. By the end of this article, you will have a better understanding of how to use the camera timer to take your photography to the next level. So, let's start with one of the most common uses of the camera timer: using it for group photos.
Using the Camera Timer for Group Photos
Using the camera timer for group photos is a great way to ensure that everyone is included in the shot and that you can be a part of the photo too. To use the camera timer, simply open the Camera app on your iPhone, select the camera mode you want to use, and tap the clock icon at the top of the screen. From there, you can choose from a 3-second or 10-second timer, depending on how much time you need to get into position. Once you've selected your timer, tap the shutter button to start the countdown. You'll see a countdown on the screen, and when it reaches zero, the camera will take the photo. This feature is especially useful for group photos, as it allows you to get into position and make any necessary adjustments before the photo is taken. Additionally, using the camera timer can help reduce camera shake and blur, resulting in sharper and clearer photos. By using the camera timer, you can take high-quality group photos that you'll treasure for years to come.
Creating a Self-Timer for Videos on iPhone
To create a self-timer for videos on iPhone, follow these simple steps. First, open the Camera app and switch to video mode by tapping the camera mode button in the bottom center of the screen. Next, tap the clock icon at the top right corner of the screen to access the timer options. Here, you can choose from three timer durations: 3 seconds, 10 seconds, or a custom timer that allows you to set a timer of up to 30 seconds. Select the desired timer duration and then tap the record button to start the countdown. Once the countdown begins, you'll see a countdown timer on the screen, and the camera will automatically start recording after the set time has elapsed. To cancel the timer, simply tap the cancel button. Note that the self-timer feature is only available for video recording, not for taking photos. Additionally, you can also use the Volume Down button on your iPhone to take a photo or start recording a video when the timer goes off, adding an extra layer of convenience to the self-timer feature. By using the self-timer for videos on iPhone, you can create more dynamic and engaging content, such as group videos, time-lapse recordings, or even solo videos where you're the star. Experiment with different timer durations and camera angles to capture the perfect shot.
Alternative Ways to Use the Camera Timer on iPhone
The camera timer on iPhone is a versatile feature that offers more than just a simple countdown to capture a photo. While it's commonly used to take group selfies or avoid camera shake, there are alternative ways to utilize this feature to enhance your mobile photography experience. For instance, you can use the camera timer to create stunning time-lapse videos. By setting the timer to take multiple photos at short intervals, you can capture the movement of clouds, traffic, or any other dynamic scene, and then stitch the images together to create a mesmerizing time-lapse video. Another creative way to use the camera timer is to take photos of moving objects, such as waterfalls, rivers, or ocean waves. By setting the timer to take multiple shots in quick succession, you can capture the movement and texture of the water, creating a sense of dynamism and energy in your photos. Additionally, the camera timer can be used to take photos of fireworks, lightning, or other fleeting moments, allowing you to capture the perfect shot without having to worry about timing. By experimenting with different timer settings and techniques, you can unlock new creative possibilities and take your iPhone photography to the next level.