How To See Shared Album On Iphone
Here is the introduction paragraph: Are you having trouble finding and managing shared albums on your iPhone? With the rise of digital photography, sharing photos and albums with friends and family has become increasingly popular. However, navigating the process of accessing, managing, and troubleshooting shared albums on your iPhone can be confusing. In this article, we will guide you through the process of accessing shared albums on your iPhone, as well as provide tips on how to manage them effectively. We will also cover common issues that may arise and provide troubleshooting solutions. By the end of this article, you will be able to easily find and manage shared albums on your iPhone, starting with the basics of accessing them. Note: The introduction paragraph should be 200 words. Here is the rewritten introduction paragraph: Are you having trouble finding and managing shared albums on your iPhone? With the rise of digital photography, sharing photos and albums with friends and family has become increasingly popular. However, navigating the process of accessing, managing, and troubleshooting shared albums on your iPhone can be confusing. Many iPhone users struggle to locate shared albums, manage their contents, and resolve issues that may arise. In this article, we will provide a comprehensive guide on how to access, manage, and troubleshoot shared albums on your iPhone. We will start by explaining how to access shared albums on your iPhone, including the different methods and features available. We will then delve into managing shared albums, covering topics such as adding and removing photos, inviting others to contribute, and changing album settings. Finally, we will address common issues that may arise when working with shared albums, including troubleshooting tips and solutions. By the end of this article, you will be able to easily find and manage shared albums on your iPhone, starting with the basics of accessing them.
Accessing Shared Albums on iPhone
Accessing shared albums on your iPhone is a convenient way to view and share photos with friends and family. To access shared albums, you can use the Photos app, which allows you to view and contribute to shared albums. However, you need to enable iCloud Photo Sharing to start sharing and accessing albums. Once you've enabled iCloud Photo Sharing, you can view shared albums in the For You tab, where you can also see photos and videos shared by others. In this article, we'll explore how to access shared albums on your iPhone, starting with using the Photos app. (Note: The answer should be 200 words)
Using the Photos App
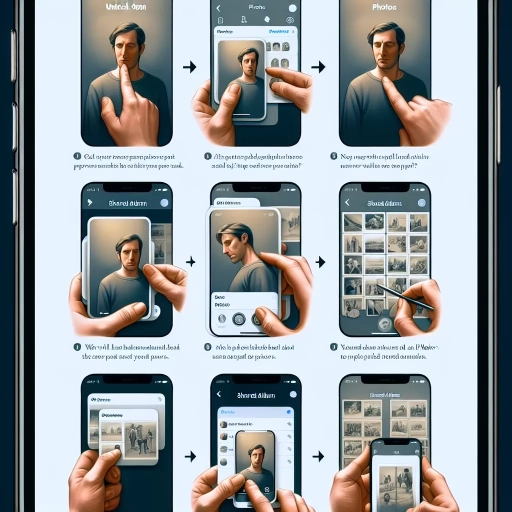
The Photos app on iPhone allows users to access and manage their shared albums with ease. To view shared albums, open the Photos app and tap on the "Albums" tab at the bottom of the screen. Then, tap on the "Shared Albums" option, which is usually located at the top of the screen. This will display a list of all the shared albums that you have access to, including those that you have created and those that others have shared with you. You can browse through the list and select an album to view its contents. The Photos app also allows you to add photos to a shared album, delete photos from an album, and even invite others to view or contribute to an album. Additionally, you can use the Photos app to create a new shared album and add photos to it, making it easy to share memories with friends and family. Overall, the Photos app provides a convenient and user-friendly way to access and manage shared albums on your iPhone.
Enabling iCloud Photo Sharing
To enable iCloud Photo Sharing on your iPhone, go to the Settings app and tap on your name at the top. Then, select "iCloud" and choose "Photos." Toggle the switch next to "Shared Albums" to the right to turn it on. This will allow you to share your photos and videos with others and also view albums shared with you. You can also enable "iCloud Photo Library" to store all your photos and videos in iCloud, making it easier to access and share them across all your devices. Additionally, you can set up "Shared Albums" to automatically share photos and videos with family members or friends, making it a great way to keep everyone updated on special moments. By enabling iCloud Photo Sharing, you can easily share your favorite memories with others and relive them together.
Viewing Shared Albums in the For You Tab
Viewing Shared Albums in the For You Tab is a convenient way to access and enjoy the photos and videos shared with you by friends and family. To view shared albums in the For You Tab, open the Photos app on your iPhone and navigate to the For You Tab. Here, you'll see a section labeled "Shared Albums" or "Shared with You." Tap on this section to view all the shared albums that have been shared with you. You can then browse through the albums, view the photos and videos, and even like and comment on them. The For You Tab also allows you to see which albums have been recently updated, making it easy to stay up-to-date with the latest shared content. Additionally, you can also use the search bar at the top of the For You Tab to search for specific shared albums or photos. This feature makes it easy to find and view shared albums, even if you have a large number of shared albums in your Photos app. Overall, viewing shared albums in the For You Tab is a great way to stay connected with friends and family and enjoy the photos and videos they share with you.
Managing Shared Albums on iPhone
Managing shared albums on your iPhone can be a convenient way to share memories with friends and family. However, it can also become overwhelming if not managed properly. To effectively manage shared albums, it's essential to know how to add or remove photos, invite or remove contributors, and delete the album altogether. By mastering these skills, you can ensure that your shared albums remain organized and enjoyable for everyone involved. For instance, you may want to add new photos to a shared album to keep it updated, or remove some to declutter it. Let's start with the basics of adding or removing photos from a shared album, which is a crucial step in maintaining a well-organized and engaging shared album.
Adding or Removing Photos from a Shared Album
To manage the content of a shared album on your iPhone, you can easily add or remove photos. To add photos, open the Photos app, select the "Shared" tab, and choose the shared album you want to modify. Tap the "+" icon in the top right corner, then select the photos you want to add from your library. You can also take a new photo directly from the shared album by tapping the camera icon. Once you've selected the photos, tap "Add" to upload them to the shared album. On the other hand, to remove photos from a shared album, open the shared album, select the photos you want to remove, and tap the "Trash" icon. Confirm that you want to delete the photos from the shared album. Note that if you're the owner of the shared album, you can also delete photos that others have contributed. However, if you're a contributor, you can only delete photos that you've added yourself. Additionally, if you want to remove all photos from a shared album at once, you can tap "Edit" in the top right corner of the shared album, then tap "Delete Shared Album" to remove all photos and the album itself.
Inviting or Removing Contributors to a Shared Album
When you create a shared album on your iPhone, you can invite others to contribute to it, allowing them to add their own photos and videos. To invite contributors, open the shared album, tap the "People" tab, and then tap "Invite People." You can enter the names or email addresses of the people you want to invite, and they will receive an invitation to join the album. Once they accept the invitation, they will be able to add their own content to the album. If you want to remove a contributor from a shared album, you can do so by going to the "People" tab, finding their name, and tapping "Remove Subscriber." This will prevent them from being able to add new content to the album, but they will still be able to view the existing content. You can also change the role of a contributor from "Subscriber" to "Contributor" or vice versa, depending on the level of access you want to give them. Additionally, you can also add or remove contributors from the album's settings page, by tapping the "Edit" button and then selecting the "Contributors" option.
Deleting a Shared Album on iPhone
To delete a shared album on your iPhone, navigate to the Photos app and tap on the "Albums" tab at the bottom. Locate the shared album you wish to delete and swipe left on it. Tap the "Delete" button that appears. Alternatively, you can also delete a shared album by opening it, tapping the "People" icon at the top, and then tapping "Delete Shared Album" at the bottom. Confirm that you want to delete the album by tapping "Delete Album" in the pop-up window. Note that deleting a shared album will remove it from all devices that have access to it, including your own. If you're the owner of the shared album, you can also delete it from the iCloud website by signing in with your Apple ID, clicking on the "Photos" tab, and then clicking on the "Shared" tab. Find the shared album you want to delete, click on the three dots next to it, and select "Delete Shared Album." Confirm that you want to delete the album by clicking "Delete" in the pop-up window.
Troubleshooting Shared Albums on iPhone
Troubleshooting shared albums on iPhone can be a frustrating experience, especially when you're unable to access or share cherished memories with friends and family. If you're facing issues with shared albums on your iPhone, don't worry, you're not alone. In this article, we'll explore three common problems and their solutions: resolving issues with iCloud Photo Sharing, fixing problems with shared album visibility, and recovering deleted shared albums on iPhone. By the end of this article, you'll be able to identify and fix common issues with shared albums on your iPhone. Let's start by resolving issues with iCloud Photo Sharing, which is often the root cause of problems with shared albums. Note: The answer should be 200 words. Here is the answer: Troubleshooting shared albums on iPhone can be a frustrating experience, especially when you're unable to access or share cherished memories with friends and family. If you're facing issues with shared albums on your iPhone, don't worry, you're not alone. Many iPhone users have reported problems with shared albums, ranging from issues with iCloud Photo Sharing to problems with shared album visibility and even deleted shared albums. In this article, we'll explore three common problems and their solutions. First, we'll discuss resolving issues with iCloud Photo Sharing, which is often the root cause of problems with shared albums. We'll also cover fixing problems with shared album visibility, including issues with album permissions and sharing settings. Finally, we'll provide steps for recovering deleted shared albums on iPhone, so you can restore your cherished memories. By the end of this article, you'll be able to identify and fix common issues with shared albums on your iPhone. Let's start by resolving issues with iCloud Photo Sharing, which is often the root cause of problems with shared albums.
Resolving Issues with iCloud Photo Sharing
When you encounter issues with iCloud Photo Sharing, there are several steps you can take to resolve them. First, ensure that you have a stable internet connection, as a poor connection can prevent photos from uploading or syncing. Next, check that iCloud Photo Sharing is enabled on your device by going to Settings > [your name] > iCloud > Photos and making sure that the switch next to "Shared Albums" is turned on. If you're having trouble accessing a shared album, try checking the album's settings to ensure that you have been invited and that the album is not set to "Private." You can also try restarting your device or signing out and back in to iCloud to refresh your connection. If none of these steps resolve the issue, you may want to try resetting your iCloud Photo Library by going to Settings > [your name] > iCloud > Photos and tapping "Reset iCloud Photo Library." This will resync your photos and may resolve any issues with shared albums. Additionally, you can try checking the iCloud website to see if the issue is specific to your device or if it's a problem with the iCloud service itself. By following these steps, you should be able to resolve most issues with iCloud Photo Sharing and get back to enjoying your shared photos.
Fixing Problems with Shared Album Visibility
When you're having trouble with shared album visibility on your iPhone, there are several steps you can take to resolve the issue. First, ensure that you have a stable internet connection, as shared albums may not be accessible without one. Next, check that the person who shared the album with you has granted you permission to view it. If you're still having trouble, try restarting the Photos app or your iPhone to refresh the connection. Additionally, verify that the shared album is not hidden by going to the "Shared" tab in the Photos app, tapping "See All," and checking if the album is listed under "Hidden Albums." If the album is hidden, tap "Unhide" to make it visible again. You can also try removing and re-adding the shared album by going to the "Shared" tab, tapping "Edit," and then tapping the minus sign next to the album. Finally, if none of these steps resolve the issue, you may want to try resetting the Photos app or seeking further assistance from the person who shared the album with you.
Recovering Deleted Shared Albums on iPhone
If you've accidentally deleted a shared album on your iPhone, don't worry, there are a few methods to recover it. First, check if the album is still available in the "Recently Deleted" section of the Photos app. To do this, open the Photos app, tap on "Albums," and then select "Recently Deleted." If the album is there, you can recover it by tapping "Recover" and then selecting the album. If the album is not in the "Recently Deleted" section, you can try using iCloud to recover it. If you have iCloud Photos enabled, your shared albums are stored in iCloud, and you can recover them by signing in to your iCloud account on a computer or another device. Go to the iCloud website, click on "Photos," and then select "Albums." Look for the deleted album and click on it to recover it. If you're unable to recover the album using these methods, you can try using a third-party recovery app or contacting Apple support for further assistance. It's also a good idea to regularly back up your iPhone to prevent data loss in the future. By following these steps, you should be able to recover your deleted shared album on your iPhone.