How To Keep Screen On Iphone
Here is the introduction paragraph: Are you tired of constantly tapping the screen to keep it on while reading, browsing, or watching videos on your iPhone? Keeping the screen on can be a frustrating experience, especially when you need to focus on the content without interruptions. Fortunately, there are several ways to keep your iPhone screen on for an extended period. In this article, we will explore three effective methods to achieve this: adjusting auto-lock settings, using Screen Time and Guided Access, and utilizing third-party apps and accessories. By implementing these techniques, you can enjoy uninterrupted screen time and enhance your overall iPhone experience. To start, let's dive into the simplest method: adjusting auto-lock settings.
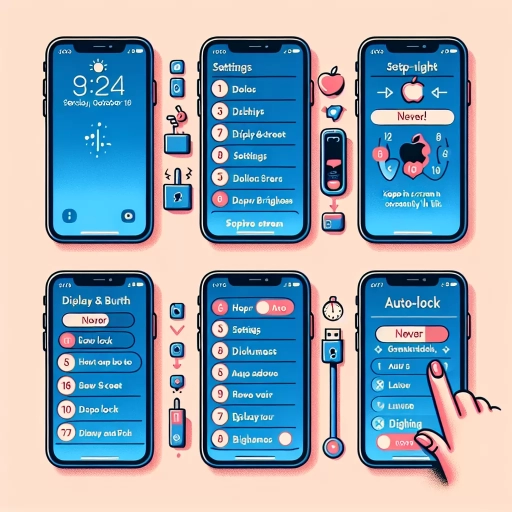
Adjusting Auto-Lock Settings
Adjusting Auto-Lock Settings can be a game-changer for individuals who want to optimize their device's battery life and enhance their overall user experience. By tweaking the Auto-Lock settings, users can ensure that their device remains active for the right amount of time, preventing unnecessary battery drain and minimizing distractions. In this article, we will explore three key aspects of adjusting Auto-Lock Settings: accessing the settings, choosing the right Auto-Lock time, and disabling Auto-Lock for specific apps. By understanding these concepts, users can tailor their device to their unique needs and preferences. To get started, let's dive into the first step: accessing Auto-Lock Settings.
Accessing Auto-Lock Settings
To access the auto-lock settings on your iPhone, navigate to the "Settings" app, which is typically found on the home screen. Once you're in the Settings app, scroll down and tap on "Display & Brightness." Within this section, you'll find the "Auto-Lock" option, which is usually located towards the bottom of the screen. Tapping on "Auto-Lock" will bring up a menu with various time intervals, ranging from 30 seconds to 5 minutes, as well as an option to turn auto-lock off entirely. Selecting one of these options will adjust the auto-lock setting on your iPhone, allowing you to customize how long your screen stays on before automatically locking.
Choosing the Right Auto-Lock Time
Choosing the right auto-lock time is crucial to balance between convenience and battery life. If the auto-lock time is set too short, you may find yourself constantly re-entering your passcode or using Face ID, which can be frustrating. On the other hand, if the auto-lock time is set too long, your iPhone's battery may drain faster, and your device may be more vulnerable to unauthorized access. To choose the right auto-lock time, consider your usage habits and environment. If you use your iPhone frequently, a shorter auto-lock time, such as 30 seconds or 1 minute, may be suitable. However, if you use your iPhone less frequently or in a secure environment, a longer auto-lock time, such as 5 minutes, may be more convenient. Additionally, you can also consider enabling the "Auto-Lock" feature when your iPhone is connected to a power source, so your screen stays on while charging. Ultimately, the right auto-lock time depends on your individual needs and preferences, so experiment with different settings to find the perfect balance between convenience and battery life.
Disabling Auto-Lock for Specific Apps
Disabling Auto-Lock for Specific Apps is a feature that allows you to keep your iPhone screen on while using certain apps, without having to adjust the overall Auto-Lock settings. This feature is particularly useful for apps that require extended screen time, such as video streaming apps, games, or educational apps. To disable Auto-Lock for specific apps, go to Settings > General > Auto-Lock, and then select the "Never" option. However, this will disable Auto-Lock for all apps, which may not be desirable. Instead, you can use the "Guided Access" feature, which allows you to lock your iPhone to a single app and disable Auto-Lock for that app only. To use Guided Access, go to Settings > General > Accessibility > Guided Access, and then toggle the switch to the "On" position. You can then select the app you want to use and triple-click the Home button to activate Guided Access. Once activated, your iPhone screen will remain on until you triple-click the Home button again to exit Guided Access. Alternatively, you can use third-party apps, such as "Stay Awake" or "No Sleep", which allow you to disable Auto-Lock for specific apps or for a set period of time. These apps can be downloaded from the App Store and can be configured to keep your iPhone screen on for as long as you need. By disabling Auto-Lock for specific apps, you can enjoy uninterrupted screen time and make the most of your iPhone experience.
Using Screen Time and Guided Access
In today's digital age, managing screen time and ensuring a safe online experience for children and individuals with disabilities is crucial. Apple's Screen Time and Guided Access features provide a comprehensive solution to this challenge. By utilizing these features, users can set limits on screen time, block inappropriate content, and restrict access to certain apps and websites. To get started, it's essential to understand how to enable Screen Time and Guided Access, set up these features, and customize their settings to suit individual needs. In this article, we'll explore how to enable Screen Time and Guided Access, set up these features, and customize their settings to ensure a safe and healthy online experience. By the end of this article, you'll be equipped with the knowledge to effectively manage screen time and create a safe online environment. So, let's begin by enabling Screen Time and Guided Access.
Enabling Screen Time and Guided Access
Enabling Screen Time and Guided Access on your iPhone allows you to monitor and control the amount of time spent on your device, as well as restrict access to certain features and apps. To enable Screen Time, go to Settings, tap on Screen Time, and toggle the switch to the right. You will then be prompted to set up Screen Time, which includes setting a passcode and choosing which features to track. Guided Access, on the other hand, allows you to temporarily restrict your iPhone to a single app, which can be useful for kids or for presentations. To enable Guided Access, go to Settings, tap on Accessibility, and then tap on Guided Access. From there, you can toggle the switch to the right and set a passcode. Once Guided Access is enabled, you can triple-click the Home button (or the side button on iPhone X and later) to enter Guided Access mode. In this mode, you can restrict access to certain features, such as the volume buttons or the Home button, and even set a time limit for the app. By enabling Screen Time and Guided Access, you can take control of your iPhone usage and ensure that you're using your device in a way that's healthy and productive.
Setting Up Screen Time and Guided Access
Setting up Screen Time and Guided Access on your iPhone is a straightforward process that can help you manage your screen usage and restrict access to certain features. To start, go to Settings and tap on Screen Time. Here, you can set a passcode to prevent others from accessing your Screen Time settings. Next, tap on Turn On Screen Time to enable the feature. You can then set a daily time limit for your screen usage, as well as schedule downtime and set up app limits. Guided Access, on the other hand, allows you to restrict your iPhone to a single app, making it ideal for kids or for use in public settings. To set up Guided Access, go to Settings, then General, and tap on Accessibility. From there, tap on Guided Access and toggle the switch to the right to enable it. You can then set a passcode to prevent others from exiting Guided Access mode. Once you've set up Screen Time and Guided Access, you can use them to monitor and control your screen usage, helping you to stay focused and avoid distractions.
Customizing Screen Time and Guided Access Settings
Customizing Screen Time and Guided Access settings allows you to tailor your iPhone's screen time management to your specific needs. To access these settings, go to Settings > Screen Time. Here, you can set a Downtime schedule, which restricts screen time during certain hours of the day or night. You can also set App Limits, which allow you to limit the amount of time spent on specific apps or categories of apps. Additionally, you can customize the Always Allowed list, which allows you to choose specific apps that are always accessible, even during Downtime or when App Limits are in place. Guided Access, on the other hand, allows you to restrict your iPhone to a single app, making it ideal for use in public settings or for individuals with disabilities. To enable Guided Access, go to Settings > Accessibility > Guided Access, and toggle the switch to the right. You can also set a passcode to prevent others from exiting Guided Access mode. By customizing these settings, you can create a more personalized and controlled screen time experience on your iPhone.
Utilizing Third-Party Apps and Accessories
The world of smartphones is constantly evolving, with new features and technologies being introduced regularly. One of the most significant advancements in recent years is the development of third-party apps and accessories that can enhance the functionality of our devices. When it comes to screen control, there are numerous options available that can improve our overall user experience. By utilizing third-party apps and accessories, we can customize our screens to suit our individual needs, making it easier to navigate and interact with our devices. In this article, we will explore the various ways in which we can utilize third-party apps and accessories to enhance our screen control, including exploring third-party apps for screen control, using screen-related accessories, and configuring third-party apps and accessories. By the end of this article, you will have a better understanding of how to take control of your screen and make the most out of your device. Let's start by exploring third-party apps for screen control.
Exploring Third-Party Apps for Screen Control
Here is the paragraphy: When it comes to exploring third-party apps for screen control, there are numerous options available that can help you customize your iPhone's screen behavior. One popular app is AutoLock, which allows you to set custom auto-lock times based on your location, Wi-Fi network, or even the time of day. Another app, Screen Time Parental Control, offers advanced features such as app blocking, screen time tracking, and customizable schedules. If you're looking for an app that can help you stay focused, Freedom is a great option, which blocks distracting apps and websites across all your devices. Additionally, apps like Moment and Screen Time Tracker provide detailed insights into your screen time habits, helping you identify areas for improvement. By exploring these third-party apps, you can gain more control over your iPhone's screen and develop healthier screen use habits.
Using Screen-Related Accessories
Using screen-related accessories is a great way to enhance your iPhone experience and keep your screen on for longer periods. One popular accessory is a screen protector, which not only protects your screen from scratches and cracks but also helps to reduce glare and improve visibility. Another useful accessory is a phone stand or holder, which allows you to prop up your iPhone at a comfortable viewing angle, reducing the need to constantly adjust the screen brightness. Additionally, a portable power bank can be a lifesaver when you're on-the-go, providing a quick and easy way to top up your iPhone's battery and keep your screen on. Furthermore, a wireless charging pad can help to keep your iPhone charged and your screen on, without the hassle of tangled cords. By using these screen-related accessories, you can enjoy a more convenient and enjoyable iPhone experience, with a screen that stays on for longer.
Configuring Third-Party Apps and Accessories
Configuring third-party apps and accessories can significantly enhance your iPhone experience, especially when it comes to keeping your screen on. To start, you'll need to download and install the desired app or accessory from the App Store or a reputable online retailer. Once installed, open the app and follow the in-app instructions to configure the settings. For example, if you're using an app like AutoLock or Stay Alive, you'll need to grant the app permission to access your iPhone's screen settings and set the desired screen timeout interval. Some apps may also offer additional features, such as customizable screen savers or low-power mode, which can help extend your iPhone's battery life. When it comes to accessories, such as screen protectors or phone cases with built-in screen savers, simply follow the manufacturer's instructions for installation and configuration. In some cases, you may need to adjust your iPhone's settings to accommodate the accessory, such as enabling the "Tap to Wake" feature to work with a screen protector. By taking the time to configure your third-party apps and accessories, you can enjoy a more seamless and convenient iPhone experience, with a screen that stays on when you need it to.