How To Adjust Water Level In Toilet Tank
Here is the introduction paragraph: Properly adjusting the water level in a toilet tank is a crucial aspect of maintaining a well-functioning toilet. A toilet tank that is not adjusted correctly can lead to a range of issues, including wasted water, increased utility bills, and even damage to the toilet itself. In order to avoid these problems, it is essential to understand the importance of proper water level in the toilet tank, identify the ideal water level, and learn how to adjust it. In this article, we will explore the significance of proper water level, discuss how to identify the ideal water level, and provide a step-by-step guide on how to adjust the water level in the toilet tank. By understanding these key concepts, homeowners can ensure their toilet is running efficiently and effectively. Understanding the importance of proper water level in the toilet tank is the first step in this process.
Understanding the Importance of Proper Water Level in the Toilet Tank
The toilet tank is a crucial component of a toilet system, and maintaining the proper water level is essential for its efficient operation. A toilet tank that is not functioning correctly can lead to a range of problems, including water waste, overflows, and poor flushing performance. In this article, we will explore the importance of proper water level in the toilet tank and how it can impact the overall performance of the toilet. We will discuss how proper water level can help prevent water waste and save money, reduce the risk of overflows and water damage, and ensure proper flushing and toilet performance. By understanding the significance of proper water level in the toilet tank, homeowners can take steps to optimize their toilet's performance and minimize potential problems. By maintaining the correct water level, homeowners can prevent unnecessary water waste and save money on their water bills, which is a crucial aspect of toilet maintenance that we will explore in more detail.
Preventing Water Waste and Saving Money
Preventing water waste and saving money go hand in hand, especially when it comes to your toilet's water level. A toilet that uses too much water can be a significant drain on your wallet and the environment. By ensuring your toilet's water level is at the optimal height, you can prevent unnecessary water waste and reduce your water bill. Here are some ways to prevent water waste and save money: * Fixing leaks promptly is essential, as a single dripping faucet can waste up to 20 gallons of water per day. Regularly inspect your toilet for any signs of leaks, such as water spots or unusual noises. * Installing low-flow fixtures, such as toilets and showerheads, can significantly reduce water consumption. Look for fixtures with the WaterSense label, which indicates they meet EPA standards for water efficiency. * Adjusting your toilet's water level to the optimal height can also make a big difference. By doing so, you can prevent unnecessary water from flowing into the overflow tube and down the drain. * Using a toilet flapper that fits properly can also help prevent water waste. A flapper that doesn't fit correctly can cause the toilet to run constantly, wasting gallons of water per day. * Finally, consider installing a dual-flush toilet, which allows you to choose between a full or partial flush, depending on your needs. This can significantly reduce water consumption, especially for liquid waste. By implementing these simple changes, you can prevent water waste, save money on your water bill, and do your part for the environment. Remember, every small change adds up, and making a few adjustments to your toilet's water level and fixtures can have a significant impact over time.
Reducing the Risk of Overflows and Water Damage
Reducing the risk of overflows and water damage is crucial to maintaining a safe and functional plumbing system. One of the most effective ways to achieve this is by ensuring the proper water level in the toilet tank. When the water level is too high, it can cause the toilet to overflow, leading to costly water damage and potential health hazards. On the other hand, if the water level is too low, it may not provide enough water to flush waste properly, resulting in clogs and backups. By adjusting the water level in the toilet tank, homeowners can prevent these issues and enjoy a trouble-free plumbing system. Additionally, proper water level adjustment can also help reduce water consumption, lower water bills, and minimize the risk of mold and mildew growth. To adjust the water level, homeowners can follow simple steps, such as turning the adjustment screw or clip, or bending the float arm to change the water level. By taking these simple steps, homeowners can significantly reduce the risk of overflows and water damage, ensuring a safe and functional plumbing system for years to come.
Ensuring Proper Flushing and Toilet Performance
Ensuring proper flushing and toilet performance is crucial for maintaining a hygienic and efficient bathroom. A toilet that doesn't flush correctly can lead to unpleasant odors, clogs, and wasted water. To guarantee optimal performance, it's essential to check the water level in the toilet tank regularly. If the water level is too low, the toilet may not flush properly, while a water level that's too high can cause water to flow into the overflow tube, wasting water and increasing your water bill. Proper flushing also depends on the correct alignment of the flapper and fill valve. If these components are not aligned correctly, it can disrupt the flushing process, leading to poor performance. Additionally, mineral buildup and debris in the toilet tank can also affect flushing performance. Regular cleaning and maintenance of the toilet tank and bowl can help prevent these issues. By ensuring the water level is at the recommended height and the toilet's components are functioning correctly, you can enjoy a toilet that flushes efficiently and effectively, saving you time, money, and hassle in the long run.
Identifying the Ideal Water Level in the Toilet Tank
Identifying the ideal water level in the toilet tank is crucial for maintaining a properly functioning toilet and conserving water. A water level that is too high or too low can lead to issues such as constant running, poor flushing performance, and increased water bills. To determine the ideal water level, there are several methods that can be employed. One approach is to check the water level against the tank's markings, which provide a clear indication of the recommended water level. Another method involves measuring the water level with a ruler or tape measure to ensure it is at the correct height. Additionally, observing the water level during a flush cycle can also provide valuable insights into the toilet's performance. By using one or a combination of these methods, homeowners can easily identify the ideal water level for their toilet tank. Checking the water level against the tank's markings is a straightforward and reliable approach, and it is often the first step in determining the ideal water level.
Checking the Water Level Against the Tank's Markings
Here is the paragraphy: To ensure the water level in your toilet tank is at the ideal height, you need to check it against the tank's markings. Most toilet tanks have a series of lines or a single line indicating the recommended water level. Locate these markings on the inside of the tank, usually on the side or back wall. Next, flush the toilet to allow the water level to stabilize. Once the water has stopped flowing, take a look at the water level in relation to the markings. If the water level is below the recommended line, you may need to adjust the float arm or the water supply valve to increase the water flow. On the other hand, if the water level is above the recommended line, you may need to adjust the float arm or the overflow tube to decrease the water flow. By checking the water level against the tank's markings, you can determine if the water level is at the ideal height, which is usually about halfway up the tank. This is important because if the water level is too high, it can cause the toilet to run constantly, wasting water and increasing your water bill. Conversely, if the water level is too low, it may not provide enough water to properly flush the toilet, leading to poor flushing performance. By adjusting the water level to the recommended height, you can ensure your toilet is functioning efficiently and effectively.
Measuring the Water Level with a Ruler or Tape Measure
Measuring the water level with a ruler or tape measure is a straightforward process that requires attention to detail. First, ensure the water level is stable and not fluctuating, as this can affect your measurement. Next, place the ruler or tape measure along the side of the toilet tank, positioning the zero point at the bottom of the tank. Carefully read the measurement at the water's surface, taking note of the water level in relation to the overflow tube or the recommended water level mark, usually indicated by a line or a clip on the side of the tank. For optimal performance and to prevent excessive water usage, the ideal water level should be about half an inch below the overflow tube. If the water level is too high, water will continuously flow into the overflow tube, wasting water and increasing your water bill. Conversely, if the water level is too low, the toilet may not flush properly, leading to poor waste removal and potential clogs. By accurately measuring the water level with a ruler or tape measure, you can determine whether adjustments are needed to achieve the optimal water level and ensure your toilet operates efficiently.
Observing the Water Level During a Flush Cycle
Observing the water level during a flush cycle is a crucial step in identifying the ideal water level in the toilet tank. To do this, start by flushing the toilet and watching the water level in the tank as it drops. Take note of the point at which the water level stops dropping and the fill valve starts to refill the tank. This is usually indicated by a slight pause in the water flow. Next, observe the water level as it rises and fills the tank. Pay attention to the point at which the water level reaches its highest point and the fill valve shuts off. This is the point at which the water level is at its maximum height. By observing the water level during a flush cycle, you can determine if the water level is too high or too low, and make adjustments accordingly. It's also important to note that the water level should be about halfway up the tank, or just below the overflow tube. If the water level is too high, water will flow into the overflow tube and be wasted. On the other hand, if the water level is too low, the toilet may not flush properly. By observing the water level during a flush cycle, you can ensure that the water level is at the ideal height, and make adjustments to save water and improve toilet performance.
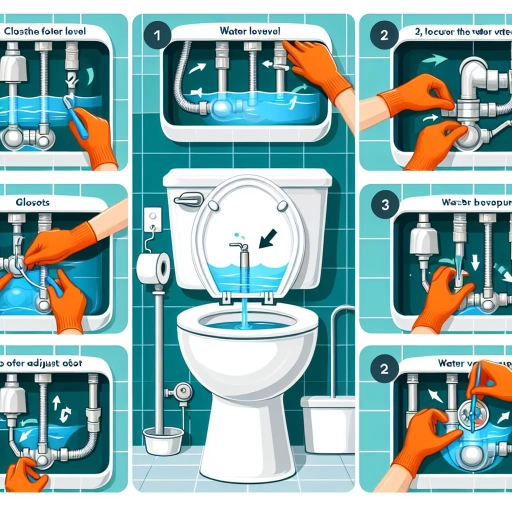
Adjusting the Water Level in the Toilet Tank
Adjusting the water level in the toilet tank is a simple yet effective way to optimize your toilet's performance, conserve water, and reduce your water bill. A toilet tank that is overfilling can lead to wasted water and increased energy costs, while a tank that is underfilling can result in poor flushing performance. Fortunately, adjusting the water level in the toilet tank is a relatively easy process that can be done with a few simple tools and some basic knowledge. To adjust the water level, you can try turning the adjustment screw or clip, bending or adjusting the float arm, or replacing the fill valve or float assembly. By making these adjustments, you can ensure that your toilet is running efficiently and effectively. In this article, we will explore each of these methods in more detail, starting with the simplest and most common approach: turning the adjustment screw or clip.
Turning the Adjustment Screw or Clip
Adjusting the water level in your toilet tank is a relatively simple process that can be accomplished with a few basic tools. To begin, you'll need to locate the adjustment screw or clip, which is usually found at the top of the fill valve or on the side of the tank. The adjustment screw or clip is used to control the water level in the tank by regulating the amount of water that flows into the tank. To adjust the water level, you'll need to turn the adjustment screw or clip clockwise to lower the water level or counterclockwise to raise it. It's essential to make small adjustments and check the water level frequently to avoid overfilling or underfilling the tank. Turning the adjustment screw or clip is a straightforward process that requires minimal effort, and it's usually the first step in adjusting the water level in your toilet tank. By making the necessary adjustments, you can ensure that your toilet is functioning efficiently and effectively, saving you water and reducing your utility bills.
Bending or Adjusting the Float Arm
The float arm is a crucial component in the toilet tank that regulates the water level. Bending or adjusting the float arm is a simple yet effective way to adjust the water level in the toilet tank. The float arm is usually a metal rod that is connected to the float, which is a plastic or metal device that floats on the surface of the water. As the water level rises or falls, the float arm moves up or down, triggering the fill valve to turn on or off. To adjust the water level, you can bend the float arm to change the point at which the fill valve turns on or off. By bending the float arm, you can adjust the water level to the desired height. For example, if the water level is too high, you can bend the float arm downwards to lower the water level. Conversely, if the water level is too low, you can bend the float arm upwards to raise the water level. It's essential to note that bending the float arm should be done carefully, as excessive bending can damage the arm or the fill valve. Additionally, it's crucial to ensure that the float arm is not touching the sides of the tank or any other components, as this can interfere with its movement and affect the water level. By adjusting the float arm, you can achieve the optimal water level in the toilet tank, which is essential for proper flushing and water conservation. A well-adjusted float arm can help prevent issues such as overflowing, constant running, or weak flushing. Moreover, adjusting the float arm is a cost-effective and DIY-friendly solution that can save you money on your water bill and reduce your environmental footprint. Overall, bending or adjusting the float arm is a simple and effective way to adjust the water level in the toilet tank, and it's a crucial step in maintaining a properly functioning toilet.
Replacing the Fill Valve or Float Assembly
Replacing the fill valve or float assembly is a relatively straightforward process that can be completed with basic tools. If the fill valve or float assembly is faulty, it may not be shutting off the water supply properly, leading to continuous running and wasted water. To replace the fill valve or float assembly, start by turning off the water supply to the toilet by locating the shut-off valve behind the toilet and turning it clockwise. Next, flush the toilet to drain the tank and bowl. Disconnect the water supply line from the fill valve and remove any clips or nuts holding the valve in place. Gently lift the fill valve out of the tank and remove the old float assembly. Install the new fill valve or float assembly by reversing the steps, making sure to secure it properly with clips or nuts. Finally, turn the water supply back on and test the toilet to ensure the new fill valve or float assembly is working correctly. It's essential to note that if you're not comfortable with DIY repairs or if the issue persists after replacing the fill valve or float assembly, it's recommended to consult a professional plumber for assistance.