How To Change The Size Of A Google Slide
Here is the introduction paragraph: When working with Google Slides, one of the most common tasks is adjusting the size of your slides to fit your presentation needs. Whether you're creating a presentation for a small group or a large audience, having the right slide size is crucial for effective communication. But how do you change the size of a Google Slide? In this article, we'll explore the basics of Google Slides, discuss the various methods to change the size of a slide, and provide best practices to ensure your presentation looks professional and polished. To get started, let's first understand the basics of Google Slides, including the default settings and how they impact your presentation. By grasping these fundamentals, you'll be better equipped to make informed decisions when changing the size of your slides. Understanding the Basics of Google Slides is the first step in mastering the art of slide size adjustment.
Understanding the Basics of Google Slides
Google Slides is a powerful tool for creating presentations, but many users are unaware of its full potential. To get the most out of this application, it's essential to understand its basics. In this article, we'll explore the fundamentals of Google Slides, including what it is and its purpose, its key features, and why changing the size of a slide is important. By grasping these concepts, you'll be able to create engaging and effective presentations that captivate your audience. So, let's start with the basics - what is Google Slides and what is its purpose?
What is Google Slides and its purpose
Google Slides is a free online presentation software developed by Google. It allows users to create, edit, and share presentations online. The primary purpose of Google Slides is to provide a collaborative and accessible platform for individuals and teams to create engaging presentations. With Google Slides, users can create slides from scratch or import existing presentations from other software, such as Microsoft PowerPoint. The platform offers a range of features, including templates, themes, and design tools, to help users create visually appealing presentations. Google Slides also allows real-time collaboration, enabling multiple users to work on a presentation simultaneously. Additionally, the platform integrates seamlessly with other Google apps, such as Google Drive and Google Docs, making it easy to share and access presentations from anywhere. Overall, Google Slides is a powerful tool for creating and sharing presentations, making it an ideal choice for students, professionals, and anyone looking to communicate ideas effectively.
Key features of Google Slides
Google Slides offers a range of key features that make it an ideal choice for creating and editing presentations. One of the most notable features is its seamless collaboration capabilities, allowing multiple users to work on a single presentation simultaneously in real-time. This feature is particularly useful for teams and groups working on projects together. Additionally, Google Slides offers a wide range of templates and themes to choose from, making it easy to create visually appealing presentations. The platform also includes a variety of formatting options, including font styles, colors, and images, which can be easily added and edited. Furthermore, Google Slides allows users to add animations and transitions to their presentations, making them more engaging and interactive. The platform also includes a built-in image editor, allowing users to edit and enhance images directly within the presentation. Moreover, Google Slides offers a range of add-ons and integrations, including Google Drive, Google Docs, and Google Sheets, making it easy to incorporate data and information from other Google apps. Overall, Google Slides provides a comprehensive set of features that make it an ideal choice for creating and editing presentations.
Why change the size of a Google Slide
Changing the size of a Google Slide can be a crucial step in creating an effective presentation. One of the primary reasons to change the size of a Google Slide is to ensure that it is compatible with the device or screen on which it will be displayed. For instance, if you're creating a presentation for a conference, you may need to adjust the slide size to fit the projector screen or the audience's devices. Additionally, changing the slide size can also help to improve the overall aesthetic of your presentation. By adjusting the size, you can create a more balanced and visually appealing layout, which can help to engage your audience and convey your message more effectively. Furthermore, changing the size of a Google Slide can also be useful when collaborating with others. If you're working on a presentation with a team, you may need to adjust the slide size to accommodate different devices or screen resolutions. By doing so, you can ensure that everyone can view and edit the presentation without any issues. Overall, changing the size of a Google Slide is an important aspect of creating a professional and effective presentation.
Methods to Change the Size of a Google Slide
Here is the introduction paragraph: Google Slides is a popular presentation software that allows users to create engaging and interactive slides. One of the key features of Google Slides is the ability to customize the size of the slides to suit different needs. Whether you're creating a presentation for a small group or a large audience, being able to adjust the slide size is crucial. In this article, we'll explore three methods to change the size of a Google Slide: using the page setup option, adjusting the slide size using the ruler, and customizing the slide size using the custom size option. By the end of this article, you'll be able to choose the method that best suits your needs. Let's start by exploring the first method: using the page setup option.
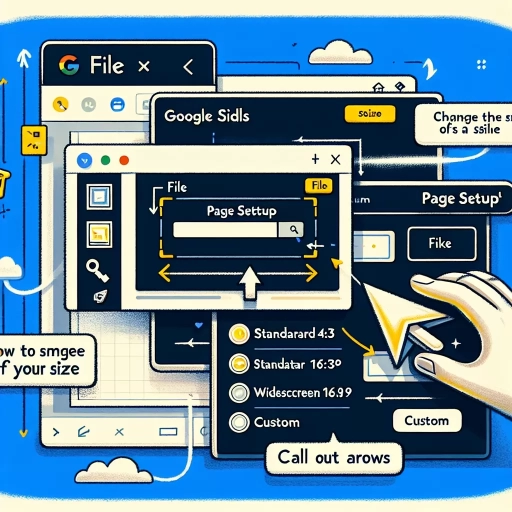
Using the Page Setup Option
Using the Page Setup option is a straightforward method to change the size of a Google Slide. To do this, go to the "File" menu and select "Page setup" from the drop-down list. In the Page setup dialog box, you will see a section labeled "Slide size." Here, you can choose from a list of predefined slide sizes, including standard sizes such as 4:3, 16:9, and A4. You can also select "Custom" to enter your own dimensions. Additionally, you can choose the orientation of your slide, either portrait or landscape. Once you have made your selection, click "Apply" to apply the changes to your slide. This method is useful if you want to change the size of a single slide or a small group of slides. However, if you want to change the size of an entire presentation, you may want to consider using the "Slide size" option in the "Theme" section of the "Slide" menu, which allows you to set a default slide size for the entire presentation.
Adjusting the Slide Size using the Ruler
Adjusting the slide size using the ruler is a straightforward method that allows you to customize the dimensions of your Google Slide. To do this, start by selecting the slide you want to resize by clicking on it in the slide panel. Next, click on the "View" menu and select "Ruler" to display the ruler on the top and left sides of the slide. The ruler will show you the current dimensions of your slide in inches. To adjust the slide size, simply click and drag the ruler to the desired width or height. You can also enter the exact dimensions in the "Width" and "Height" fields located in the "Page setup" section of the "File" menu. As you adjust the slide size, you'll see the changes reflected in the slide preview. Keep in mind that adjusting the slide size using the ruler will not affect the content or layout of your slide, so you may need to make additional adjustments to ensure everything fits properly. By using the ruler to adjust the slide size, you can create a custom layout that meets your specific needs and enhances the overall presentation of your Google Slide.
Customizing the Slide Size using the Custom Size Option
If you want to have more control over the size of your Google Slide, you can use the custom size option. This option allows you to set a specific width and height for your slide, giving you more flexibility in terms of design and layout. To access the custom size option, go to the "File" menu and select "Page setup." In the "Page setup" dialog box, click on the "Custom" option under the "Slide size" dropdown menu. This will open a new dialog box where you can enter the width and height of your slide in inches or pixels. You can also select the unit of measurement and the orientation of your slide. Once you've entered the desired dimensions, click "OK" to apply the changes. Your slide will now be resized to the custom dimensions you specified. Note that using a custom size may affect the layout and formatting of your slide, so you may need to make some adjustments to ensure everything looks the way you want it to. Additionally, keep in mind that custom sizes may not be compatible with all devices or presentation software, so it's a good idea to test your slide on different devices and platforms before sharing it with others.
Best Practices for Changing the Size of a Google Slide
When it comes to changing the size of a Google Slide, there are several best practices to keep in mind to ensure that your presentation looks professional and is easy to view. One of the key considerations is the aspect ratio and resolution of your slide, as this can affect how your content is displayed. Additionally, choosing the right size for your content is crucial to avoid overwhelming or underwhelming your audience. Furthermore, ensuring compatibility with different devices is essential to guarantee that your presentation can be viewed seamlessly across various platforms. By considering these factors, you can create a well-designed and effective Google Slide presentation. To start, let's dive into the importance of considering the aspect ratio and resolution of your slide.
Considering the Aspect Ratio and Resolution
When changing the size of a Google Slide, it's essential to consider the aspect ratio and resolution to ensure that your presentation looks professional and visually appealing. The aspect ratio refers to the proportional relationship between the width and height of your slide. Google Slides offers several pre-set aspect ratios, including 16:9, 4:3, and 1:1, which are suitable for different types of presentations. For example, a 16:9 aspect ratio is ideal for widescreen presentations, while a 4:3 aspect ratio is better suited for traditional screen presentations. On the other hand, the resolution of your slide refers to the number of pixels that make up the image. A higher resolution will result in a sharper and more detailed image, but it may also increase the file size of your presentation. When changing the size of your Google Slide, it's crucial to balance the aspect ratio and resolution to ensure that your presentation looks great on different devices and screens. A good rule of thumb is to use a minimum resolution of 1024 x 768 pixels and an aspect ratio of 16:9 for most presentations. Additionally, you can also use the "Scale" feature in Google Slides to adjust the size of your slide while maintaining the aspect ratio. By considering the aspect ratio and resolution, you can create a professional-looking presentation that will engage your audience and effectively communicate your message.
Choosing the Right Size for Your Content
When it comes to choosing the right size for your content in Google Slides, there are several factors to consider. The size of your content will depend on the purpose of your presentation, the audience, and the device on which it will be displayed. For example, if you're creating a presentation for a large conference, you may want to use a larger font size and more prominent images to ensure that your message is clear and visible to everyone in the room. On the other hand, if you're creating a presentation for a small group or for online viewing, you may be able to use smaller font sizes and more detailed images. Additionally, you'll want to consider the aspect ratio of your slides, as well as the resolution of any images or videos you include. A good rule of thumb is to use a font size of at least 24 points for headings and 18 points for body text, and to use high-resolution images that are at least 1024 x 768 pixels. By choosing the right size for your content, you can ensure that your presentation is clear, engaging, and effective.
Ensuring Compatibility with Different Devices
Ensuring compatibility with different devices is crucial when changing the size of a Google Slide. With the increasing use of various devices, such as smartphones, tablets, and laptops, it's essential to ensure that your presentation looks great on all of them. To achieve this, consider the following best practices. First, use a consistent aspect ratio, such as 16:9 or 4:3, to ensure that your slide looks good on both wide-screen and standard devices. Second, choose a font that is clear and readable on all devices, avoiding fonts that are too ornate or complex. Third, use high-quality images that are optimized for web use, as low-resolution images may appear pixelated on high-resolution devices. Fourth, avoid using too much text or complex graphics, as these can be difficult to read on smaller screens. Finally, test your presentation on different devices to ensure that it looks great on all of them, making any necessary adjustments to ensure compatibility. By following these best practices, you can ensure that your Google Slide presentation looks great on all devices, regardless of their size or resolution.