How To Propagate A Spider Plant
Spider plants are one of the most popular houseplants, and for good reason. They're easy to care for, versatile, and can be propagated with minimal effort. Propagating a spider plant can be a fun and rewarding experience, allowing you to share plants with friends and family or expand your own collection. To successfully propagate a spider plant, it's essential to understand the basics of the process, including the best methods and timing. In this article, we'll delve into the world of spider plant propagation, covering the fundamentals, methods, and post-propagation care. First, we'll explore the basics of spider plant propagation, including the types of plants that can be propagated and the necessary materials. From there, we'll discuss the various methods for propagating spider plants, including division, leaf cuttings, and plantlets. Finally, we'll provide guidance on post-propagation care, including how to nurture your new plants and encourage healthy growth. Let's start by Understanding Spider Plant Propagation Basics.
Understanding Spider Plant Propagation Basics
Spider plant propagation is a simple and rewarding process that can be done by anyone, regardless of their gardening experience. By understanding the basics of spider plant propagation, you can easily multiply your favorite plants and share them with friends and family. But before we dive into the nitty-gritty of propagation, let's take a step back and explore why this process is so important. Propagating spider plants allows you to preserve the unique characteristics of your favorite varieties, ensuring that they continue to thrive for years to come. Additionally, propagating spider plants can be a cost-effective way to obtain new plants, eliminating the need to purchase them from a nursery or store. With the right techniques and a little patience, you can successfully propagate your spider plants and enjoy their beauty and benefits for years to come. So, what exactly is spider plant propagation, and how does it work?
What is Spider Plant Propagation
Spider plant propagation is a simple and effective way to multiply your favorite houseplant. It involves creating new plants from the offsets or "babies" that grow on the ends of the mother plant's stems. These offsets are genetically identical to the parent plant and can be easily removed and potted up to create new plants. Spider plant propagation can be done through division, leaf cuttings, or by allowing the offsets to grow into new plants on their own. Division involves separating the offsets from the mother plant and potting them up in a new container, while leaf cuttings involve cutting off a healthy leaf from the mother plant and rooting it in water or soil. Allowing the offsets to grow into new plants on their own is a more passive approach, where you simply wait for the offsets to develop their own roots and leaves before separating them from the mother plant. Regardless of the method, spider plant propagation is a low-maintenance and rewarding process that can help you share your favorite plant with friends and family or expand your own plant collection. With proper care and attention, the new plants will thrive and produce their own offsets, allowing you to propagate them further. Spider plant propagation is also a great way to refresh your plant collection, as it allows you to replace old or dying plants with new, healthy ones. Overall, spider plant propagation is a fun and easy way to multiply your favorite houseplant and enjoy the many benefits of having more plants in your home.
Why Propagate Spider Plants
Propagating spider plants is a simple and rewarding process that offers several benefits. For one, it allows you to share these beautiful plants with friends and family, spreading the joy of plant parenthood. By propagating spider plants, you can also increase the number of plants you have, creating a lush and verdant atmosphere in your home. Additionally, propagating spider plants is a great way to replace old or dying plants, ensuring that you always have a healthy and thriving plant on hand. Furthermore, spider plant propagation is an excellent way to learn about the life cycle of plants and develop your green thumb. By propagating spider plants, you can observe the entire process of plant growth, from the formation of new roots and leaves to the development of mature plants. This hands-on experience can help you develop a deeper appreciation for the natural world and improve your skills as a plant caretaker. Overall, propagating spider plants is a fun and educational experience that can bring numerous benefits to both you and your plants.
Choosing the Right Spider Plant for Propagation
Here is the paragraphy: When it comes to choosing the right spider plant for propagation, there are a few factors to consider. First, look for a healthy plant with plenty of leaves and stems. A robust plant will provide more opportunities for successful propagation. Next, consider the type of spider plant you want to propagate. There are several varieties, including 'Vittatum', 'Tricolor', and 'Bonnie', each with its own unique characteristics. 'Vittatum' is a popular choice for its striking white stripes, while 'Tricolor' boasts a mix of green, white, and yellow leaves. 'Bonnie' is a compact variety that's perfect for smaller spaces. Choose a plant that fits your desired aesthetic and growing conditions. Additionally, select a plant with plenty of baby plants or spiderettes, as these will be used for propagation. Avoid plants that are too old or leggy, as they may not produce as many viable spiderettes. By choosing a healthy, robust plant with the right characteristics, you'll set yourself up for success in your spider plant propagation journey.
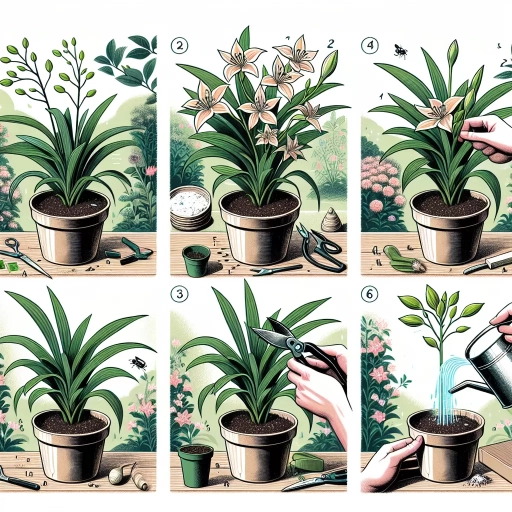
Methods for Propagating Spider Plants
Spider plants are one of the most popular houseplants due to their low-maintenance requirements and versatility in decoration. One of the reasons they are so well-liked is their ability to be easily propagated, allowing plant enthusiasts to share them with friends and family or expand their own collection. There are several methods for propagating spider plants, including division, leaf and stem cuttings, and plantlets. Each of these methods has its own advantages and can be used depending on the desired outcome and the materials available. For those looking to quickly multiply their spider plant, division is a highly effective method. By separating the plantlets that grow on the ends of the stems, you can create multiple new plants in a short amount of time. This method is especially useful for those who want to share plants with others or quickly fill a space with these beautiful plants. In this article, we will explore the division method for spider plant propagation in more detail.
Division Method for Spider Plant Propagation
The division method is a popular technique for propagating spider plants, which involves separating the plantlets or "spiderettes" from the mother plant. This method is ideal for mature spider plants with multiple stems and a robust root system. To begin, carefully remove the mother plant from its pot and gently wash away the soil to expose the roots. Next, identify the natural divisions between the stems and use a sharp, sterile knife or pruning tool to separate the plantlets, making sure each section has at least one growing stem and a small amount of roots. It's essential to handle the roots with care, as they can be delicate. Once the plantlets are separated, pot them up in a well-draining potting mix, and water thoroughly. Keep the soil consistently moist but not waterlogged, and provide bright, indirect light. With proper care, the new plants will establish themselves quickly, and you'll soon have multiple spider plants to enjoy or share with friends. The division method is a straightforward and efficient way to propagate spider plants, and it's an excellent option for those who want to increase their plant collection or replace old plants.
Leaf and Stem Cuttings for Spider Plant Propagation
Leaf and stem cuttings are a popular method for propagating spider plants, and for good reason. This technique allows you to create new plants from the existing leaves and stems of your mature spider plant, making it a cost-effective and efficient way to multiply your favorite houseplant. To take leaf cuttings, simply snip off a healthy leaf from the mother plant, making sure to leave a small piece of stem attached to the leaf. Remove any lower leaves that will be submerged in water or soil, and place the cut end in a glass of water or a pot filled with moistened soil. Roots should develop within 1-2 weeks, after which you can transfer the new plant to a pot. Stem cuttings, on the other hand, involve cutting a section of stem from the mother plant, typically around 2-3 inches long. Remove any lower leaves, dip the cut end in rooting hormone, and plant it in a pot filled with moistened soil. Keep the soil consistently moist and warm, and roots should develop within 2-3 weeks. Both leaf and stem cuttings can be rooted in water or soil, and the key to success is to provide the right conditions, including bright, indirect light and temperatures between 65-75°F (18-24°C). With a little patience and care, you can successfully propagate your spider plant using leaf and stem cuttings, and enjoy the satisfaction of watching your new plants grow and thrive.
Spider Plant Propagation through Plantlets
Spider plant propagation through plantlets is a popular and easy method of multiplying these beautiful plants. Spider plants produce baby plants or plantlets on the ends of long stems, which can be easily removed and potted to create new plants. To propagate a spider plant through plantlets, start by waiting for the plantlets to mature and develop their own roots and leaves. This can take several weeks to a few months, depending on the health and vigor of the mother plant. Once the plantlets are ready, use a pair of clean scissors or pruning shears to cut the stem about an inch below the base of the plantlet. Make sure to leave a small piece of stem attached to the plantlet to help it absorb water and nutrients. Next, pot the plantlet in a well-draining potting mix, and water it thoroughly. Keep the soil consistently moist but not waterlogged, and provide bright, indirect light. With proper care, the new plantlet will quickly establish itself and start producing its own plantlets, allowing you to propagate even more spider plants. This method of propagation is not only easy but also allows you to share plants with friends and family, making it a great way to spread the joy of spider plant ownership. Additionally, propagating spider plants through plantlets is a great way to rejuvenate old or leggy plants, as it allows you to remove the old plantlets and encourage the mother plant to produce new growth. Overall, spider plant propagation through plantlets is a simple and effective way to multiply these beautiful plants and enjoy their many benefits.
Post-Propagation Care for Spider Plants
After propagating spider plants, it's essential to provide them with the right conditions to thrive. This includes offering optimal lighting, watering, and fertilizing them correctly. Proper lighting is crucial for new spider plants, as it directly affects their growth and development. Spider plants prefer bright, indirect light, but not direct sunlight, which can cause scorching. Providing the right amount of light will help your new spider plants photosynthesize and grow strong and healthy. In this article, we'll dive deeper into the specifics of post-propagation care for spider plants, starting with the importance of providing optimal lighting. (Note: The supporting paragraphs are already written, I just need the introductory paragraph that transitions into the first supporting paragraph)
Providing Optimal Lighting for New Spider Plants
Here is the paragraphy: Providing optimal lighting for new spider plants is crucial for their growth and development. Spider plants prefer bright, indirect light but can tolerate low light conditions. Direct sunlight can cause the leaves to become scorched, so it's best to provide filtered or dappled light. East- or west-facing windows are ideal for spider plants, as they receive gentle, indirect light. Avoid placing spider plants in areas with full sun or extreme shade, as this can lead to weak and leggy growth. If you're growing spider plants indoors, consider using grow lights to supplement natural light, especially during the winter months when daylight hours are shorter. Aim to provide 12-14 hours of light per day, and adjust the lighting schedule as needed to promote healthy growth. By providing optimal lighting, you can help your new spider plants thrive and produce plenty of baby plants, or spiderettes, which can be easily propagated to create new plants.
Watering and Humidity Requirements for New Spider Plants
Spider plants are known for their ability to thrive in a variety of environments, but they do have specific watering and humidity requirements to ensure optimal growth and health. After propagation, it's essential to provide your new spider plants with the right amount of moisture. Water your spider plants when the top 1-2 inches of soil feels dry to the touch, usually every 7-10 days during the spring and summer months when they're actively growing. During the fall and winter months, you can reduce watering to every 4-6 weeks, as the plants are dormant. Make sure not to overwater, as this can lead to root rot and other problems. In terms of humidity, spider plants prefer a relatively high humidity environment, typically between 40-60%. You can increase the humidity around your plants by placing the pot on a tray filled with water and pebbles or using a humidifier. However, they can adapt to average humidity levels, so it's not necessary to go to great lengths to maintain a specific humidity level. By providing your new spider plants with the right watering and humidity conditions, you'll be able to promote healthy growth and encourage them to thrive.
Fertilizing New Spider Plants for Healthy Growth
Fertilizing new spider plants is a crucial step in promoting healthy growth and development. After propagation, spider plants require essential nutrients to establish a strong root system and produce new leaves and stems. A balanced, water-soluble fertilizer with a 20-20-20 NPK ratio is ideal for new spider plants. Dilute the fertilizer to half the recommended strength to prevent burning the tender roots. Apply the fertilizer once a month, taking care not to over-fertilize, as this can cause more harm than good. Additionally, consider using a fertilizer specifically formulated for indoor plants, as these products are designed to promote healthy growth in low-light conditions. Organic fertilizers, such as compost tea or worm casting, can also be used as a natural alternative. When fertilizing, make sure to water the plant thoroughly before application to prevent the fertilizer from burning the roots. By providing your new spider plant with the necessary nutrients, you'll be rewarded with a lush, vibrant, and thriving plant that will continue to produce new offsets and flowers. Regular fertilization will also help to prevent nutrient deficiencies, such as yellowing leaves or stunted growth, ensuring your spider plant remains healthy and robust.