How To Change Your Location On Iphone
 In an increasingly connected universe, your iPhone is always aware of your whereabouts, explicitly or implicitly, thus ensuring you enjoy features like weather alerts, tracking and navigation tools, local news, and many more. However, there are various reasons why you may want to alter your iPhone's location, such as maintaining privacy, bypassing geolocation restrictions, or just for simple fun. This comprehensive article provides clear insights on the diverse range of options that you can explore. We delve into three effective methods for changing your location, including altering your default Location Services settings, using a Virtual Private Network (VPN) to disguise your real location, and employing a third-party location spoofing app. As we proceed, you will discover the ease of modifying your geographic details, starting with how to adjust your Location Services Settings on your device. You'll get acquainted with these strategic processes, which will help you take control of your digital persona on iPhone.
Method 1: Change Location Services Settings
The innovation of technology has provided us with services that enable us to alter our location settings to our preference. These settings can be easily tweaked by paying keen attention to three simple and general steps. First, proceed to your device's settings to locate and select the 'Location Services' option. Secondly, you come across a switch that allows you to toggle your location services on or off. This functionality bears significance in giving you control over whether apps can track your location or not. Lastly, you are given the chance to choose which applications can or cannot access your location information, hence enhancing your privacy. All these steps, which will be discussed in more detail below, rely heavily on the premise of user preference and privacy. Starting off, let's delve further into how you can navigate to your settings and select 'Location Services'.
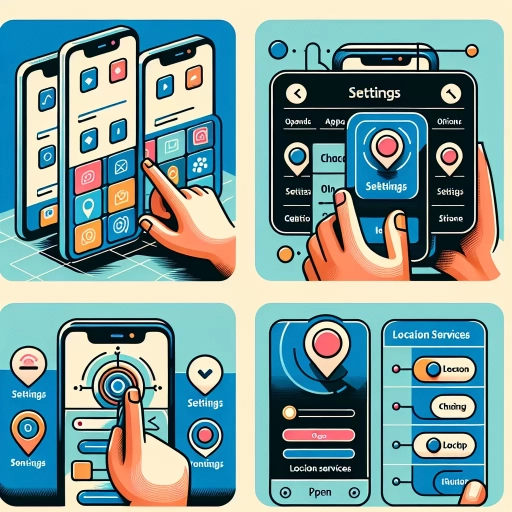
1. Go to Settings and Select Location Services
The first step to altering your location settings on your iPhone is to navigate to 'Settings' and then select 'Location Services'. On your iPhone's main screen, you'll see an icon that says 'Settings'; it typically appears as a silver gear and is almost always present on your home screen. Once you tap on 'Settings', a vast array of features and functionalities will appear, each enabling you to customize different facets of your iPhone to best cater to your preferences. Upon scrolling down the setting's options, you'll find 'Privacy' listed. Tapping on it will present numerous options related to your privacy and safety while using the device. You will find 'Location Services' amongst these options which is crucial in determining how location information is processed on your phone. Selecting 'Location Services' will guide you to another assortment of options, allowing you to tweak just how your iPhone's location is utilized. While this may seem like a process too intricate or nuanced, the iPhone's user-friendly interface makes it easy to understand. Location Services control how your phone uses and shares your location with various apps. Each app may request your location information for various reasons, be it to provide weather forecasts, navigation, or even finding a nearby café. But sometimes, resetting or changing these settings is needed – for example, you might be concerned about privacy and don't want certain apps to always track your whereabouts. Other times, some apps may require a mock location setting to function optimally. Therefore, understanding how to access and change your Location Services settings on your iPhone is pivotal in maintaining your privacy and optimizing your device usage. Remember, all applications listed under Location Services are set to use your location by default. But your control doesn't end there – you can allow certain apps to use your location only while you're using the app or deny access altogether. The power to individualize each app's ability to use your location lies squarely in your hands. Thus, the 'Settings' and 'Location Services' interface is not just about navigation but, more importantly, about exercising choice and command over your privacy and sharing. Rest assured, this process is molded to respect your personal preferences without compromising the functionality of your device.
2. Toggle Location Services On or Off
Understanding how to toggle Location Services on or off is crucial for controlling the privacy of your iPhone. This function can access your geographical position and aid various apps in customizing their services based on your proximity. For instance, weather apps utilize your location to provide accurate weather forecast, or navigation apps to guide you accurately to your desired destination. However, it is also possible that you may want to limit or turn off these services for privacy reasons or to conserve battery. To toggle Location Services, first, navigate your way to the primary Settings section of your iPhone. Scroll down until you find Privacy and tap on it. Here, you'll find the option for Location Services situated at the very top. When Location Services are turned on, your iPhone is allowing apps, which have requested and obtained your permission, to access your location. It's important to note that while you can completely turn off Location Services, doing so may impact the functionality of certain apps. If you wish to deactivate the Location Services, switch the toggle button to 'Off.' Your iPhone will then cease to track your location automatically. But, if you'd rather control which apps have access to your location, you can do so by individually adjusting each app's settings under the Location Services tab. This capability provides you with a granified control over your privacy. Moreover, activating the 'While Using' function will compel apps to only track your location while they're in active use. Alternatively, 'Never' utterly stops apps and your iPhone from tracking your location, and 'Ask Next Time' allows you to choose every time the app is in use. You can always switch between these as per your comfort. Always remember, that your choice of setting greatly depends on how comfortable you are with sharing your location data both for utility and privacy concerns. Furthermore, you can review the "System Services" option under Location Services where numerous system services such as Find My iPhone and location-based ads are listed. Here, you can customize whether these services are allowed to access your location. In conclusion, toggling Location Services on or off allows you to easily and efficiently control the privacy of your location on your iPhone. It's a simple yet crucial aspect of managing how your device interacts with location-based applications and services.
3. Choose Which Apps Can Access Your Location
Location access can play a critical role in enhancing your interactions with different apps on your iPhone. Utilizing this information, Google Maps can point out your present location, weather apps can give you location-specific updates, and restaurant apps can suggest nearby dining spots. However, it's also crucial to monitor and limit which apps can access your location for privacy reasons. Doing so is easy thanks to the iPhone’s in-depth settings. You can make changes through 'Location Services Settings', found within the settings section. Firstly, go to 'Settings' on your home screen and scroll down to locate 'Privacy'. Tapping on 'Privacy' opens a menu where 'Location Services' is one of the options. Tap on 'Location Services' to view the list of apps that have requested access to your location information. This list provides an at-a-glance view of whether location access is on or off for each app, granting you the freedom to easily determine which apps can know your location. To be more specific, you can adjust the setting for each individual app according to your need. Tap on the app name; you will now see three options: 'Never', 'Ask Next Time', and 'While Using the App'. Selecting 'Never' completely restricts the app from tracking your location. On the other hand, 'Ask Next Time' means the app will prompt you every time it wants to access your location. 'While Using the App' means the app can access your location information only while you're actively using it. If you're concerned about battery life, it might be wise to restrict some apps from accessing your location in the background. Moreover, scroll further down the app list, and there is a 'System Services' option. Tap on it, and you can manage the various system services associated with location services. 'Significant Locations' is one of the options listed, which logs data about the places where you spend the most time. If this feature is not desired, it can also be turned off for additional privacy control. By adjusting these location access permissions, you can retain better control over your privacy while still benefiting from location-based features when needed. It provides a robust solution without needing to completely disable Location Services altogether. Routinely reviewing and updating these settings can ensure your device operates in accordance with your personal privacy and usability preferences. In the increasingly digital age, location settings control has emerged as a key facet of digital privacy management.
Method 2: Use a VPN to Mask Your Location
Protecting your online privacy has become a major concern in an era where data breaches and surveillance are all too common. One of the most reliable methods to achieve this is by using a Virtual Private Network, or VPN. This highly effective solution masks your original IP address by channeling your internet connection through a server in a different location - virtually placing you elsewhere in the world. This article breaks down this process into three crucial steps; downloading and installing a VPN app, connecting to a VPN server in a different location, and lastly, verifying your new location. Each of these ultimately contributes to ensuring your anonymity online, helping you evade prying eyes and potential cyber threats. Diving into the first step, downloading and installing a VPN app is simple. The market is overflowing with options, free and paid, all of which vary in terms of their speed, security, and other features. Choose the one that suits your specific needs, install it, and you will have taken the first but crucial step towards securing your online footprint.
1. Download and Install a VPN App
Knowing how to download and install a VPN app can be quite helpful, especially when the aim is to mask your location. A Virtual Private Network (VPN) is primarily designed to give you online privacy, anonymity, and security by creating a private network from a public internet connection. Before you can use a VPN to trick your iPhone location, you need to download and install a VPN app. This can be done quite easily. Begin by visiting the App Store on your iPhone device and typing in "VPN" into the search bar. The App Store will display several results, presenting various VPN apps like ExpressVPN, NordVPN, or CyberGhost. Some may require a subscription fee, while others may provide a limited free version of the app. Depending upon your personal requirements, select an app that has good ratings, is reliable, and compatible with your iPhone. After you've selected the app that best suits your needs, tap the "Get" or "Download" button. When the app is downloaded, you may be required to create an account. This is usually a quick and easy process involving the input of some basic information. Once the account is set up, you'll have to choose your server location. The server location you choose will depend on where you want apps on your phone to think you are located. For instance, you might choose a server located in Germany if you want your apps to think that you're located in that country. Once you have chosen the server and agreed to the terms and conditions, you should then return to your iPhone settings, tap on 'General,' then 'Profile,' and finally, on the VPN app name. Mark it as trusted, and you should be all set. It's worth mentioning that you might want to look out for VPN apps renowned for their security features. These apps not only mask your location but also secure your data with encryption, preventing hackers and snoopers from intercepting your sensitive information, such as banking details and private messages, even if you're using a public Wi-Fi connection. While using a VPN might slightly slow down your internet speed, this inconvenience is often overshadowed by the advantages it offers in terms of privacy, security, and location flexibility. Lastly, keep in mind that while a VPN app can mask your location, it may also clash with some apps' functionalities, primarily those that rely heavily on location data. Hence, be sure to deactivate the VPN whenever you need these apps to work correctly. Remember that successfully downloading and installing a VPN on your iPhone is just part of the process. The other part is knowing when and how to use it effectively, which requires some knowledge and patience to perfect.
2. Connect to a VPN Server in a Different Location
A VPN or Virtual Private Networks serve as a solid tool not just for ensuring privacy and data security but also for changing your perceived location. By connecting to a VPN server, you link your device to a server located anywhere in the world. This next step of using a VPN to mask your location involves you, the user, connecting to a VPN server in a different location. Let's say you want to connect to Netflix US and you currently reside in India. You can change your connection to a US-based server using your chosen VPN service. When you activate your VPN, you will usually have a list of countries to select from. Once you choose the country, the VPN will reroute your internet traffic through a server in that country. The rerouting process involves the VPN server 'masking' your IP address with one local to it. Therefore, any website or service you connect to will identify you as being in the location of the VPN server instead of your actual location. This ability to mask your real location with a different one is particularly useful for bypassing geoblocks, allowing you to access content that might otherwise be unavailable in your actual geographical area. Your connection to all your apps and services will now look like it's coming from the server's location, regardless of where you physically are. This functionality works for all applications, including location-based games like Pokémon Go, streaming services like Hulu, Netflix, and even social media sites like Facebook. Please note that the effectiveness might vary based on the VPN service you have chosen. Some VPNs can effortlessly bypass even the toughest geoblocks while others may struggle. It's important to pay attention to the security protocol and logging policies of the VPN you select. Some VPNs use encryption protocols that provide a more secure connection, protecting your data from potential intruders. Besides, some VPN providers keep logs of your activity, which can somewhat infringe your privacy. Thus, always opt for a service that follows a strict no-logs policy and uses high-level encryption protocols. In conclusion, to connect to a VPN server in a different location, all you require is a dependable VPN service. These services, once enabled and connected to a desired server location, mask your actual location, allowing you to circumnavigate geographical restrictions. It's an excellent tool for privacy, security, and broadening your digital horizon but do consider the VPN's security protocol and logging policies before settling on a provider.
3. Verify Your New Location is Being Used
Upon setting up and activating your VPN, the next crucial step is to verify if your new location is being effectively used. This step is essential, especially if the purpose of changing your location is to bypass geographical restrictions on certain apps or services. If your location is not successfully spoofed, you might not gain access to these restricted features or content. To verify your location, you can use a number of websites or apps designed to detect your IP address’s geographical location. Firstly, try visiting "WhatIsMyIPAddress.com". This site immediately gives you information about your IP address when you load the website. It displays the country, city, latitude and longitude, and ISP related to the IP address your iPhone is currently using. If the VPN is working correctly, the location shown should correspond to the location you selected on your VPN app, not your actual physical location. In addition to websites, you can use apps like "Locate My IP" or check the location settings directly on your device in the Settings → Privacy → Location Services section. If you notice any discrepancies between the location displayed and the one chosen in your VPN, try switching to another server within the VPN app or reach out to their customer service for assistance, as there might be certain issues preventing the correct location from being displayed. Your iPhone may still have location-based data cached in some of your apps, meaning that after changing your location, it might still show the old location within these apps. In such a case, try closing out and relaunching these apps or, in the most prolonged situations, consider uninstalling and reinstalling the app entirely. Remember that not every VPN service offers the same level of efficiency, so if you continue to face issues after ensuring all the steps are correctly followed, it may be worth exploring other VPN providers. A good VPN should effectively mask your actual location and provide you with a different IP address that matches your chosen location. Making sure your new location is being used is a fundamental part of using a VPN to mask your iPhone location. This step not only assures that you have achieved your desired goal but also fosters a deeper understanding of how VPNs work, giving you the confidence to navigate this technology in the future.
Method 3: Use a Location Spoofing App
The versatility of modern mobile devices allows us to do things we never thought possible, and this includes the ability to mimic our geographic location via GPS. This article dives deep into Method 3: Using a Location Spoofing App. This method is mainly achievable in a trifecta of simple steps, including downloading and installing a location spoofing app, setting up a new location with this app, and finally testing the new location to ensure it's functioning correctly. These steps breathe simplicity yet effectiveness into the sometimes necessary procedure of modifying one's apparent location, and have proven useful in scenarios involving location-based mobile games, privacy maintenance, and even testing geographically diverse marketing plans. We begin with the first step, which is to identify a reliable location-spoofing app in the various app marketplaces. Downloading and installing such an app will pave the way for the process of tricking your GPS to believe you're somewhere you're not. Let's delve more into the first step - downloading and setting up a location spoofing app.
1. Download and Install a Location Spoofing App
Downloading and installing a location spoofing app is a more sophisticated method of changing your location on your iPhone. The process involves using third-party software that provides artificial GPS coordinates, tricking your device and any of your applications into believing you’re in a different place than your actual physical location. To accomplish this, first, you need to find a reputable location spoofing app. There are numerous apps available, but it's recommended to opt for one with high user ratings and reviews for security and reliability. Apps like iTools, Dr.Fone - Virtual Location, and NordVPN are among the popularly used ones. To download your preferred spoofing app, open your App Store, type in the name of the application in the search bar, and hit 'enter.' Once the application appears, tap 'Get' and then 'Install.' As the application downloads, your device may request your Apple ID password. If this happens, enter the password and continue. After the download finishes, you need to grant the necessary permissions, like access to your device’s location services, for the application to operate successfully. Installing the app follows a similar procedure. Once the application has been downloaded, it needs to be installed on your device. The installation files are included within the downloaded package, so the installation begins automatically after the download is completed, and you just need to follow the installation instructions. Make sure to accept any terms of use and give any necessary permissions during the installation process for the location-spoofing app to operate effectively. Once installed, you will typically have to select a country, pinpoint a specific location, or even simulate movement along a route in some apps. It's a quick and convenient way to alter your digital geolocation without physically moving to a new location. It's imperative to note that while it's generally safe to use location spoofing apps, it's crucial to use credible ones to avoid any potential security risks. Also, remember that misusing these apps can lead to breaches in terms and services of some applications or services. Use these tools responsibly and respect privacy laws and terms of service.
2. Set a New Location Using the App
2. Set a New Location Using the App Once you have installed a reliable location spoofing app, such as iTools, you can now move to set a new location on your iPhone. This is a simple process that typically involves a few clicks and adjustments. Here's an elaborate step-by-step guide on how to make this adjustment. Start by opening your chosen location spoofing app. The immediate interface on most of these apps prompts you to either choose a location manually or automatically. If you prefer a specific place, you can utilize the manual option and type in the coordinates or place's name. Conversely, if you are in for exploration and wouldn't mind any location, the automatic feature will surprise you with a random place. Some advanced applications give you the leverage to save specific locations, making it easy for you to switch between your favorite spots. If excitement and exploration tickle your fancy, such features will come in handy. You only need to switch within the saved locations and experience a change in your virtual environment swiftly. Additionally, there are location spoofing apps with movement simulation. This feature comes in handy when you need to pretend you are on the move in your selected new location. The simulation can mimic the velocity of walking, cycling, or driving, making it seem real to any third-party app that you're indeed traversing a city or racing on a highway, while in real sense, you're comfortably seated on your couch. To confirm your changes once you're through setting a new location, close the location spoofing app and open a location-based app like Google Maps. This should instantly confirm that you are indeed in the new location, virtually. Remember, location spoofing doesn't change your actual GPS coordinates; it simply tricks your iPhone and its apps into believing you're somewhere else. The revamp disappears if you turn off your device or when the location spoofing app doesn't run in the background. Also worth noting, while these changes can be enjoyable and beneficial for various purposes, it's critical to use these location spoofing apps responsibly and ethically. Misuse of these apps could lead to a violation of terms of service with some applications and potential legal issues. In conclusion, the process of setting a new location using a location spoofing app revolves around selecting or manually inputting a location and confirming the changes. Advanced features like movement simulation and saved favorite spots enhance the user experience, making the whole process fun and superficially real. Always remember to use these tools responsibly to avoid adverse repercussions.
3. Test the New Location to Ensure it is Working
Before launching your location spoofing app, you should thoroughly test all of its features and ensure its operations align with the intended use. This step is a necessary precaution when using covert methods that could compromise your security if not handled with discernible care.
After successfully downloading and installing your preferred location spoofing app, you may need to restart your iPhone for the app to seamlessly integrate with the device's system settings. Now, you're ready for the test run. Select the location you intend to set as your spoofed location. You can type the location directly into the app. Most location spoofing apps have map features where you can manually pinpoint the exact place on the globe you would like to appear from. Return to the app's main dashboard to confirm if your new location has set successfully.
It's crucial to note that although your location spoofing app may successfully simulate a virtual movement to your desired global coordinates, some apps and services may not be fooled so easily. Sophisticated systems such as banks, mainstream social media platforms, and high-functioning online games like Pokemon Go have improved their security features to detect location spoofing attempts. Running a check on these platforms can give you a better understanding of how well your spoofing app works.
To validate this, use a location-check website or install an app that allows you to check your current location. If the test confirms that you are indeed appearing to be in your chosen spoofed location, your location spoofing app is working correctly. This shows that any location-based restrictions on your online activities are now lifted.
However, if the verification demonstrates that you still appear to be in your actual physical location, you might have to reconsider the spoofing app you're currently using. Go back into your app settings, review your inputs, or try a different location spoofing app from your app store. It is crucial to remember that results may vary from one app to another. Some apps may integrate better with certain devices due to compatibility differences.
This is why testing the new location is an indispensable part of the process of changing your location on your iPhone. It's not just about achieving the spoof, but guaranteeing your device security and getting the best out of the apps and services your iPhone can offer. Always remember to responsibly use location spoofing apps and respect user agreements to avoid breaching community guidelines and the law.