How To Convert Heic To Jpg On Iphone
Here is the introduction paragraph: Are you tired of struggling with HEIC files on your iPhone? The High Efficiency Image File Format (HEIC) is a great way to save storage space, but it can be frustrating when you need to share or edit your photos in a more widely supported format like JPEG. Fortunately, converting HEIC to JPG on your iPhone is easier than you think. In this article, we'll explore three simple methods to convert HEIC to JPG, including using the built-in Photos app, a third-party app, and even a computer and iTunes. Whether you're looking for a quick and easy solution or a more flexible approach, we've got you covered. So, let's dive in and start with the most straightforward method: using the Photos app to convert your HEIC files to JPG.
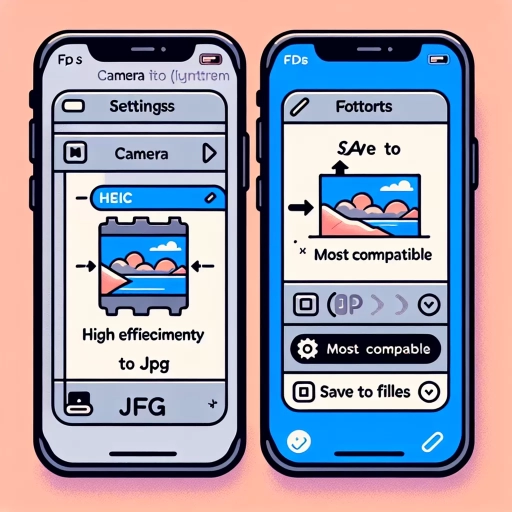
Method 1: Using the Photos App
Here is the introduction paragraph: Are you tired of struggling with HEIC images that won't open on your device or can't be shared with others? Do you wish there was a simple way to convert these files to a more widely supported format like JPEG? Fortunately, there are several methods to convert HEIC to JPEG, and in this article, we'll explore one of the most convenient and user-friendly approaches. By using the Photos app, you can easily convert your HEIC images to JPEG in just a few taps. To do this, you'll need to open the Photos app and select the HEIC image you want to convert, then tap the share icon and choose the "Save as JPEG" option. Finally, wait for the conversion process to complete, and you'll have a JPEG version of your image ready to use. In this article, we'll walk you through Method 1: Using the Photos App.
Open the Photos App and Select the HEIC Image
. To convert HEIC to JPG on your iPhone, start by opening the Photos app, which is the default image viewer on your device. Once the app is open, navigate to the album or folder where your HEIC image is stored. You can find your HEIC images in the "Media Types" or "Albums" section, depending on how your photos are organized. Locate the specific HEIC image you want to convert and select it by tapping on it. This will open the image in full-screen mode, allowing you to view it in more detail. With the image selected, you can now proceed to the next step to convert it to JPG format. The Photos app provides a convenient way to convert HEIC images to JPG, making it easy to share them with others or use them in applications that don't support HEIC format. By following these simple steps, you can quickly and easily convert your HEIC images to JPG on your iPhone.
Tap the Share Icon and Choose the "Save as JPEG" Option
. Here is the paragraphy: To convert HEIC to JPG on your iPhone, start by opening the Photos app and selecting the image you want to convert. Tap the "Share" icon, which looks like a box with an arrow coming out of it. This will open the share menu, where you'll find various options for sharing or saving your image. From the share menu, choose the "Save as JPEG" option. This will convert your HEIC image to a JPEG file and save it to your iPhone's camera roll. You can then access the converted image from the Photos app, where you can share it, edit it, or use it as you would any other JPEG file. Note that this method will create a new JPEG file, leaving the original HEIC file intact. This is a convenient way to convert individual images, but if you need to convert multiple images at once, you may want to consider using a different method.
Wait for the Conversion Process to Complete
. Here is the paragraphy: Once you've selected the HEIC file you want to convert, the Photos app will automatically start the conversion process. This process may take a few seconds or minutes, depending on the size of the file and the speed of your iPhone. It's essential to wait for the conversion process to complete, as interrupting it may result in a corrupted or incomplete file. You can monitor the progress of the conversion by looking for a progress bar or a spinning wheel on the screen. Once the conversion is complete, you'll see a "Converted" or "Done" message on the screen, indicating that the file has been successfully converted to JPEG format. At this point, you can open the converted file and verify that it has been converted correctly. If you encounter any issues during the conversion process, you can try restarting the Photos app or your iPhone to resolve the problem. It's also a good idea to ensure that your iPhone has sufficient storage space and a stable internet connection to avoid any interruptions during the conversion process. By waiting for the conversion process to complete, you can ensure that your HEIC file is converted to JPEG format successfully and without any errors.
Method 2: Using a Third-Party App
If you're looking for an alternative way to convert HEIC images to JPEG format, you can use a third-party app. This method offers more flexibility and customization options compared to using the Photos app. By downloading and installing a HEIC to JPEG converter app, you can select the HEIC image you want to convert and choose the desired conversion option. Additionally, you can adjust settings such as image quality and compression level to suit your needs. Once you've made your selections, you can save the converted JPEG image to your device. This method provides more control over the conversion process and can be a better option if you need to convert multiple images at once. If you're not comfortable using a third-party app, you can always refer back to Method 1: Using the Photos App.
Download and Install a HEIC to JPEG Converter App
. If you prefer a more straightforward approach, you can download and install a HEIC to JPEG converter app on your iPhone. There are several options available in the App Store, such as HEIC Converter, Convert HEIC to JPEG, and HEIC to JPEG Converter, among others. These apps are designed to make the conversion process easy and convenient, allowing you to convert multiple files at once and even batch convert entire albums. Once you've downloaded and installed the app, simply select the HEIC files you want to convert, choose the output format (JPEG), and let the app do the rest. Some apps may also offer additional features, such as the ability to adjust image quality, resize images, or add watermarks. By using a dedicated HEIC to JPEG converter app, you can quickly and easily convert your HEIC files to JPEG format, making them compatible with a wider range of devices and platforms. Plus, many of these apps are free to download and use, with some offering in-app purchases for additional features or premium functionality. Overall, downloading and installing a HEIC to JPEG converter app is a simple and effective way to convert your HEIC files to JPEG format on your iPhone.
Select the HEIC Image and Choose the Conversion Option
. Here is the paragraphy: To convert HEIC images to JPG on your iPhone using a third-party app, start by selecting the HEIC image you want to convert. You can do this by opening the Photos app, navigating to the album or folder where the image is stored, and tapping on the image to open it. Once the image is open, tap the "Share" icon, which looks like a box with an arrow coming out of it. This will open the share menu, where you can select the conversion option. Look for an app that offers HEIC to JPG conversion, such as "HEIC Converter" or "Convert to JPG". Tap on the app's icon to select it, and then follow the in-app instructions to complete the conversion process. Some apps may offer additional features, such as batch conversion or image editing, so be sure to explore the app's options to get the most out of the conversion process. By selecting the HEIC image and choosing the conversion option, you can easily convert your HEIC images to JPG format using a third-party app on your iPhone.
Adjust Settings and Save the Converted JPEG Image
. Here is the paragraphy: Once you've made the necessary adjustments, tap "Save" to convert the HEIC image to a JPEG file. The converted image will be saved in the Photos app, and you can access it from the "Albums" tab. You can also share the converted image directly from the app by tapping the "Share" icon. If you want to save the converted image to your iPhone's Files app, tap "Save to Files" and choose a location to save the file. The converted image will be saved in the JPEG format, and you can access it from the Files app. Additionally, you can also use the "Share" feature to send the converted image to other apps, such as email or messaging apps, or to upload it to cloud storage services like Google Drive or Dropbox. By using a third-party app to convert HEIC to JPEG, you can easily share your photos with others, regardless of the device or platform they use.
Method 3: Using a Computer and iTunes
Here is the introduction paragraph: If you're looking for an alternative method to convert HEIC images to JPEG format, you can use a computer and iTunes. This method is particularly useful if you have a large number of images to convert or if you prefer to manage your photos on your computer. By connecting your iPhone to your computer and using iTunes, you can easily select the HEIC images you want to convert and export them in JPEG format. In this article, we'll walk you through the steps to convert HEIC images to JPEG using a computer and iTunes, including connecting your iPhone to your computer and opening iTunes, selecting the HEIC image and choosing the "Export" option, and choosing the JPEG format and saving the converted image. If you're looking for a more straightforward method, you can also consider using the Photos app on your iPhone, as described in Method 1.
Connect Your iPhone to Your Computer and Open iTunes
. Here is the paragraphy: To convert HEIC files to JPG on your iPhone, you can use a computer and iTunes. Start by connecting your iPhone to your computer using a USB cable. Once connected, open iTunes on your computer. If you don't have iTunes installed, you can download it from the Apple website. Once iTunes is open, select your iPhone from the top left corner of the screen. You may be prompted to enter your iPhone's passcode or trust the computer, so follow the on-screen instructions to complete this step. With your iPhone connected and selected in iTunes, you can now access your iPhone's files and convert your HEIC files to JPG. This method is useful if you want to convert multiple files at once or if you prefer to use a computer to manage your iPhone's files. Additionally, using iTunes to convert HEIC files to JPG ensures that the converted files are of high quality and compatible with most devices and software.
Select the HEIC Image and Choose the "Export" Option
. To convert HEIC images to JPG on your iPhone using a computer and iTunes, start by connecting your iPhone to your computer using a USB cable. Once connected, open iTunes on your computer and select your iPhone from the top left corner of the iTunes window. Next, click on the "Photos" tab and select the "Sync Photos" option. Then, choose the folder where your HEIC images are stored on your computer. Now, select the HEIC image you want to convert and choose the "Export" option. You can export the image as a JPG file by selecting the "JPG" format from the export options. You can also choose to export the image in its original size or resize it to a smaller size. Once you've selected the export options, click on the "Export" button to start the conversion process. The converted JPG image will be saved to the folder you specified on your computer. You can then transfer the JPG image back to your iPhone or use it on your computer as needed. This method is a convenient way to convert HEIC images to JPG on your iPhone using a computer and iTunes.
Choose the JPEG Format and Save the Converted Image
. When you've selected the desired image, click on the "Choose" button to proceed. The next step is to choose the JPEG format and save the converted image. In the "Save as type" dropdown menu, select "JPEG" as the file format. You can also choose to save the image in other formats like PNG or BMP, but JPEG is the most commonly used format for photos. Once you've selected the JPEG format, choose a location on your computer to save the converted image. You can save it to your desktop, documents folder, or any other location of your choice. Make sure to give the file a descriptive name, so you can easily identify it later. Finally, click on the "Save" button to save the converted image in JPEG format. The image will be saved in the selected location, and you can now use it as needed. By following these simple steps, you can easily convert HEIC images to JPEG format using a computer and iTunes. This method is especially useful if you need to share the image with someone who doesn't have an iPhone or if you want to use the image in a program that doesn't support HEIC format.