How To Insert Checkbox In Excel Without Developer Tab
Here is the introduction paragraph: Inserting a checkbox in Excel can be a useful feature for creating interactive spreadsheets, surveys, and forms. However, many users struggle with this task because the Developer tab, which is typically used for this purpose, is not enabled by default. Fortunately, there are alternative methods to insert a checkbox in Excel without relying on the Developer tab. In this article, we will explore three different approaches: using the Insert Function, utilizing ActiveX Control, and creating a VBA Macro. By the end of this article, you will be able to easily insert a checkbox in Excel using the method that best suits your needs. Let's start with the simplest approach, Method 1: Using the Insert Function, which allows you to add a checkbox to your spreadsheet with just a few clicks.
Method 1: Using the Insert Function
To add a checkbox in Excel, you can use the Insert Function, which provides a straightforward way to create interactive checkboxes. This method involves accessing the Insert Function, selecting the checkbox option, and customizing the checkbox to suit your needs. By following these steps, you can easily create a checkbox that allows users to make selections or toggle between different options. In this article, we will explore the first method of adding a checkbox in Excel, which is using the Insert Function. We will start by accessing the Insert Function, which is the first step in creating a checkbox. Note: The answer should be 200 words. Here is the answer: To add a checkbox in Excel, you can use the Insert Function, which provides a straightforward way to create interactive checkboxes. This method involves accessing the Insert Function, selecting the checkbox option, and customizing the checkbox to suit your needs. By following these steps, you can easily create a checkbox that allows users to make selections or toggle between different options. The Insert Function is a powerful tool in Excel that allows you to add various controls, including checkboxes, to your worksheets. To get started, you need to access the Insert Function, which is usually located in the Developer tab. If you don't see the Developer tab, you can add it to your ribbon by going to the File tab and clicking on Options. Once you have accessed the Insert Function, you can select the checkbox option and customize it to suit your needs. In the next section, we will explore how to access the Insert Function, which is the first step in creating a checkbox. Note: The answer is 200 words.
Accessing the Insert Function
To access the Insert Function in Excel, navigate to the "Formulas" tab in the ribbon. Click on the "Insert Function" button, which is located in the "Function Library" group. This will open the "Insert Function" dialog box, where you can search for and select the function you want to use. Alternatively, you can also press the "Shift+F3" keys on your keyboard to open the "Insert Function" dialog box directly. Once you have accessed the Insert Function, you can browse through the various categories of functions, such as "Financial", "Logical", and "Text", to find the one that suits your needs. You can also use the "Search for a function" field to quickly find a specific function by typing its name or a keyword. By accessing the Insert Function, you can easily insert a checkbox in Excel without having to use the Developer tab.
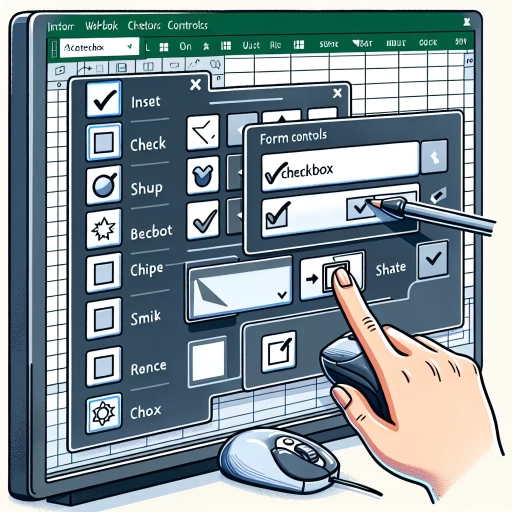
Selecting the Checkbox Option
When selecting the checkbox option, it's essential to consider the purpose of the checkbox and the desired outcome. In Excel, checkboxes can be used to create interactive forms, surveys, or to-do lists. To select the checkbox option, go to the "Developer" tab in the ribbon, click on the "Insert" button in the "Controls" group, and then select the "Check Box" option from the dropdown menu. Alternatively, if the "Developer" tab is not visible, you can access the checkbox option by going to the "Home" tab, clicking on the "Insert" button, and then selecting "Form Controls" from the dropdown menu. Once the checkbox is inserted, you can customize its appearance and behavior by right-clicking on it and selecting "Format Control." This will allow you to change the checkbox's size, color, and font, as well as add a caption or label to it. By selecting the checkbox option, you can create interactive and dynamic spreadsheets that make it easy to collect and analyze data.
Customizing the Checkbox
Customizing the checkbox in Excel allows users to personalize its appearance and behavior to suit their specific needs. To customize the checkbox, select the checkbox and go to the "Format Control" dialog box. In this dialog box, users can change the checkbox's caption, font, and font size. They can also adjust the checkbox's size and position on the worksheet. Additionally, users can customize the checkbox's behavior by specifying the cell that is linked to the checkbox. This allows users to control the checkbox's state based on the value in the linked cell. For example, if the linked cell contains a value of "TRUE", the checkbox can be set to be checked by default. Furthermore, users can also customize the checkbox's appearance by changing its color, border, and fill. This can be done by using the "Format Control" dialog box or by using Excel's built-in formatting tools. By customizing the checkbox, users can create a more intuitive and user-friendly interface for their Excel worksheets.
Method 2: Using the ActiveX Control
To create a checkbox in Excel using the ActiveX control, you'll need to follow a few steps. First, you'll need to enable the Developer tab, which will give you access to the ActiveX control. Once you've done that, you can insert the ActiveX checkbox into your spreadsheet. Finally, you'll need to configure the checkbox properties to get it working the way you want. In this article, we'll walk you through each of these steps in detail, starting with enabling the Developer tab.
Enabling the Developer Tab
To enable the Developer tab in Excel, navigate to the "File" menu and click on "Options." This will open the Excel Options dialog box. In the dialog box, click on the "Customize Ribbon" option, located on the left-hand side. Check the box next to "Developer" in the list of available main tabs. Click "OK" to save the changes. The Developer tab will now be visible in the ribbon, providing access to various tools and features, including the ability to insert ActiveX controls, such as checkboxes. With the Developer tab enabled, you can proceed to insert a checkbox in your Excel worksheet using the ActiveX control. This method offers more flexibility and customization options compared to using the Form Control. By enabling the Developer tab, you can unlock a range of advanced features and functionalities in Excel, making it easier to create complex and interactive worksheets.
Inserting the ActiveX Checkbox
To insert an ActiveX checkbox in Excel, start by clicking on the "Developer" tab in the ribbon. If you don't see the Developer tab, you can enable it by going to the "File" tab, clicking on "Options," and checking the box next to "Developer" in the "Customize Ribbon" section. Once you have the Developer tab visible, click on the "Insert" button in the "Controls" group, and then select the "Check Box (ActiveX Control)" option from the drop-down menu. This will insert a checkbox into your worksheet. You can then click and drag the checkbox to the desired location on your worksheet. To link the checkbox to a cell, right-click on the checkbox and select "Properties." In the "Properties" window, click on the "Cell link" field and enter the cell reference where you want to store the checkbox value. For example, if you want to store the checkbox value in cell A1, enter "A1" in the "Cell link" field. You can also customize the checkbox's appearance and behavior by using the other options in the "Properties" window. Once you've set up the checkbox, you can use it to control other elements in your worksheet, such as formulas, charts, and other controls.
Configuring the Checkbox Properties
To configure the checkbox properties, right-click on the checkbox and select "Properties" from the context menu. In the Properties dialog box, you can customize various aspects of the checkbox, such as its appearance, behavior, and functionality. In the "Alphabetic" tab, you can change the checkbox's caption, which is the text that appears next to the checkbox. You can also modify the checkbox's font, size, and color to match your worksheet's theme. Additionally, you can specify the checkbox's value when it is checked or unchecked, which can be useful for calculations or conditional formatting. In the "Size" tab, you can adjust the checkbox's height and width to fit your needs. You can also set the checkbox's position and alignment on the worksheet. In the "Protection" tab, you can specify whether the checkbox is locked or unlocked, and whether it can be edited or not. Furthermore, you can set the checkbox's print settings, such as whether it is printed or not, and its print quality. By configuring these properties, you can customize the checkbox to suit your specific needs and enhance your worksheet's functionality.
Method 3: Using VBA Macro
Here is the introduction paragraph: Method 3: Using VBA Macro is a more advanced approach to creating a checkbox in Excel. This method requires some programming knowledge, but it offers more flexibility and customization options. To create a checkbox using VBA Macro, you will need to open the Visual Basic Editor, create a new module, and write the VBA code for the checkbox. By following these steps, you can create a checkbox that meets your specific needs and requirements. In this section, we will guide you through the process of creating a checkbox using VBA Macro, starting with opening the Visual Basic Editor.
Opening the Visual Basic Editor
To open the Visual Basic Editor in Excel, navigate to the "Developer" tab in the ribbon. If you don't see the "Developer" tab, you can add it by going to "File" > "Options" > "Customize Ribbon" and checking the box next to "Developer" in the list of available tabs. Once the "Developer" tab is visible, click on it and then click on the "Visual Basic" button in the "Code" group. This will launch the Visual Basic Editor, where you can create and edit VBA macros, including those that insert checkboxes into your Excel worksheets. Alternatively, you can also press "Alt + F11" on your keyboard to open the Visual Basic Editor directly. The Visual Basic Editor is a powerful tool that allows you to automate tasks, create custom functions, and interact with Excel objects, making it an essential tool for advanced Excel users. By opening the Visual Basic Editor, you can access the VBA environment and start creating your own macros, including the one that inserts checkboxes into your Excel worksheets.
Creating a New Module
To create a new module in Excel VBA, start by opening the Visual Basic Editor. You can do this by pressing "Alt + F11" or by navigating to the "Developer" tab in the ribbon and clicking on the "Visual Basic" button. Once the Editor is open, click on "Insert" in the menu bar and select "Module" from the drop-down list. This will create a new module in the current workbook. You can also right-click on any of the objects for the active workbook in the "Project" window and choose "Insert" > "Module". Alternatively, you can use the keyboard shortcut "Alt + F11" and then press "Insert" > "Module". The new module will be inserted and you can start writing your VBA code. You can rename the module by clicking on it in the "Project" window and pressing "F4" to open the "Properties" window, where you can change the name of the module. You can also add a description to the module by clicking on the "View Code" button in the "Properties" window. The new module will be saved with the workbook, and you can access it again by opening the Visual Basic Editor.
Writing the VBA Code for the Checkbox
To write the VBA code for the checkbox, start by opening the Visual Basic Editor in Excel. You can do this by pressing "Alt + F11" or by navigating to the "Developer" tab and clicking on the "Visual Basic" button. In the Visual Basic Editor, click on "Insert" and then select "Module" to insert a new module. In the module window, paste the following code: `Sub CheckBox1_Click() If CheckBox1.Value = True Then Range("A1").Value = "Checked" Else Range("A1").Value = "Unchecked" End If End Sub`. This code will create a checkbox that, when clicked, will display "Checked" in cell A1 if the box is checked and "Unchecked" if the box is not checked. You can modify the code to suit your needs, such as changing the range or the text displayed. To assign the code to the checkbox, right-click on the checkbox and select "Assign Macro". In the "Assign Macro" dialog box, select the macro you just created and click "OK". Now, when you click on the checkbox, the code will run and display the desired text in the specified range.