How To Open A Paint Can
Opening a paint can may seem like a straightforward task, but it requires attention to detail and a few simple precautions to ensure a smooth and safe experience. Whether you're a seasoned DIY enthusiast or a professional painter, understanding the proper techniques for opening a paint can is essential to avoid accidents and achieve professional-looking results. In this article, we will guide you through the process of opening a paint can, from preparation to post-opening precautions. To start, it's crucial to prepare yourself and your workspace for the task at hand. This involves gathering the necessary tools, protecting your surroundings, and taking safety measures to prevent accidents. By doing so, you'll be able to approach the task with confidence and avoid any potential hazards. Preparation is Key, and it's the first step in successfully opening a paint can.
Preparation is Key
Preparation is key to a successful project. Whether you're a DIY enthusiast or a professional contractor, having the right tools and equipment is crucial to getting the job done efficiently and effectively. However, preparation goes beyond just having the right tools. It's also about creating a safe working environment and taking necessary precautions to avoid accidents. In this article, we'll discuss the importance of preparation and provide tips on how to prepare for a project. We'll cover the importance of choosing the right tool for the job, wearing protective gear to prevent injuries, and working in a well-ventilated area to avoid health hazards. By following these tips, you'll be well-prepared to tackle any project that comes your way. So, let's start with the first step in preparation: choosing the right tool.
Choose the Right Tool
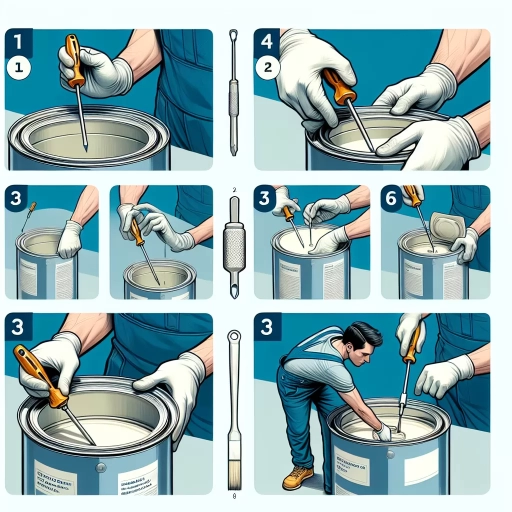
Choosing the right tool is essential when it comes to opening a paint can. The most common tool used for this purpose is a flathead screwdriver or a paint can opener. A flathead screwdriver is a versatile tool that can be used for a variety of tasks, including prying open the lid of a paint can. However, it's essential to use a screwdriver that is sturdy enough to withstand the pressure required to open the can. A paint can opener, on the other hand, is a specialized tool designed specifically for opening paint cans. It typically has a curved or angled blade that allows for easy prying and a comfortable grip for leverage. When choosing a tool, consider the size and type of paint can you are working with. For smaller cans, a flathead screwdriver may be sufficient, while larger cans may require a paint can opener. Additionally, consider the material of the tool, as some may be more prone to slipping or breaking than others. Ultimately, the right tool will make the process of opening a paint can much easier and safer.
Wear Protective Gear
Wearing protective gear is a crucial step in ensuring a safe and successful painting experience. When working with paint, it's essential to protect your skin, eyes, and respiratory system from the harsh chemicals and particles that can be released during the process. A pair of gloves will prevent paint from coming into contact with your skin, while safety goggles or glasses will shield your eyes from splatters and spills. A mask or respirator will filter out fumes and particles, reducing the risk of inhalation and respiratory problems. Additionally, wearing old clothes or a painting smock will protect your clothing from stains and splatters. By taking the time to put on the necessary protective gear, you'll be able to focus on the task at hand without worrying about your safety, allowing you to work more efficiently and effectively.
Work in a Well-Ventilated Area
When working with paint, it's essential to work in a well-ventilated area to avoid inhaling harmful fumes and particles. Paints, thinners, and other chemicals can release volatile organic compounds (VOCs) that can cause respiratory problems, headaches, and dizziness. Inhaling these fumes can also lead to long-term health issues, such as lung damage and cancer. To ensure a safe working environment, open windows and doors to provide good airflow, and consider using a fan to circulate the air. If you're working in a confined space, consider using a respirator or mask to filter out the fumes. Additionally, keep the area clean and free of clutter to prevent accidents and spills. By working in a well-ventilated area, you can minimize the risks associated with painting and ensure a safe and healthy working environment.
Opening the Paint Can
Opening a paint can can be a daunting task, especially if you're new to DIY projects or haven't worked with paint before. However, with the right techniques and tools, you can easily open a paint can and get started on your project. To open a paint can, you'll need to locate the lid's edge, apply gentle pressure, and use a paint can opener if necessary. By following these simple steps, you can avoid spills and messes, and ensure a smooth and successful painting experience. In this article, we'll take a closer look at each of these steps, starting with the first and most crucial one: locating the lid's edge.
Locate the Lid's Edge
To locate the lid's edge, start by examining the paint can carefully. Look for a slight gap or a thin line that runs along the edge of the lid, which indicates where the lid meets the can. This gap is usually visible, but it may be more pronounced on some cans than others. If you're having trouble finding the edge, try running your finger or a blunt object, such as a pencil or a chopstick, around the rim of the can. This will help you feel for the slight indentation or bump that marks the edge of the lid. Alternatively, you can also look for a small notch or a series of notches on the lid, which can serve as a guide to help you locate the edge. By identifying the lid's edge, you'll be able to position your tool or opener correctly, making it easier to pry the lid off the can.
Apply Gentle Pressure
When opening a paint can, it's essential to apply gentle pressure to avoid spilling or splashing the paint. This is especially crucial when dealing with a full can, as the pressure inside can be quite strong. To apply gentle pressure, start by placing the can on a stable surface and ensuring the lid is securely positioned. Next, use a paint can opener or a flathead screwdriver to pry the lid off slowly and carefully. Apply gentle pressure in a clockwise direction, working your way around the lid until it starts to loosen. As the lid begins to come off, reduce the pressure to prevent the paint from splashing out. Continue to apply gentle pressure until the lid is completely removed, taking care not to spill any paint in the process. By applying gentle pressure, you can safely and effectively open the paint can without making a mess.
Use a Paint Can Opener if Necessary
If the paint can is particularly stubborn, you may need to use a paint can opener. This is a specialized tool designed specifically for opening paint cans, and it can be found at most hardware stores or home improvement centers. To use a paint can opener, simply place the opener on the edge of the can and twist it gently until the lid begins to loosen. Continue to twist the opener until the lid comes off completely. Be careful not to spill any paint when removing the lid, as it can be messy and difficult to clean up. If you don't have a paint can opener, you can also use a screwdriver or a sharp object to pry the lid off, but be careful not to damage the can or the lid. It's also important to note that some paint cans may have a special type of lid that requires a specific type of opener, so be sure to check the manufacturer's instructions before attempting to open the can.
Post-Opening Precautions
When opening a can of paint, it's essential to take certain precautions to ensure the paint remains usable and safe. After opening the can, there are several steps you can take to maintain the quality of the paint and prevent accidents. First, it's crucial to stir the paint thoroughly to redistribute the pigments and prevent settling. Additionally, checking for debris and contamination is vital to prevent the introduction of foreign particles that can affect the paint's texture and finish. Finally, closing the can properly when not in use is necessary to prevent spills and drying out. By following these simple steps, you can ensure your paint remains in good condition and is ready to use when you need it. To start, let's take a closer look at the importance of stirring the paint thoroughly.
Stir the Paint Thoroughly
Stir the paint thoroughly before using it to ensure an even color and consistency. This is a crucial step that many people often overlook, but it's essential to get the best results from your painting project. When you open a paint can, the paint may have separated into different layers, with the heavier particles settling at the bottom. If you don't stir the paint, these particles can remain at the bottom of the can, resulting in an uneven color and texture on your walls. Stirring the paint helps to redistribute these particles, ensuring that the color and consistency are uniform throughout the can. To stir the paint effectively, use a paint stirrer or a wooden spoon to mix the paint in a circular motion, starting from the bottom of the can and working your way up. Be sure to scrape the sides and bottom of the can to loosen any stuck particles. Continue stirring until the paint is smooth and even, with no visible streaks or lumps. It's also a good idea to stir the paint occasionally as you're using it, especially if you're working on a large project. This will help to maintain the color and consistency of the paint, ensuring that your finished project looks professional and polished. By taking the time to stir the paint thoroughly, you can avoid common painting mistakes and achieve a beautiful, even finish that will last for years to come.
Check for Debris and Contamination
When opening a paint can, it's essential to check for debris and contamination to ensure a smooth and successful painting process. Debris, such as dried paint, dust, and dirt, can accumulate on the rim and lid of the can, which can then be transferred to the paint and cause lumps, uneven texture, and other defects. Contamination, on the other hand, can occur when the paint comes into contact with air, moisture, or other substances, leading to spoilage, mold, and bacterial growth. To check for debris and contamination, start by inspecting the can's rim and lid for any visible signs of dirt, dust, or dried paint. Use a clean cloth or paper towel to wipe away any debris, and then inspect the paint itself for any signs of contamination, such as an off smell, slimy texture, or mold growth. If you notice any of these signs, it's best to err on the side of caution and discard the paint to avoid any potential problems. Additionally, always make sure to store paint cans in a clean, dry, and well-ventilated area to prevent contamination and debris from accumulating in the first place. By taking these precautions, you can ensure that your paint is fresh, clean, and ready to use, resulting in a professional-looking finish and a successful painting project.
Close the Can Properly When Not in Use
When not in use, it's essential to close the paint can properly to prevent spills, contamination, and drying out of the paint. To do this, start by wiping the rim of the can with a clean cloth or paper towel to remove any excess paint. Next, place the lid back on the can, ensuring it's centered and aligned with the rim. Tighten the lid by hand, then use a wrench or pliers to secure it tightly. Make sure the lid is snug but not over-tightened, as this can damage the can or the lid. Finally, store the can in a cool, dry place, away from direct sunlight and heat sources. By following these simple steps, you can help extend the life of your paint and keep it fresh for future use. Additionally, closing the can properly also helps to prevent accidents and messes, making it a crucial part of post-opening precautions.