How To Draw Bowser
Bowser, the iconic villain from the Super Mario Bros. series, is a beloved character among gamers and artists alike. His intimidating appearance and menacing personality have made him a staple in the world of gaming. For those looking to bring Bowser to life on paper, understanding his character design is crucial. To draw Bowser accurately, one must first comprehend the intricacies of his design, from his scaly skin to his imposing physique. This article will guide you through the process of drawing Bowser, starting with an in-depth look at his character design. We will then break down the drawing process, providing step-by-step instructions on how to bring Bowser's iconic features to life. Finally, we will explore how to add depth and dimension to your drawing with color and shading, making Bowser look as menacing as ever. By the end of this article, you'll be well on your way to creating a Bowser drawing that's sure to impress. So, let's start by understanding the foundation of Bowser's character design.
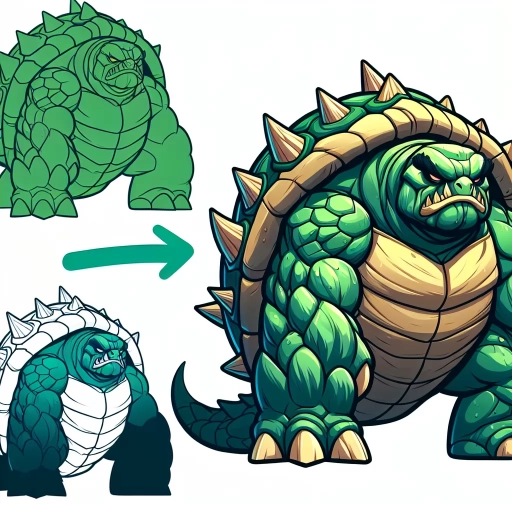
Understanding Bowser's Character Design
Bowser, the iconic villain of the Super Mario Bros. series, has been a beloved character in the world of gaming for decades. His character design is a masterclass in creating a memorable and intimidating villain. To truly understand Bowser's character design, it's essential to break down the various elements that make up his appearance. This includes his physical appearance and proportions, which set the foundation for his overall look. Additionally, his facial expressions and emotions play a crucial role in conveying his personality and intentions. Finally, his iconic accessories and details, such as his spiky shell and flame breath, add a touch of menace and power to his character. By examining these aspects of Bowser's design, we can gain a deeper understanding of what makes him such an enduring and compelling character. Let's start by taking a closer look at Bowser's physical appearance and proportions, which provide the basis for his imposing presence.
Bowser's Physical Appearance and Proportions
Bowser's physical appearance is a defining aspect of his character design, and it's essential to get his proportions right to capture his intimidating and menacing persona. Bowser's body is a massive, hulking mass of scales, muscles, and spikes, with a distinctive turtle-like shell on his back. His shell is a crucial part of his design, and it's essential to draw it with a rounded, dome-like shape, with a series of sharp, jagged spikes running along the edges. The shell should be large enough to cover most of his back, with a slight gap at the top to reveal his neck and head. Bowser's head is shaped like a snake's, with a long, curved snout and a distinctive crest on top, which is often depicted as a series of sharp, bony plates. His eyes are a piercing yellow, with vertical pupils that seem to gleam with malevolence. Bowser's arms and legs are thick and muscular, with sharp claws at the end of each limb. His arms are slightly longer than his legs, which gives him a slightly hunched, ape-like posture. When drawing Bowser, it's essential to capture his massive size and imposing presence, so be sure to use bold lines and exaggerated proportions to convey his intimidating persona. A good rule of thumb is to make Bowser's body at least twice as large as Mario's, with a much more muscular and imposing build. By getting Bowser's physical appearance and proportions right, you'll be able to capture the essence of his character and create a truly menacing and intimidating villain.
Bowser's Facial Expressions and Emotions
Bowser's facial expressions and emotions play a crucial role in his character design, as they convey his personality, intentions, and reactions to various situations. His facial structure, with its sharp angles, pointed teeth, and menacing scowl, already exudes a sense of intimidation and aggression. However, it's the subtle variations in his expressions that add depth and nuance to his character. A raised eyebrow or a slight smirk can indicate his cunning and cleverness, while a furrowed brow or a snarl can convey his frustration and anger. His eyes, in particular, are expressive, gleaming with malevolence when he's plotting or glowing with excitement when he's about to unleash his flames. The way his facial muscles tense and relax also adds to his emotional range, allowing him to convey a sense of satisfaction or disappointment. By mastering Bowser's facial expressions and emotions, artists can bring this iconic villain to life and create a more engaging and believable character. By studying his various expressions, artists can also gain insight into his personality and motivations, allowing them to create more nuanced and compelling artwork. Whether he's scheming, raging, or gloating, Bowser's facial expressions and emotions are an essential aspect of his character design, and a key element in bringing this beloved villain to life.
Bowser's Iconic Accessories and Details
Bowser's iconic accessories and details are an integral part of his character design, making him instantly recognizable. One of the most distinctive features is his spiky shell, which is often depicted as being a deep, fiery red color. The shell is adorned with a series of sharp, jagged spikes that run along the edges, giving Bowser a menacing and intimidating appearance. In addition to his shell, Bowser is often shown wearing a pair of white gloves, which add a touch of elegance and sophistication to his overall design. His eyes are typically depicted as being a bright, fiery red, which seems to glow with an inner intensity, giving him a fierce and malevolent stare. On his head, Bowser wears a distinctive crown-like structure, which is often depicted as being made of a dark, metallic material. The crown is adorned with a series of sharp, pointed spikes, which add to Bowser's overall menacing appearance. Overall, Bowser's iconic accessories and details work together to create a character design that is both visually striking and deeply intimidating, making him one of the most recognizable villains in the world of video games.
Breaking Down Bowser's Drawing Process
Bowser, the iconic villain from the Super Mario Bros. series, is a beloved character among gamers and artists alike. His intimidating appearance and complex design make him a fascinating subject to draw. In this article, we will break down Bowser's drawing process into three key stages: sketching his basic shape and form, adding texture and pattern to his body, and refining his facial features and details. By following these steps, artists can create a detailed and accurate representation of Bowser. To start, let's begin with the foundation of Bowser's drawing process: sketching his basic shape and form.
Sketching Bowser's Basic Shape and Form
Here is the paragraphy: When sketching Bowser's basic shape and form, start by drawing a large oval for his body, making sure it's tall rather than wide. The oval should be slightly tilted, with the top end leaning towards the back. This will help create a sense of movement and aggression in your drawing. Next, add a smaller oval for his head, connected to the body by a neck. The head should be positioned at a slight angle, with the snout pointing downwards. Use simple shapes to block out the basic features of Bowser's face, including his eyes, nostrils, and mouth. For his arms and legs, use long, curved lines that are slightly thicker at the top than at the bottom. This will help create a sense of muscle and power in your drawing. Finally, add a long, curved tail that follows the natural curve of Bowser's body. Make sure to keep your lines loose and expressive, as this will help capture the dynamic movement and energy of Bowser's character.
Adding Texture and Pattern to Bowser's Body
Adding texture and pattern to Bowser's body is a crucial step in bringing this iconic character to life. To start, focus on adding scales to his body, using short, curved lines that follow the contours of his muscles. Vary the size and spacing of the scales to create a sense of depth and dimension. For a more realistic look, add a slight gradient to the scales, with the edges being lighter and the centers being darker. Next, add some texture to his skin, using short, hatching lines to create a rough, bumpy surface. This will help to give Bowser a more menacing and intimidating appearance. Finally, add some pattern to his body, using a combination of stripes and spots to create a unique and eye-catching design. For example, you could add a series of horizontal stripes to his arms and legs, with a series of spots on his back and shoulders. By adding texture and pattern to Bowser's body, you can create a more detailed and engaging drawing that really brings this character to life.
Refining Bowser's Facial Features and Details
Refining Bowser's Facial Features and Details: To add depth and personality to Bowser's face, focus on refining his facial features and details. Start by defining the shape of his eyes, making sure they are angled and menacing. Add pupils to give his eyes a piercing stare, and consider adding a slight glow to his eyes to convey his fiery personality. Next, define the shape of his nose, making sure it is large and imposing. Add nostrils to give his nose a more realistic appearance, and consider adding a slight curve to the bridge of his nose to give it a more menacing appearance. Move on to his mouth, defining the shape of his lips and adding teeth to give his mouth a more menacing appearance. Consider adding a slight curve to the corners of his mouth to give him a more sinister grin. Finally, add details such as eyebrows, horns, and a crown to complete Bowser's facial features and give him a more regal and intimidating appearance. By refining these details, you can bring Bowser's face to life and make him a more believable and menacing character.
Bringing Bowser to Life with Color and Shading
When it comes to bringing Bowser to life, color and shading play a crucial role in capturing the essence of this iconic character. A well-designed color scheme can evoke emotions and convey personality, while shading and lighting can add depth and dimension to the character's form. To create a high-quality, engaging, and informative design, it's essential to consider the color scheme, shading, and lighting that will bring Bowser to life. In this article, we'll explore the key elements of designing Bowser, including choosing a color scheme that reflects his character, applying shading and lighting to enhance his form, and adding final details and highlights to complete his design. By understanding these essential components, designers can create a visually stunning and engaging representation of Bowser. Let's start by examining the importance of choosing a color scheme for Bowser's character.
Choosing a Color Scheme for Bowser's Character
Here is the paragraphy: When it comes to choosing a color scheme for Bowser's character, there are several options to consider. The most iconic and recognizable color scheme for Bowser is his classic red and yellow scales, which have been a staple of his design since his debut in Super Mario Bros. This color scheme is not only visually striking but also helps to convey Bowser's fiery personality and menacing demeanor. However, it's worth noting that Bowser's color scheme has varied over the years, with some games and spin-offs featuring different shades of red, orange, and even purple. For a more dramatic and intense look, a darker, more muted color scheme featuring deep reds and blacks could be used to emphasize Bowser's villainous nature. On the other hand, a brighter, more vibrant color scheme featuring bold reds and yellows could be used to create a more cartoonish and comedic take on the character. Ultimately, the choice of color scheme will depend on the desired tone and style of the artwork or animation.
Applying Shading and Lighting to Enhance Bowser's Form
Applying shading and lighting to Bowser's form is a crucial step in bringing this iconic villain to life. To create a more realistic and menacing appearance, it's essential to understand the principles of shading and lighting. Start by identifying the light source in your scene, as this will determine the placement of shadows and highlights on Bowser's body. Typically, the light source is positioned above and to the side of the subject, casting a diagonal shadow across the form. Next, use a range of shading techniques, such as hatching, cross-hatching, and stippling, to create depth and dimension on Bowser's body. Pay particular attention to the areas where the light source is most intense, such as the top of his head, shoulders, and the ridges on his shell. These areas should be rendered with lighter, more delicate lines, while the areas in shadow should be darker and more heavily shaded. Additionally, consider the texture and material of Bowser's body, as this will also impact the way light interacts with his form. For example, the scaly texture of his skin should be rendered with short, curved lines, while the smooth surface of his shell should be depicted with longer, more flowing lines. By carefully applying shading and lighting to Bowser's form, you can create a more dynamic and engaging image that draws the viewer's eye and brings this iconic character to life.
Adding Final Details and Highlights to Bowser's Design
Adding the final details and highlights to Bowser's design is a crucial step in bringing this iconic villain to life. To start, focus on adding texture and depth to his scaly skin, using a combination of short, curved lines and gentle hatching to create a rough, bumpy appearance. Next, add some definition to his facial features, using bold lines to outline his sharp teeth and pointed horns. Don't forget to add some personality to his eyes, using a bright, fiery red to give him a menacing glare. Moving on to his body, add some muscle definition to his arms and legs, using gentle curves and soft shading to create a sense of bulk and power. Finally, add some highlights to his claws and teeth, using a sharp white to create a sense of sharpness and danger. With these final details in place, Bowser is sure to be a formidable foe on the page.