How To Tie A Bracelet
Tying a bracelet can be a fun and creative activity, allowing you to express your personal style and add a unique touch to your outfit. With a few simple steps and the right materials, you can create a beautiful and meaningful piece of jewelry that reflects your individuality. To get started, it's essential to understand the basics of bracelet-tying, including choosing the right materials, mastering basic knotting techniques, and designing and tying the bracelet itself. In this article, we'll explore these key concepts in detail, providing you with the knowledge and skills needed to create your own stunning bracelets. First, let's begin with the foundation of any great bracelet: selecting the right materials.
Choosing the Right Materials
When it comes to creating unique and personalized jewelry, choosing the right materials is crucial. With so many options available, it can be overwhelming to decide on the perfect components for your piece. However, by considering a few key factors, you can ensure that your jewelry is not only beautiful but also durable and long-lasting. In this article, we will explore the different types of materials you can use to create your jewelry, including the various types of cords and strings, beading options, and clasps and fasteners. By understanding the characteristics and uses of each, you can make informed decisions and create a piece that truly reflects your personal style. From the delicate and dainty to the bold and statement-making, the right materials can make all the difference in your jewelry. So, let's start by exploring the different types of cords and strings that can be used as the foundation of your piece.
Types of Cords and Strings
When it comes to choosing the right materials for your handmade bracelet, the type of cord or string you use can make all the difference. There are several types of cords and strings to choose from, each with its own unique characteristics, advantages, and disadvantages. Leather cords, for example, are a popular choice for their durability and stylish look. They come in a variety of colors and textures, from smooth and sleek to rough and rugged. Waxed cords, on the other hand, are known for their flexibility and resistance to tangling. They are often used for macrame and other types of knotting. Cotton cords are another popular option, offering a soft and natural look that is perfect for bohemian-inspired designs. Hemp cords are also a great choice, providing a sturdy and eco-friendly option that is resistant to fraying. Nylon cords are strong and durable, making them ideal for heavy-duty designs. Satin cords, with their smooth and lustrous finish, are perfect for creating elegant and sophisticated designs. Finally, elastic cords are great for creating stretchy and comfortable designs that can fit a variety of wrist sizes. By considering the type of cord or string you use, you can create a unique and personalized bracelet that reflects your style and personality.
Beading Options
When it comes to beading options, the choices can be overwhelming, but understanding the different types of beads and their characteristics can help you make informed decisions. Seed beads, for example, are small and versatile, perfect for intricate designs and patterns. Gemstone beads, on the other hand, add a touch of elegance and sophistication, with their natural beauty and unique characteristics. Crystal beads, such as Swarovski, offer exceptional brilliance and fire, making them ideal for statement pieces. Wood and shell beads provide a natural, earthy look, while metal beads can add a modern, edgy feel. Additionally, there are various shapes, sizes, and textures to consider, from smooth and rounded to faceted and irregular. Furthermore, some beads are specifically designed for certain techniques, such as beading looms or wire working. By considering the type of project, the desired look, and the level of complexity, you can narrow down your beading options and choose the perfect beads for your unique creation.
Clasps and Fasteners
Clasps and fasteners are a crucial component of any bracelet, as they provide a secure and comfortable way to fasten and unfasten the piece. When choosing a clasp or fastener, consider the type of material used, the size and weight of the bracelet, and the desired level of security. For example, a delicate chain bracelet may require a small and dainty clasp, while a chunky beaded bracelet may need a more substantial fastener. There are various types of clasps and fasteners available, including toggle clasps, lobster claw clasps, magnetic clasps, and screw clasps. Toggle clasps are a popular choice for their ease of use and versatility, while lobster claw clasps are known for their secure grip. Magnetic clasps are a great option for those who struggle with traditional clasps, and screw clasps provide an added level of security. In addition to the type of clasp, the material used is also important. For example, a silver or gold-plated clasp can add a touch of luxury to a bracelet, while a plastic or resin clasp can be a more affordable option. Ultimately, the right clasp or fastener will depend on the individual's personal style and preferences, as well as the specific design of the bracelet. By considering these factors, you can choose a clasp or fastener that complements your bracelet and provides a secure and comfortable fit.
Basic Knotting Techniques
Knotting techniques are an essential skill for various outdoor activities, such as sailing, camping, and rock climbing. Mastering basic knots can make a significant difference in ensuring safety and efficiency. In this article, we will explore three fundamental knotting techniques that every outdoor enthusiast should know: the Lark's Head Knot, the Square Knot, and the Half Hitch Knot. These knots are not only easy to learn but also versatile and reliable. By understanding how to tie these knots, individuals can improve their outdoor experiences and develop a sense of confidence in their abilities. Let's start by learning the Lark's Head Knot, a simple yet effective knot that can be used in a variety of situations.
Learning the Lark's Head Knot
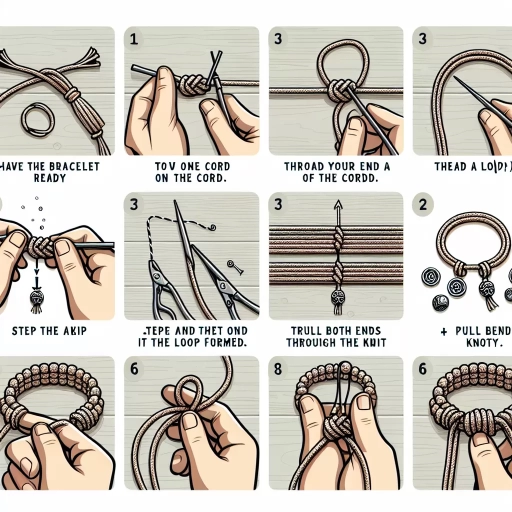
The Lark's Head Knot is a fundamental knotting technique that is essential for creating a variety of bracelets, including the popular wrap bracelet. To learn the Lark's Head Knot, start by holding a length of cord or leather in one hand, with the ends facing away from you. Create a loop in the cord, keeping your hand inside the loop. Then, pass the ends of the cord through the loop you just created. You should now have a second loop on the other side of the first loop. Take the ends of the cord and pass them through the second loop, pulling them gently to tighten the knot. Adjust the knot as needed to create a secure and comfortable fit. With practice, the Lark's Head Knot will become second nature, allowing you to create a wide range of stylish and functional bracelets.
Mastering the Square Knot
Mastering the Square Knot, also known as the Reef Knot, is a fundamental skill that every individual should possess, especially when it comes to tying a bracelet. This knot is a crucial component of various knotting techniques and is widely used in sailing, camping, and even in everyday life. To tie a Square Knot, start by holding two ends of a rope or cord together, overlapping them by about an inch. Next, take the right end and pass it over the top of the left end, then take it under and up through the loop you just created. Now, take the left end and pass it over the top of the right end, then take it under and up through the loop again. Pull the knot tight to secure it. With practice, tying a Square Knot becomes second nature, and it's an essential skill to have when working with ropes or cords. By mastering the Square Knot, you'll be able to tie a variety of knots, including the Bowline, Sheet Bend, and Clove Hitch, which are all useful for different applications. In the context of tying a bracelet, the Square Knot is particularly useful for securing the ends of the cord or rope, creating a neat and tidy finish. By incorporating the Square Knot into your knotting repertoire, you'll be able to create a wide range of stylish and functional bracelets that are sure to impress. Whether you're a seasoned knotter or just starting out, mastering the Square Knot is an essential step in developing your knotting skills, and it's a great place to start when learning how to tie a bracelet.
Understanding the Half Hitch Knot
The half hitch knot is a fundamental knotting technique that is essential for various applications, including sailing, camping, and crafting. It is a type of hitch knot that is used to secure a rope to a post, rail, or other fixed object. The half hitch knot is simple to learn and can be tied quickly, making it a valuable skill to have in a variety of situations. To tie a half hitch knot, start by wrapping the rope around the post or rail, then pass the end of the rope under the standing part of the rope. Next, take the end of the rope and pass it over the top of the standing part, then bring it back under the standing part and through the loop that you just created. Pull the end of the rope gently to tighten the knot. The half hitch knot can be used in a variety of ways, including securing a rope to a post, creating a temporary anchor point, or even as a quick-release knot. With practice, the half hitch knot can be tied quickly and easily, making it a valuable addition to your knot-tying skills.
Designing and Tying the Bracelet
Designing and tying a bracelet can be a fun and creative activity, allowing you to express your personal style and add a unique touch to your outfit. To create a beautiful and well-crafted bracelet, there are several key steps to follow. First, you'll need to measure and cut the cord to the right length, taking into account the size of your wrist and the type of clasp you'll be using. Next, you'll add beads and embellishments to give your bracelet some visual interest and personality. Finally, you'll secure the clasp and finish the bracelet, making sure it's comfortable and secure to wear. By following these steps, you can create a stunning and one-of-a-kind bracelet that reflects your individuality. So, let's start with the first step: measuring and cutting the cord.
Measuring and Cutting the Cord
To accurately measure and cut the cord for your bracelet, start by determining the desired length. A standard bracelet length is 7-8 inches, but you can adjust this based on your wrist size or personal preference. Once you have your desired length, add 2-3 inches to account for the knot and any adjustments you may need to make. Next, use a ruler or measuring tape to measure out the cord to the desired length. Cut the cord using scissors or a craft knife, making sure to cut cleanly and avoid fraying the ends. If you're using a cord with a tendency to fray, consider using a lighter or a match to carefully singe the ends, which will help prevent further fraying. With your cord cut to the correct length, you're now ready to begin designing and tying your bracelet.
Adding Beads and Embellishments
Adding beads and embellishments is a crucial step in designing and tying a bracelet. This is where you can get creative and add a personal touch to your accessory. Beads come in various shapes, sizes, colors, and materials, allowing you to experiment with different textures and patterns. You can choose from a wide range of beads, including seed beads, gemstone beads, crystal beads, and wooden beads, to name a few. Embellishments, on the other hand, can add an extra layer of visual interest to your bracelet. These can include charms, pendants, tassels, and other decorative elements that can enhance the overall look of your bracelet. When adding beads and embellishments, it's essential to consider the theme, style, and color scheme of your bracelet. You can also experiment with different techniques, such as beading patterns, wire wrapping, and knotting, to create a unique and eye-catching design. By carefully selecting and arranging your beads and embellishments, you can create a beautiful and meaningful bracelet that reflects your personality and style.
Securing the Clasp and Finishing the Bracelet
Securing the clasp and finishing the bracelet is the final step in creating a beautiful and functional piece of jewelry. To secure the clasp, start by threading the end of the cord through the loop on the clasp, then pass it through the loop again to create a secure knot. Pull the cord gently to tighten the knot, making sure it is snug against the clasp. Next, trim the excess cord with scissors, leaving about 1/4 inch of cord at the end. To finish the bracelet, tie a knot at the end of the cord to prevent it from fraying, and apply a small amount of clear nail polish to the knot to secure it in place. Finally, inspect the bracelet for any loose threads or uneven knots, and make any necessary adjustments before wearing. With the clasp securely in place and the cord neatly finished, your handmade bracelet is now complete and ready to be worn.