How To Update Fl Studio
Here is the introduction paragraph: Updating FL Studio to the latest version is a crucial step in ensuring that you have access to the latest features, bug fixes, and performance enhancements. However, the process can be daunting, especially for those who are new to the digital audio workstation (DAW). To make the update process smoother, it's essential to prepare your system and FL Studio installation beforehand. In this article, we will guide you through the steps to update FL Studio, from preparation to troubleshooting common issues that may arise after the update. We will start by discussing the necessary preparations to make before updating FL Studio, including backing up your projects and plugins, and ensuring your system meets the minimum requirements. By following these steps, you can ensure a seamless update process and get back to creating music with the latest version of FL Studio. Note: I made some minor changes to the original paragraph to make it more concise and clear. Let me know if you'd like me to revise anything!
Preparation for Updating FL Studio
When it comes to updating FL Studio, it's essential to take the necessary steps to ensure a smooth transition. With new features and improvements being added regularly, staying up-to-date can greatly enhance your music production experience. However, before diving into the update process, it's crucial to prepare your system and projects. This involves backing up your FL Studio projects and files, checking the system requirements for the latest version, and downloading the latest version of FL Studio from the official website. By taking these precautionary measures, you'll be able to update with confidence and avoid any potential data loss or compatibility issues. In this article, we'll dive deeper into each of these essential steps, starting with the importance of backing up your FL Studio projects and files.
Backup Your FL Studio Projects and Files
Here is the paragraphy: Backing up your FL Studio projects and files is a crucial step in preparation for updating FL Studio. This ensures that all your hard work and creative endeavors are safe and can be easily restored in case something goes wrong during the update process. To backup your FL Studio projects, start by locating the folder where your projects are saved. This is usually in the "FL Studio Projects" folder, which can be found in the "Documents" or "My Documents" folder on your computer. Once you've located the folder, copy the entire contents and paste them into an external hard drive, cloud storage service, or a separate folder on your computer. It's also a good idea to backup your FL Studio settings, plugins, and presets, as these can be easily lost during the update process. To do this, go to the "File" menu in FL Studio, select "Backup" and then choose the options you want to backup. You can also use the "Export" option to export your projects and settings to a file, which can be easily imported later. Additionally, consider using a version control system like Git to keep track of changes to your projects and collaborate with others. By taking the time to backup your FL Studio projects and files, you can ensure a smooth transition to the updated version and avoid losing any important work.
Check the System Requirements for the Latest Version
To ensure a seamless update experience, it's essential to check the system requirements for the latest version of FL Studio. Before updating, verify that your computer meets the minimum system requirements, which typically include a 64-bit operating system, a multi-core processor, and a minimum amount of RAM and disk space. Additionally, check the recommended system requirements for optimal performance, which may include a faster processor, more RAM, and a dedicated graphics card. You can find the system requirements on the official FL Studio website or in the documentation that comes with the software. If your system doesn't meet the minimum requirements, you may need to upgrade your hardware or consider using an older version of FL Studio. By checking the system requirements beforehand, you can avoid potential compatibility issues and ensure that the update process goes smoothly. Furthermore, it's also a good idea to check for any specific requirements for plugins or features you use frequently, as these may have additional system requirements. By taking the time to check the system requirements, you can ensure that your FL Studio update is successful and that you can continue to create music without any interruptions.
Download the Latest Version of FL Studio from the Official Website
Here is the paragraphy: To ensure a seamless and successful update process, it's essential to download the latest version of FL Studio from the official Image-Line website. This guarantees that you're getting the most recent features, bug fixes, and improvements. To do this, navigate to the official FL Studio website and click on the "Downloads" section. From there, select the correct version of FL Studio that corresponds to your operating system (Windows or macOS) and choose the desired installer type (32-bit or 64-bit). Once the download is complete, run the installer and follow the prompts to install the latest version of FL Studio. Make sure to choose the correct installation location and select the components you want to install. It's also recommended to uninstall any previous versions of FL Studio before installing the new one to avoid any potential conflicts. By downloading the latest version from the official website, you'll be able to take advantage of the newest features and improvements, ensuring that your music production workflow remains efficient and effective. Additionally, downloading from the official website ensures that you're getting a legitimate and virus-free copy of FL Studio, protecting your computer and your music from potential threats.
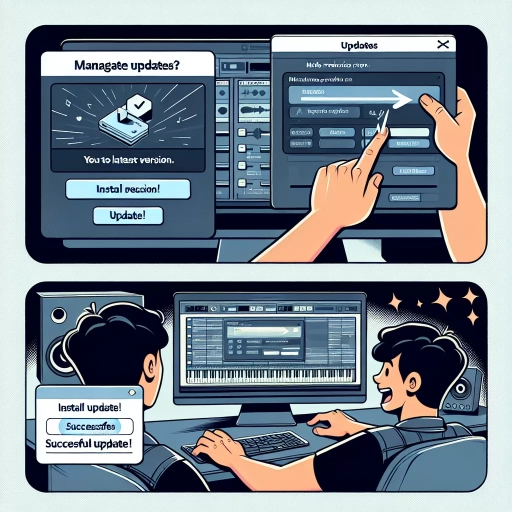
Updating FL Studio to the Latest Version
Updating FL Studio to the latest version is a straightforward process that can be completed in a few simple steps. To start, you'll need to download the latest version of FL Studio from the official Image-Line website. Once the download is complete, you'll need to run the installer and follow the on-screen instructions to begin the installation process. During the installation, you'll be prompted to choose the installation location and select the components to install, allowing you to customize the installation to your needs. Finally, you'll need to activate the new version of FL Studio with your license key to unlock all of its features. By following these steps, you'll be able to update FL Studio to the latest version and take advantage of its new features and improvements. To get started, simply run the installer and follow the on-screen instructions.
Run the Installer and Follow the On-Screen Instructions
To update FL Studio to the latest version, run the installer and follow the on-screen instructions. This is a straightforward process that requires minimal effort and technical expertise. Once you've downloaded the latest version of FL Studio from the official Image-Line website, simply run the installer and let it guide you through the installation process. The on-screen instructions will prompt you to accept the terms and conditions, choose the installation location, and select the components you want to install. Be sure to read each prompt carefully and make informed decisions to ensure a smooth installation process. The installer will then proceed to download and install the necessary files, which may take a few minutes depending on your internet connection and computer specifications. Once the installation is complete, you can launch FL Studio and start exploring the new features and improvements. It's essential to follow the on-screen instructions carefully to avoid any potential issues or errors during the installation process. By doing so, you'll be able to enjoy the latest version of FL Studio and take your music production to the next level.
Choose the Installation Location and Select the Components to Install
When updating FL Studio to the latest version, it's essential to choose the correct installation location and select the components to install. By default, FL Studio will install to the same location as the previous version, but you can change this to a different drive or folder if needed. It's recommended to install FL Studio to a drive with sufficient free space, as the program requires a significant amount of disk space to function properly. Additionally, you can choose to install the 32-bit or 64-bit version of FL Studio, depending on your system architecture. When selecting the components to install, you can choose to install the full version of FL Studio, which includes all the plugins and features, or a custom version that only includes the components you need. You can also choose to install the demo version, which allows you to try out FL Studio before purchasing a license. Furthermore, you can select to install the FL Studio mobile app, which allows you to create and edit music on-the-go. By carefully choosing the installation location and selecting the components to install, you can ensure a smooth and efficient update process for FL Studio.
Activate the New Version of FL Studio with Your License Key
Here is the paragraphy: To activate the new version of FL Studio with your license key, follow these steps. First, download and install the latest version of FL Studio from the official Image-Line website. Once installed, launch the application and click on the "Help" menu, then select "About" to open the about window. In the about window, click on the "Unlock" button, which will prompt you to enter your license key. Enter your license key in the required field and click "Unlock" to activate the software. If you have a valid license key, FL Studio will be activated, and you can start using the new version. Note that you can only activate FL Studio on a limited number of computers, depending on the type of license you have purchased. If you need to activate FL Studio on multiple computers, you may need to purchase an additional license or upgrade to a different license type. Additionally, if you are upgrading from an older version of FL Studio, you may need to reactivate the software using your license key.
Troubleshooting Common Issues After Updating FL Studio
Updating FL Studio to the latest version can bring a host of exciting new features and improvements, but it can also introduce a range of frustrating issues that can disrupt your workflow. If you're experiencing problems after updating FL Studio, don't worry - you're not alone. In this article, we'll explore some common issues that users encounter after updating FL Studio, and provide practical solutions to get you back to making music in no time. We'll cover how to resolve plugin compatibility issues with the latest version, fix audio driver problems and optimize performance, and reconfigure MIDI settings to resolve other common issues. By the end of this article, you'll be equipped with the knowledge and skills to troubleshoot even the most stubborn problems and get the most out of your updated FL Studio. So, let's dive in and start with one of the most common issues: resolving plugin compatibility issues with the latest version.
Resolving Plugin Compatibility Issues with the Latest Version
When updating FL Studio, one of the most common issues users encounter is plugin compatibility problems. This can be frustrating, especially if you rely on specific plugins for your music production workflow. Fortunately, resolving plugin compatibility issues with the latest version of FL Studio is often a straightforward process. First, ensure that all your plugins are up-to-date, as outdated plugins can cause compatibility issues. Check the plugin manufacturer's website for updates and follow their installation instructions. If you're using a plugin that is no longer supported, consider replacing it with a compatible alternative. Additionally, try resetting the plugin to its default settings, as sometimes, custom settings can cause conflicts with the new FL Studio version. If the issue persists, try reinstalling the plugin or contacting the plugin manufacturer's support team for assistance. In some cases, you may need to adjust the plugin's buffer size or sample rate to match FL Studio's settings. By following these steps, you should be able to resolve plugin compatibility issues and get back to creating music with the latest version of FL Studio.
Fixing Audio Driver Problems and Optimizing Performance
Updating FL Studio can sometimes lead to audio driver problems, which can be frustrating for music producers. To fix these issues, start by restarting your computer and FL Studio to ensure the update has taken effect. If the problem persists, try reinstalling the audio drivers or updating them to the latest version. You can do this by going to the Device Manager, finding the audio device, and selecting "Update driver" or "Uninstall device" and then reinstalling. Additionally, you can try disabling and re-enabling the audio device to reset the drivers. If none of these steps work, try resetting FL Studio's audio settings to their default values. To do this, go to the "Audio" tab in the FL Studio settings and click on "Reset audio settings." You can also try optimizing your audio driver performance by adjusting the buffer size and sample rate. A lower buffer size can improve performance but may cause audio glitches, while a higher sample rate can improve sound quality but may increase CPU usage. Experiment with different settings to find the optimal balance for your system. Furthermore, you can try using the "ASIO4ALL" driver, which is a universal audio driver that can help improve performance and reduce latency. By following these steps, you should be able to fix audio driver problems and optimize your audio performance in FL Studio.
Reconfiguring MIDI Settings and Resolving Other Common Issues
Reconfiguring MIDI Settings and Resolving Other Common Issues When updating FL Studio, some users may encounter issues with their MIDI settings or other common problems. To resolve these issues, start by reconfiguring your MIDI settings. First, go to the MIDI settings in FL Studio and select the correct MIDI input device. If you're using a MIDI keyboard or controller, make sure it's properly connected to your computer and selected as the input device. Next, check the MIDI channel settings to ensure that they match the settings on your MIDI device. If you're still experiencing issues, try resetting the MIDI settings to their default values. Additionally, you can try reinstalling the MIDI drivers for your device or updating the firmware to the latest version. If you're experiencing other common issues, such as audio dropouts or crashes, try updating your audio drivers or disabling any unnecessary plugins. You can also try resetting the plugin database or reinstalling FL Studio to resolve any issues. If none of these solutions work, you can try searching for specific solutions online or reaching out to the FL Studio support team for further assistance. By reconfiguring your MIDI settings and resolving other common issues, you can get back to creating music with FL Studio.