How To Reheat Ribs
 Elevate your culinary skills by mastering the art of reheating ribs without losing their mouthwatering taste and texture. Ribs, esteemed for their tenderness and flavor, can become a dry disappointment if not reheated properly. This article aims to take you on a scrumptious journey of understanding the intricacies involved in reheating ribs, thereby helping you maintain the original taste and texture of your beloved barbecue item, and providing practical tips and tricks for reheating ribs at home. We delve into the science and strategy behind capturing that just-grilled flavor and tenderness during the reheating process, unlocking the secrets of succulent reheated ribs. Buckle up as we embark on this savory venture and kickstart our journey by truly understanding the intricacies involved in reheating ribs.
Understanding The Intricacies Involved In Reheating Ribs
The delicate process of reheating ribs is integral to preserving the original flavors and succulence that make this BBQ staple so beloved. Mastering this method involves a deep understanding of various elements, such as alternative reheating techniques, the significance of gradual reheating, and the role of spices and sauces. The alternative methods for reheating provide flexibility and depend on the tools at your disposal, offering techniques such as oven, grill, or even microwave reheating. Furthermore, gradually reheating ribs accessibly creates even heat distribution, preventing the ribs from drying out, and preserving the perfectly cooked, juicy texture. Lastly, spices and sauces play a crucial role in this process. They add moisture and flavor that seep into the ribs during reheating, elevating their taste profile to match, if not surpass, that of freshly cooked ribs. Let's dive deep into the first factor - understanding the alternative methods for reheating ribs, examining each technique's unique nuances.
Alternative methods for reheating ribs
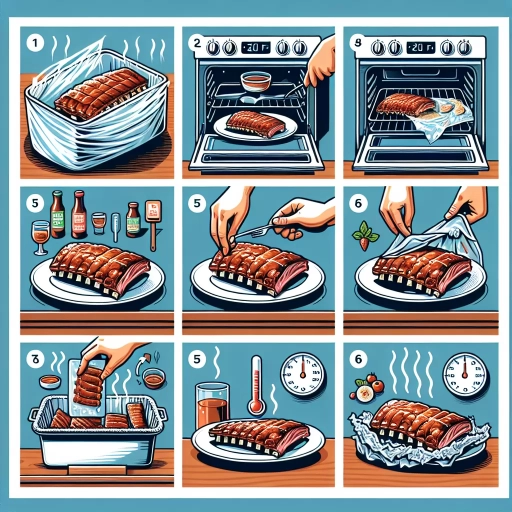
When it comes to enjoying leftover ribs, understanding alternative methods for reheating can be crucial in ensuring the tenderness, juiciness and flavors remain intact. One such method is using an oven, which provides even and gradual heating that penetrates deeply into the meat, preserving moisture and tenderness. Start by preheating the oven to 250 degrees Fahrenheit, then wrap the ribs in aluminum foil to seal in moisture. Place them on a baking sheet and heat for approximately 30 minutes. Monitor closely, as overcooking can render the ribs dry and tough. Alternatively, consider reheating ribs on the grill, another ideal method for recreating that smoky, charred flavor associated with barbecue. Preheat your grill on medium heat, coat the ribs lightly with some sauce to keep them moist, and then grill them for 10-15 minutes on each side. Ensure you flip them frequently to prevent burning and to encourage even heating. Another innovative reheating method is via the sous vide technique, which requires more effort but also provides delicious results. This involves vacuum-sealing the ribs in a plastic bag and then submerging them in a water bath to cook at a precise temperature. By setting the temperature at around 165 degrees Fahrenheit, you can reheat the ribs without overcooking them, thereby maintaining their original quality and enhancing their flavor. Steam reheating is another viable option, particularly if you want to restore the ribs to their original juicy, tender state quickly. Just place the ribs in a steamer basket for about 30 minutes, and the steam will do the job of retaining the moisture and heating evenly. Regardless of the reheating method you choose, it is essential to determine the optimal heating temperature and time to achieve the best results. Whether you opt for the oven, grill, sous vide, or steam, remember to respect the original cooking method of the ribs in order to maintain their authentic flavors. While these alternative methods offer unique benefits, they only serve as guides. The ultimate goal is to ensure that your reheated ribs are just as tasty, if not tastier, than when they were first cooked.
The significance of gradual reheating
The importance of adopting a gentle, gradual reheating process for ribs cannot be overstated. This distinctive approach is a critical element to uphold the key qualities of ribs that customers treasure – its juicy, tender meat, and the deep, succulent flavors. By gradual reheating, we are referring to the process of slowly raising the temperature of the ribs to achieve an optimal warm level, rather than subjecting them to a sudden high heat. This method ensures the ribs are heated evenly, preventing the exterior from becoming excessively dry or burnt while the interior remains cold. One of the intricacies concerned with reheating ribs revolves around the preservation of its original taste, texture, and aroma. When ribs are hastily reheated at a high temperature, they often become tough and lose their appetizing moisture, leading to a disappointing dining experience. Gradual reheating, however, ensures the preservation of the meat's succulence, thereby allowing the ribs to retain their original tenderness and sumptuous barbecue taste. Another often overlooked benefit of the gentle reheating is the enhancement of the ribs’ flavor profile. As the heat slowly permeates through the meat fibers, it allows the already marinated and smoked meat to imbibe the flavors even more thoroughly. The result? Delectably juicy ribs with an intensified flavor that promises an unforgettable culinary experience. Moreover, from a safety point of view, gradual reheating could be beneficial. While quick or uneven heating might not adequately warm the entire portion rendering it unsafe for consumption, gradual reheating assures that the meat is thoroughly heated, killing any potential harmful bacteria. If you're looking for an uncompromised rib-eating experience that offers the same palatable delight as it did the first time, understanding the importance of gradual reheating is essential. Incorporating this method as part of your culinary routine is not merely a ritual, but a strategic move designed to maximize the taste and quality of your favorite rib dish. The key takeaway here is, patience is the secret ingredient that culminates in the most deliciously reheated ribs. It is these subtle nuances like gradual reheating which form the linchpin for successfully reheating ribs, a subject not enough explored but deeply significant. Never underestimate the power of a slow, steady warmth to awaken the real, irresistible taste of ribs! No wonder the saying goes, "The best things come to those who wait".
Role of Spices and Sauces in reheating ribs
The role of spices and sauces in reheating ribs cannot be overstated as not only does it enhance the overall taste, but also revitalizes the dish. Applying a fresh coat of these critical ingredients after the warm-up process is a common culinary practice that pays homage to the richness and diversity of flavors inherent in barbecue ribs. Often, as we reheat dishes like ribs, the original flavors are likely to diminish. But with cautious use of spices and sauces, you can bask in the experience of relishing fresh-off-the-grill succulent ribs. The art of seasoning plays a significant role here. The pairing of varying spices such as cumin, paprika, black pepper, or cayenne pepper provides an aromatic depth, adding a kick of zest and warmth. On the contrary, sprinkling your reheated ribs with dried herbs like rosemary and thyme can impart a refreshing and earthy feel, serving as a delightful counterbalance to the spiciness. Sauces, on the other hand, help restore the moisture content that often escapes during reheating. The tangy-sweet BBQ sauce, when applied liberally, helps retain the natural juiciness of the ribs, while complementing and amplifying the already present flavors. Moreover, the caramelization that happens while reheating with the sauces brings a smoky-sweet layer, enhancing the overall experience, making it feel almost as if they’ve never been refrigerated. In addition, the use of marinades can further improve the flavor profile. They can transform the ribs from simply reheated leftovers into a dish that tastes as though it's been cooking for hours. From zesty citrus marinades to more robust, spicy blends, the possibilities are endless. A good marinade can penetrate deeper into the meat, revitalizing it with rich flavors. Thus, spices and sauces play an invaluable role when it comes to the reheating of ribs, enabling a resurrection of those juicy, tender, and flavorful morsels. They help recapture the sensory delight that is a well-cooked rack of ribs, providing a consistent experience - even on reheating. So, the next time you find yourself pondering over the task of reheating ribs, remember the potent powers hidden within your spice rack and sauce bottles.
Maintaining the Original Taste and Texture of Ribs during Reheating
Maintaining the original taste and texture of ribs during the reheating process can be an art in itself. Reheated ribs have a notorious reputation for losing their desirable BBQ flavor, drying out, or even overcooking. However, with the right techniques at our disposal, these predicaments can be effortlessly avoided, ensuring the meticulous preservation of that succulent texture and irresistible smoky taste encompassed in your ribs. This guide navigates through three crucial aspects of reheating ribs. Firstly, we'll explore how to effectively reheat your ribs while preserving the essential BBQ flavor that makes them so delectable. Secondly, we will delve into the secrets of keeping your ribs moist to avoid drying out during reheating. Lastly, there'll be a comprehensive analysis of preventing overcooking during reheating, a common menace known to ruin the initial integrity of the ribs. Now, let's dive into the first key area, where we illuminate on how to reheat ribs without sacrificing that true BBQ flavor that sets them apart on your taste buds.
Reheating ribs without losing the essential BBQ flavor
Reheating ribs without losing their essential BBQ flavor is an art that needs careful steps to maintain its delectable taste and texture. The key is to maintain the ribs succulence without drying them out, as ribs are marinated and cooked for extended periods to achieve their distinctive flavor, and hasty reheating can lead to loss of moisture, impacting both texture and taste. To maintain the original taste and texture, preheat your oven to 250 degrees Fahrenheit. While the oven heats, wrap your ribs in two layers of aluminum foil containing a splash of apple juice or broth, creating a tightly sealed package - this helps to retain moisture and flavor. Reheating should be slow and low, thus taking around 30 minutes for them to reach an internal temperature of 165 degrees Fahrenheit, the safe temperature for reheating meat, as per USDA guidelines. It's recommended to use a meat thermometer to avoid overheating. Upon reaching the desired temperature, one may choose to add an extra layer of BBQ sauce and to broil the ribs for an additional 2-3 minutes for that perfect glaze. And voila, your ribs have been reheated with their original BBQ flavor intact, ready for you to enjoy as if they were freshly made. Managing the reheating process could spell the difference between moist, flavorful ribs, and a dried-out meal, the former being our ultimate goal. Achieving this provides a feast that stays true to the all-time favorite tender, juicy ribs with smoky barbecue flavor bursting in every bite. This approach of reheating ribs maintains their inherent delectability, satisfying the expectations of BBQ lovers who expect nothing less from this flavorful dish. It's all about preserving that fresh-off-the-grill taste so that each reheated meal feels like a fresh BBQ experience.
Avoiding the drying out of ribs during reheating
When reheating ribs, maintaining the original tastiness and succulent texture involves much more than just popping them back into a heat source. One crucial aspect of this process is ensuring the ribs don't dry out and lose their indulging mouthfeel or tantalizing flavor during reheating. The art and science of avoiding rib dryness lie in the reheating method and supplementary preservation techniques employed. Microwaving or excessively long heating durations often drain the moisture out, leading to uninspiring taste and texture. Hence, an optimal reheating strategy for ribs is to heat up at a low temperature over a long duration, ideally in an oven set to 250F for roughly 30 minutes. This gentle reheating method helps retain the rich flavors, keeping the meat's structure largely intact. In addition to specific reheating methods, shielding practices can help save ribs from drying out during the process. Wrapping the ribs in aluminum foil is an effective technique that both stores in moisture and encourages heat to distribute evenly. This ensures that the entirety of the ribs receive the same reheating attention, reducing instances of part being overcooked and getting dried out. Bringing into play a steaming tactic can be an excellent shield against dryness. This can be achieved by simply adding a little bit of liquid such as stock or apple juice to the foil package before reheating. Not only will these added liquids prevent the ribs from drying out, but they will also infuse the meat with added flavors, producing a more enjoyable end product. Finally, an underrated twist in reheating ribs is letting the ribs reach room temperature before going in for the reheating. Taking them straight out from the fridge into the oven can lead to dehydration of the meat, while allowing them to warm up slightly at room temperature beforehand can promote even reheating and result in moist and tender ribs that taste as good as they were when freshly cooked. Property reheating therefore preserves the ribs’ mouthwatering magic and makes them reheating proof, effectively ensuring that the succulent ribs you fell in love with retain their original charm, taste, and texture.
Preventing overcooking during the reheating process
Maintaining the original taste and texture of ribs during reheating can easily be compromised by overcooking, a common mishap in the process. A mastery of the reheating process is paramount to prevent this undesirable outcome, and essential to preserving the lush, flavorful essence and tender succulence of your ribs. Overcooking during reheating is a predicament often stemming from excessive heat or extended heating times. Such practices can dry out the meat, leading to the ribs losing their original taste and texture. Therefore, controlling the heat and time of reheating is a critical step in upholding the ribs' authentic flavors and textures. Optimal heating temperature generally ranges around 250-275 degrees Fahrenheit, an interval that can sufficiently warm the ribs without exacting unnecessary heat damage. Also, encasing the ribs in aluminum foil not only compartmentalizes the heat uniformly around the ribs, but it also maintains a moist environment restricting the evaporation of natural juices. The reheating process can also benefit considerably from a technique known as "low and slow." This method involves reheating at a lower temperature over a longer duration instead of a high heat blitz. The “low and slow” method provides a more forgiving window for the uninitiated, significantly reducing the risk of overcooking. This process pays homage to the rib’s initial cooking method, which often involves a long, slow cook at a low temperature to ensure the meat's tenderness. Lastly, introducing steam during the reheating process can also prevent overcooking. A steam bath created by adding a little water, apple juice, or broth into the rib package before sealing can keep the meat moisturized during reheating, forestalling the meat from drying out and losing its original taste and texture. In conclusion, preventing overcooking during the reheating process is a combination of techniques that all hinge on a prolonged, moderated heat supply and moisture preservation. Correctly executed, you can bid farewell to the fear of losing the original taste and texture of your ribs during reheating.
Practical Tips and Tricks for Reheating ribs at Home
Reheating ribs at home can feel daunting, especially if you wish to preserve their smoky appeal whilst ensuring their succulence. However, with practical knowledge and the right approach, achieving this feat can be simpler than you think. Whether you're a novice or a pro, our article encapsulates strategic tips and tricks for heat-regeneration of your favorite ribs. Firstly, we delve into and compare safe reheating techniques, outlining the pros and cons of using the oven and microwave, respectively. This will help you choose the method best suited to your ribs and reheating goals. Secondly, we offer an in-depth, step-by-step guide about reheating ribs on a pan, a technique that may surprise you with its efficacy. Finally, our expert guide will also illuminate the crucial role and advantages of using aluminum foil when reheating ribs, a secret often overlooked. It’s more than just wrapping! So, sit back, relax, and read on for the ultimate guide in reheating ribs to perfection. Let's start, then, by exploring the world of safe reheating techniques: the oven vs the microwave.
Safe reheating techniques: The oven vs the microwave
When it comes to reheating ribs at home, understanding safe reheating techniques is crucial. The two popular methods, the oven and the microwave, both have their unique benefits and drawbacks. Ovens, on one hand, are highly revered for their ability to evenly distribute heat. This gradual and consistent heating method helps retain the rib's flavors and tenderness, ensuring that your reheated ribs don't end up dry or tough. However, one needs to take into consideration the longer warming time, typically around 30 minutes at 250 degrees Fahrenheit, making it a less suitable option for those in a rush. Meanwhile, using a microwave is a quicker venture - it will have your ribs heated in just a few minutes. But, while time-effective, microwaves can unevenly distribute heat, making parts of your ribs too hot and others still cool. Furthermore, without careful attention, the microwave can quickly make your ribs dry out or toughen up. But a trick to meandering around this issue is by placing a damp paper towel over your ribs while reheating; the steam helps to keep the ribs moist. Both methods offer different advantages in their own rights. Choosing between them ultimately depends on the reheater's priorities. If taste and texture preservation are paramount, then the oven could be your ideal heating companion. Conversely, if time efficiency trumps all other factors, a microwave will certainly be the go-to. Whichever option you choose, remember that safe reheating is equally as important as how good your meal tastes. Always ensure your ribs reach a food-safe temperature of at least 165 degrees Fahrenheit to avoid foodborne illness, and you'll be on your way to a savory, reheated rib experience.
Reheating ribs on a Pan: A detailed step by step guide
Reheating ribs on a pan can be a simple and effective method if done properly. The first step is to take your leftover ribs out of the refrigerator and let them reach room temperature. This is an important step because it allows the meat to heat evenly when you cook it. Once your ribs have reached room temperature, apply a thin coating of barbeque sauce, if desired, to restore the original flavor lost due to refrigeration. The next step involves preheating your pan over medium heat. It's recommended to use a non-stick pan, as it prevents the meat from sticking to the surface and promotes even heat distribution. Once the pan is hot enough, place the ribs in the pan and cover it. The steam trapped will help in reheating the ribs uniformly and keep them moist. After about three to five minutes, carefully flip the ribs to the other side and continue to heat. The key here is to reheat them slowly to prevent the meat from drying out. Finally, once the ribs are adequately heated, do a taste test to see if more seasoning is needed. This detailed step-by-step guide will assure the reheated ribs preserve their succulent taste and remain juicy, making your culinary experience worthwhile. These practical tips and tricks not only make the process of reheating ribs at home easier but also ensure that the quality and flavor remain tantalizing to your taste buds. Always keep in mind that the secret to reheating lies in doing it slowly and evenly, ensuring the meat retains its original taste and texture.
The role of aluminum foil in reheating ribs
The role of aluminum foil in reheating ribs is pivotal and multifaceted. It not only retains the moisture of the ribs but also redistributes the heat evenly, avoiding the undesirable parched, chewy result that often accompanies the reheating process. Foil is a commonly found household item that turns out to be an essential ally in reheating ribs without losing their original succulence. Using aluminum foil for reheating ribs helps emulate the indirect grilling technique, allowing the ribs to soak up the heat gradually from all sides. Direct exposure to heat, especially in a microwave, can dehydrate the ribs quickly and make them tough to chew. This is where the magic of aluminum foil comes in. It acts as a heat shield, protecting the ribs from harsh, direct heat. Now, the ribs have the chance to be warmed gently, maintaining the integrity of the mouthwatering juices and ensuring the ribs remain savory and succulent. Another crucial advantage of using foil to reheat ribs is heat redistribution. Heat penetrates the foil-wrapped ribs evenly, allowing them to cook homogenously. This evenness of heat ensures that all portions of the rib rack are reheated to the same temperature, hence enhancing its overall taste. Not forgetting, the use of aluminum foil also helps prevent a mess in your oven or microwave. By tightly wrapping your ribs in foil, any drippings or splatters are contained within the foil, making cleanup a real breeze. The procedure of using aluminum foil while reheating ribs is as simple as it is effective. First, preheat your oven to a moderate heat - around 250°F (approximately 120°C). Then, cover the ribs in two layers of aluminum foil, creating a tight seal to lock in moisture. Reheat them for around 30 minutes, or until they reach an internal temperature of 165°F (approximately 74°C). To validate this, use a meat thermometer. In conclusion, the use of aluminum foil when reheating ribs at home not only saves you from a desiccated dish but is also a practical, efficient and mess-free approach. It's a clever kitchen hack that assures juicy, delicious ribs, drumming up flavors as though they were just freshly barbecued.