How To Change Language On Mac
Here is the introduction paragraph: Changing the language on your Mac can be a straightforward process, but it can also be a bit tricky if you're not familiar with the steps involved. Whether you're a multilingual user who wants to switch between languages or a user who has purchased a Mac from a different region, this article will guide you through the process of changing the language on your Mac. We'll cover three main topics: changing the system language, which will affect the overall language of your Mac's interface and settings; changing the language for specific apps, which can be useful if you want to use a different language for a particular application; and troubleshooting language change issues, which can help you resolve any problems that may arise during the process. To get started, let's begin with the most fundamental step: changing the system language.
Changing the System Language
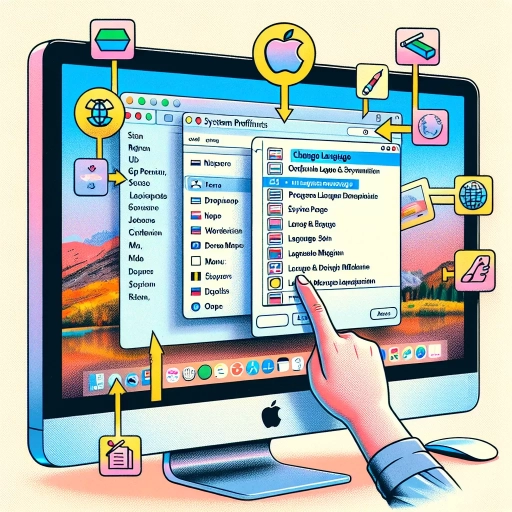
Changing the system language is a straightforward process that can be completed in a few steps. To start, users need to access the Language & Region preferences, where they can select a new language from the list of available options. It's essential to understand the language priority list, as it determines the order in which languages are used in the system. By following these steps, users can easily change the system language to their preferred option. To begin, let's take a closer look at how to access the Language & Region preferences.
Accessing the Language & Region Preferences
Here is the paragraphy: To access the Language & Region preferences on your Mac, follow these steps. First, click on the Apple menu located at the top left corner of your screen. From the drop-down menu, select "System Preferences." This will open the System Preferences window, where you can access various settings and options for your Mac. In the System Preferences window, click on "Language & Region." This will open the Language & Region preferences window, where you can change the language and region settings for your Mac. Alternatively, you can also use Spotlight to quickly access the Language & Region preferences. To do this, press Command + Space to open Spotlight, type "Language & Region" in the search field, and select the "Language & Region" result from the search results. This will also open the Language & Region preferences window. Once you have accessed the Language & Region preferences, you can change the language and region settings for your Mac, including setting the primary language, adding or removing languages, and setting the region and time zone.
Selecting a New Language from the List
When selecting a new language from the list, it's essential to consider a few factors to ensure a smooth transition. First, check if the language you want to add is available in the list of languages provided by Apple. You can do this by going to System Preferences, clicking on Language & Region, and then selecting the "+" button at the bottom left corner of the window. This will open a list of available languages, and you can browse through it to find the one you're looking for. If the language you want is not available, you may need to consider using a third-party language pack or seeking assistance from Apple support. Once you've found the language you want to add, click on it to select it, and then click the "Add" button to add it to your list of preferred languages. You can then arrange the languages in your preferred order by dragging and dropping them in the list. It's also a good idea to set the new language as your primary language by dragging it to the top of the list. This will ensure that your Mac uses the new language for all system menus, dialogs, and notifications. Additionally, you may need to restart your Mac or log out and log back in for the changes to take effect. By following these steps, you can easily select a new language from the list and start using it on your Mac.
Understanding the Language Priority List
When you're changing the system language on your Mac, it's essential to understand the Language Priority List. This list determines the order in which your Mac uses languages to display menus, dialog boxes, and other text. By default, the Language Priority List is set to use the system language as the primary language, but you can customize it to prioritize other languages. To access the Language Priority List, go to System Preferences > Language & Region, and click on the "Language" tab. Here, you'll see a list of languages in the order of priority. You can drag and drop languages to change their order, with the top language being the primary language used by your Mac. If a language is not available in the Language Priority List, you can add it by clicking the "+" button and selecting the language from the list. Understanding the Language Priority List is crucial when changing the system language, as it ensures that your Mac uses the correct language for all system elements, including menus, dialog boxes, and notifications. By customizing the Language Priority List, you can ensure a seamless language transition and avoid any confusion or inconsistencies.
Changing the Language for Specific Apps
Changing the language for specific apps can be a useful feature for individuals who communicate in multiple languages or prefer to use certain apps in their native language. This feature allows users to customize their app experience to better suit their needs. To change the language for a specific app, users can start by locating the app's language settings, which can usually be found within the app's settings or preferences menu. Once the language settings are located, users can use the app's built-in language options to select their preferred language. In some cases, users may need to set a different language for a specific app, which can be done through the device's language settings or the app's settings menu. By following these steps, users can easily change the language for specific apps and enhance their overall app experience. To get started, let's take a closer look at locating the app's language settings.
Locating the App's Language Settings
To locate the app's language settings, you'll typically need to access the app's preferences or settings menu. The exact steps may vary depending on the app, but here are some common methods: Look for a "Preferences" or "Settings" option in the app's menu bar, usually found under the app's name or a gear icon. Alternatively, you can try pressing the keyboard shortcut Command (⌘) + comma (,) to open the preferences window. Some apps may also have a dedicated "Language" or "Localization" section within their settings menu. If you're using a third-party app, you can also check the app's documentation or support website for specific instructions on how to access the language settings. Additionally, some apps may offer in-app language switching, allowing you to change the language directly from within the app. In this case, you may see a language dropdown menu or a button that says "Change Language" or "Switch Language." By following these steps, you should be able to locate the app's language settings and change the language to your preferred option.
Using the App's Built-in Language Options
Using the app's built-in language options is another way to change the language for specific apps on your Mac. Many apps, especially those from popular developers, offer built-in language options that allow you to change the language within the app itself. To do this, you'll typically need to access the app's preferences or settings menu. Look for a "Language" or "Localization" option, and select the language you want to use. Some apps may also offer additional language options, such as dialects or regional variations. For example, if you're using a language learning app, you may be able to choose between different accents or dialects to help you learn more effectively. By using the app's built-in language options, you can customize the language experience within the app without affecting the system-wide language settings. This can be especially useful if you need to use multiple languages for different apps or tasks. Additionally, some apps may also offer language-specific features or content, such as language-specific keyboards or dictionaries, which can enhance your overall language experience. By taking advantage of the app's built-in language options, you can tailor your language experience to your specific needs and preferences.
Setting a Different Language for a Specific App
Here is the paragraphy: To set a different language for a specific app on your Mac, follow these steps. First, go to the Apple menu and select "System Preferences." Then, click on "Language & Region." In the Language & Region window, click on the "+" button at the bottom left corner to add a new language. Select the language you want to add from the list and click "Add." Next, click on the "Apps" tab at the top of the window. Here, you'll see a list of all the apps installed on your Mac. Find the app for which you want to set a different language and click on it. Then, click on the "Language" dropdown menu and select the language you want to use for that app. If the language you want to use is not listed, you can add it by clicking on the "+" button and following the same steps as before. Once you've selected the language, click "OK" to save your changes. The app will now use the language you've selected, while the rest of your Mac will continue to use the default language. Note that not all apps support multiple languages, so this feature may not work for every app.
Troubleshooting Language Change Issues
If you've recently changed the language on your Mac, you may encounter some issues with certain apps or system features. Don't worry, troubleshooting language change issues is relatively straightforward. To resolve these problems, you can try restarting your Mac after the language change, as this often resolves any glitches or conflicts. Additionally, you may need to check if the apps you're using support the new language, as some apps may not be compatible. If the issue persists, you can try resetting your language settings to their default values. By following these steps, you should be able to resolve any language change issues on your Mac. In this article, we'll explore each of these solutions in more detail, starting with the simplest and most effective method: restarting your Mac after a language change.
Restarting Your Mac After a Language Change
Here is the paragraphy: Restarting your Mac after a language change is a simple yet effective way to ensure that the new language settings take effect properly. When you change the language on your Mac, it may not update all the system settings and applications immediately. Restarting your Mac allows the system to refresh and apply the new language settings to all aspects of the operating system, including menus, dialogs, and keyboard layouts. This can help resolve any issues with language display or functionality. To restart your Mac, click the Apple menu and select "Restart" or press the power button and select "Restart" from the menu. Your Mac will shut down and then automatically restart, applying the new language settings. After restarting, your Mac should display the new language correctly, and all system features should function as expected. If you're still experiencing issues with language display or functionality after restarting, you may want to try other troubleshooting steps, such as checking for software updates or resetting the System Management Controller (SMC).
Checking for Language Support in Apps
Here is the paragraphy: When troubleshooting language change issues on your Mac, it's essential to check if the app you're using supports the language you want to switch to. Not all apps are designed to be multilingual, and some may only offer a limited set of languages. To check for language support in an app, follow these steps: 1. Open the app and go to its preferences or settings menu. This is usually found in the app's menu bar, often under "Preferences" or "Settings." 2. Look for a "Language" or "Localization" option. This may be a separate tab or a dropdown menu. 3. Check if the language you want to switch to is listed as an available option. If it's not, the app may not support that language. 4. If the language is listed, try selecting it and see if the app's interface changes accordingly. If it doesn't, there may be a problem with the app's language support. Additionally, you can also check the app's documentation or support website to see if they have any information on language support. Some apps may also offer language packs or plugins that can be downloaded and installed to add support for additional languages. It's also worth noting that some apps may have language support, but it may not be enabled by default. In this case, you may need to enable the language support manually. This can usually be done by going to the app's preferences or settings menu and looking for a "Language" or "Localization" option. By checking for language support in apps, you can quickly determine if the issue is with the app itself or with your Mac's language settings. This can help you troubleshoot the problem more efficiently and find a solution to get your Mac speaking your language.
Resetting Language Settings to Default
If you're experiencing issues with your Mac's language settings, resetting them to default may be the solution you need. To do this, go to System Preferences and click on Language & Region. Then, click on the "Advanced" button at the bottom right corner of the window. In the Advanced settings, click on the "Reset" button next to "Language Settings." This will reset your language settings to their default values, which may resolve any issues you're experiencing. Note that resetting your language settings will not affect any other settings on your Mac, so you don't have to worry about losing any other customizations. Additionally, if you're using a Mac with multiple users, resetting language settings will only affect the current user account. If you're still experiencing issues after resetting your language settings, you may want to try restarting your Mac or seeking further assistance from Apple support.