How To Melt Chocolate Wafers
Melting chocolate wafers is a delicate process that requires attention to detail and the right techniques to achieve the perfect, smooth, and creamy texture. Whether you're a professional chocolatier or a home baker, melting chocolate wafers is an essential skill to master. To ensure success, it's crucial to start with the right chocolate wafers, as different types can have varying melting points and properties. In this article, we'll explore the key factors to consider when choosing the right chocolate wafers for melting. We'll also discuss the importance of preparing the chocolate wafers for melting, including how to handle and store them to prevent damage. Finally, we'll provide tips and techniques for melting the chocolate wafers safely and effectively, including how to avoid common mistakes and achieve the perfect melt. By following these guidelines, you'll be well on your way to melting chocolate wafers like a pro. So, let's start by choosing the right chocolate wafers.
Choosing the Right Chocolate Wafers
When it comes to choosing the right chocolate wafers, there are several factors to consider. With so many options available in the market, it can be overwhelming to make a decision. To make the right choice, it's essential to understand the different types of chocolate wafers available, consider the cocoa content and flavor profile, and look for high-quality chocolate wafers. By understanding these key aspects, you can make an informed decision and indulge in the perfect chocolate wafer that suits your taste buds. In this article, we will delve into the world of chocolate wafers and explore the different types available, helping you to make a more informed choice. Let's start by understanding the different types of chocolate wafers.
Understanding the Different Types of Chocolate Wafers
When it comes to melting chocolate wafers, understanding the different types of chocolate wafers available is crucial. There are several types of chocolate wafers, each with its own unique characteristics, advantages, and melting properties. The most common types of chocolate wafers are milk chocolate, dark chocolate, white chocolate, and flavored chocolate. Milk chocolate wafers are made with milk powder or condensed milk and have a sweeter and creamier flavor. They are ideal for melting and are often used in candy making, baking, and decorating. Dark chocolate wafers, on the other hand, have a higher cocoa content and a more intense flavor. They are perfect for those who prefer a stronger chocolate taste and are often used in baking and cooking. White chocolate wafers are made with cocoa butter, sugar, and milk powder, and have a sweet and creamy flavor. They are ideal for melting and are often used in candy making and decorating. Flavored chocolate wafers, such as mint, orange, or hazelnut, are made by adding natural or artificial flavorings to the chocolate. They are perfect for adding a unique twist to your chocolate creations. Understanding the different types of chocolate wafers and their characteristics will help you choose the right type for your melting needs and ensure that your chocolate creations turn out perfect.
Considering the Cocoa Content and Flavor Profile
When it comes to choosing the right chocolate wafers for melting, considering the cocoa content and flavor profile is crucial. The cocoa content, which is usually indicated as a percentage on the packaging, affects the flavor, texture, and melting properties of the chocolate. A higher cocoa content typically results in a more intense, richer flavor and a smoother texture. For example, dark chocolate wafers with a high cocoa content (70% or higher) are ideal for those who prefer a bold, slightly bitter taste. On the other hand, milk chocolate wafers with a lower cocoa content (30-50%) are sweeter and creamier, making them perfect for those with a sweet tooth. Additionally, some chocolate wafers may have added flavorings, such as vanilla or nuts, which can enhance the overall taste experience. When selecting chocolate wafers, consider the type of project you're working on and the desired flavor profile. If you're making chocolate-covered strawberries, for instance, a sweeter milk chocolate might be a better choice. However, if you're creating a rich, decadent chocolate cake, a high-cocoa-content dark chocolate would be more suitable. By taking the time to consider the cocoa content and flavor profile, you can ensure that your melted chocolate wafers turn out perfectly and meet your desired taste and texture expectations.
Looking for High-Quality Chocolate Wafers
When it comes to melting chocolate wafers, the quality of the chocolate is crucial. High-quality chocolate wafers will melt smoothly and evenly, resulting in a rich and velvety texture. To ensure you're getting the best chocolate wafers, look for products made from high-cocoa-content chocolate, ideally 35% or higher. This will guarantee a deeper flavor and a better melting experience. Additionally, check the ingredient list for any added preservatives or artificial flavorings, which can affect the melting process and the overall taste. Opt for chocolate wafers with minimal ingredients and no artificial additives. Another important factor is the texture of the wafers. Look for wafers that are thin and even, as these will melt more consistently than thicker or irregularly-shaped wafers. Finally, consider the brand reputation and read reviews from other customers to ensure you're purchasing high-quality chocolate wafers that will meet your melting needs.
Preparing the Chocolate Wafers for Melting
When it comes to preparing chocolate wafers for melting, there are several crucial steps to ensure a smooth and successful process. To start, it's essential to remove any packaging or wrappers from the chocolate wafers, as these can interfere with the melting process and create unwanted textures. Additionally, ensuring the chocolate wafers are at room temperature is vital, as this helps to promote even melting and prevents the formation of unwanted crystals. Finally, chopping or breaking the chocolate wafers into small pieces is a critical step, as this increases the surface area and allows for more efficient melting. By following these steps, you'll be well on your way to creating a delicious and professional-looking chocolate treat. In this article, we'll dive deeper into the importance of each of these steps, starting with the crucial process of chopping or breaking the chocolate wafers into small pieces.
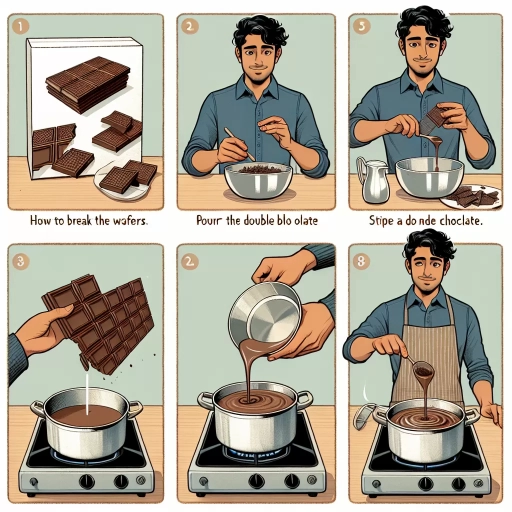
Chopping or Breaking the Chocolate Wafers into Small Pieces
Chopping or breaking the chocolate wafers into small pieces is a crucial step in preparing them for melting. This process helps to increase the surface area of the chocolate, allowing it to melt more evenly and quickly. To chop the chocolate wafers, place them on a cutting board and use a sharp knife to break them into small pieces. You can also use a food processor or a chocolate chopper to chop the wafers into smaller pieces. Another option is to place the wafers in a plastic bag and use a rolling pin to crush them into smaller pieces. Regardless of the method you choose, make sure to chop the chocolate wafers into pieces that are roughly the same size so that they melt at the same rate. This will help to prevent some pieces from melting too quickly while others remain solid. By chopping the chocolate wafers into small pieces, you'll be able to melt them more efficiently and achieve a smooth, creamy texture in your final product.
Removing Any Packaging or Wrappers
Removing any packaging or wrappers from the chocolate wafers is a crucial step in preparing them for melting. This step is often overlooked, but it's essential to ensure that the chocolate melts evenly and efficiently. Packaging materials, such as plastic or paper wrappers, can interfere with the melting process and even introduce unwanted flavors or contaminants into the chocolate. By removing the wrappers, you can prevent these issues and ensure that your melted chocolate is smooth, creamy, and free of any impurities. To remove the wrappers, simply peel them off the chocolate wafers, taking care not to touch the chocolate itself to prevent any oils from your skin from affecting the melting process. If the wrappers are stubborn, you can gently twist or pull them off, but be careful not to break or damage the chocolate wafers in the process. Once the wrappers are removed, your chocolate wafers are ready to be melted, and you can proceed with the next step in the melting process.
Ensuring the Chocolate Wafers are at Room Temperature
Ensuring the chocolate wafers are at room temperature is a crucial step in preparing them for melting. This is because chocolate wafers that are too cold or too warm can affect the melting process, leading to a less-than-desirable texture or consistency. When chocolate wafers are stored in the refrigerator or freezer, the fat molecules contract and become more rigid, making it more difficult for them to melt smoothly. On the other hand, if the chocolate wafers are too warm, the fat molecules can become too soft and separate, resulting in a grainy or separated texture. By allowing the chocolate wafers to come to room temperature, the fat molecules can relax and become more receptive to melting, resulting in a smooth and creamy texture. To ensure the chocolate wafers are at room temperature, simply remove them from the refrigerator or freezer and let them sit at room temperature for about 30 minutes to an hour before melting. This will allow the chocolate wafers to slowly come to room temperature, ensuring a smooth and even melting process. Additionally, it's also important to note that the ideal room temperature for melting chocolate wafers is between 68°F to 72°F (20°C to 22°C), so it's best to melt the chocolate wafers in a room with a consistent temperature within this range. By taking the time to ensure the chocolate wafers are at room temperature, you can achieve a smooth and creamy melted chocolate that is perfect for dipping, coating, or molding.
Melting the Chocolate Wafers Safely and Effectively
Melting chocolate wafers can be a delicate process, requiring attention to detail and the right techniques to achieve smooth, creamy results. To melt chocolate wafers safely and effectively, it's essential to choose the right method. Three common methods for melting chocolate wafers include using a double boiler or a heatproof bowl set over a pot, microwaving the chocolate wafers in short intervals, and stirring constantly to prevent burning or seizing. By understanding the benefits and drawbacks of each method, you can select the best approach for your specific needs. In this article, we'll explore these methods in more detail, starting with the classic technique of using a double boiler or a heatproof bowl set over a pot.
Using a Double Boiler or a Heatproof Bowl Set Over a Pot
Using a double boiler or a heatproof bowl set over a pot is a popular method for melting chocolate wafers safely and effectively. This technique involves placing the chocolate wafers in a heatproof bowl or the top of a double boiler, which is then set over a pot of simmering water. The heat from the water is transferred to the chocolate, causing it to melt slowly and evenly. To use this method, start by filling a pot with water to a depth of about 1-2 inches. Bring the water to a simmer over medium heat, then reduce the heat to low. Next, place the heatproof bowl or the top of the double boiler over the pot, making sure that the bottom of the bowl is not touching the water. Add the chocolate wafers to the bowl and let them melt, stirring occasionally. As the chocolate melts, you can remove it from the heat and let it cool slightly before using it in your recipe. This method is ideal for melting large quantities of chocolate, and it allows for precise control over the temperature. Additionally, it's a great way to melt chocolate without exposing it to direct heat, which can cause it to seize up or become grainy. By using a double boiler or a heatproof bowl set over a pot, you can melt your chocolate wafers safely and effectively, resulting in a smooth and creamy texture that's perfect for dipping, coating, or molding.
Microwaving the Chocolate Wafers in Short Intervals
Microwaving the chocolate wafers in short intervals is a crucial step in melting them safely and effectively. To do this, place the chocolate wafers in a microwave-safe bowl and heat them in 10-15 second increments, checking on them after each interval. This will help prevent the chocolate from overheating and seizing up. After each interval, remove the bowl from the microwave and gently stir the chocolate wafers to redistribute the heat. If the chocolate is still not melted to your liking, continue to heat it in short intervals until it reaches the desired consistency. It's also important to note that the power level of your microwave can affect the melting time, so adjust the heating time accordingly. Additionally, be careful when removing the bowl from the microwave as it may be hot. By microwaving the chocolate wafers in short intervals, you can ensure that they melt smoothly and evenly, making them perfect for dipping, drizzling, or using in your favorite recipes.
Stirring Constantly to Prevent Burning or Seizing
Stirring constantly is crucial when melting chocolate wafers to prevent burning or seizing. Burning occurs when the chocolate is exposed to high temperatures, causing it to turn dark and develop a bitter flavor. Seizing, on the other hand, happens when the chocolate comes into contact with a cold surface or is not melted evenly, resulting in a grainy or separated texture. To avoid these issues, it's essential to stir the chocolate wafers constantly, especially when using a double boiler or microwave. This ensures that the heat is distributed evenly, and the chocolate melts smoothly and consistently. Additionally, stirring constantly helps to prevent hot spots from forming, which can cause the chocolate to burn or seize. By stirring constantly, you can achieve a smooth, creamy, and evenly melted chocolate that's perfect for dipping, coating, or molding.