How To Draw A Backpack
Drawing a backpack can be a fun and creative activity, whether you're an artist, a student, or simply someone who loves to draw. With a few simple steps and some basic drawing skills, you can create a realistic and detailed backpack that looks like it's ready to hit the trails. To get started, it's essential to understand the basics of drawing a backpack, including its shape, proportions, and overall structure. Once you have a solid foundation, you can move on to sketching the main components of the backpack, such as the straps, pockets, and zippers. Finally, adding details and finishing touches will bring your backpack drawing to life. In this article, we'll take you through each of these steps, starting with the fundamentals. So, let's begin by understanding the basics of drawing a backpack.
Understanding the Basics of Drawing a Backpack
Drawing a backpack can be a fun and creative activity, but it requires some basic understanding of its shape and structure. To get started, it's essential to familiarize yourself with the different parts of a backpack, including the main compartment, pockets, straps, and buckles. Additionally, choosing the right drawing tools and materials can make a significant difference in the quality of your drawing. A set of sharp pencils, a sketchbook, and an eraser can help you create a detailed and accurate representation of a backpack. Furthermore, setting up your drawing space for comfort and efficiency can also impact your overall drawing experience. A well-lit and organized workspace can help you stay focused and avoid distractions. By considering these factors, you can set yourself up for success and create a realistic and detailed drawing of a backpack. Let's start by familiarizing yourself with the shape and structure of a backpack.
Familiarizing Yourself with the Shape and Structure
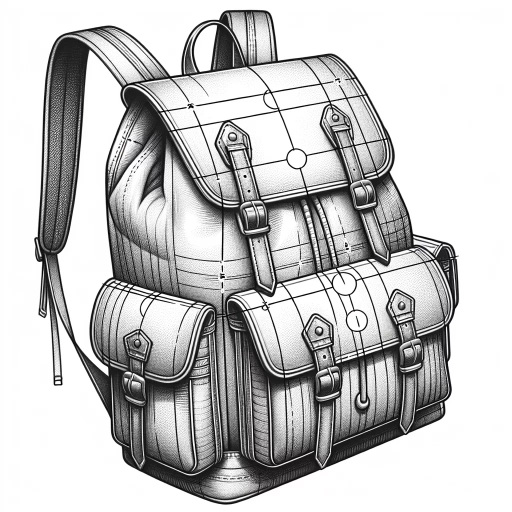
Familiarizing yourself with the shape and structure of a backpack is a crucial step in drawing one accurately. A backpack typically consists of a main compartment, shoulder straps, and a back panel. The main compartment is usually rectangular in shape, with a zipper or other closure running along the top. The shoulder straps are typically curved and padded, attaching to the main compartment at the top and bottom. The back panel is usually flat and rectangular, providing additional support and protection for the wearer's back. When drawing a backpack, it's essential to capture these key elements and their relationships to each other. Start by sketching the overall shape of the backpack, paying attention to its proportions and dimensions. Then, add the shoulder straps and back panel, making sure to accurately depict their curves and angles. Finally, add details such as zippers, pockets, and buckles to complete the drawing. By taking the time to familiarize yourself with the shape and structure of a backpack, you'll be able to create a more accurate and detailed drawing.
Choosing the Right Drawing Tools and Materials
When it comes to drawing a backpack, having the right tools and materials can make all the difference in achieving a realistic and detailed representation. To start, you'll need a pencil with a range of hardness levels, such as a set of graphite pencils (HB, 2B, 4B, 6B) or a sketching pencil with a built-in sharpener. This will allow you to create a variety of lines and shading, from fine details to broad strokes. A sharpener is also essential to keep your pencils sharp and ready to use. In addition to pencils, a set of markers or colored pencils can be useful for adding color and texture to your drawing. Look for markers with a range of tip sizes and colors to achieve different effects. A blending stump or tortillon can also be helpful for smoothing out shading and creating subtle transitions between colors. When it comes to paper, choose a high-quality, smooth paper that can handle a range of media, such as cartridge paper or hot press watercolor paper. Avoid using thin or flimsy paper that may buckle or tear under the pressure of drawing. Finally, consider investing in a drawing board or sketchbook with a sturdy cover to provide support and protection for your work. By choosing the right tools and materials, you'll be well on your way to creating a detailed and realistic drawing of a backpack.
Setting Up Your Drawing Space for Comfort and Efficiency
Setting up your drawing space for comfort and efficiency is crucial for creating a productive and enjoyable drawing experience. To start, choose a quiet and dedicated area with good lighting, preferably natural light, to minimize eye strain. Invest in a comfortable and ergonomic chair, as well as a drawing table or desk that allows you to work at a comfortable height. Consider using a drawing board or lap desk to provide additional support and flexibility. Ensure your drawing space is well-ventilated and at a comfortable temperature to prevent distractions and promote focus. Organize your drawing tools and materials within easy reach to save time and reduce clutter. A pencil case or container can help keep your pencils, pens, and markers tidy, while a paper tray or file organizer can keep your paper and reference materials in order. Finally, consider investing in a drawing lamp or task light to provide focused lighting and reduce eye strain. By setting up your drawing space with comfort and efficiency in mind, you'll be able to focus on creating your best work, including drawing a realistic and detailed backpack.
Sketching the Main Components of the Backpack
When it comes to sketching a backpack, it's essential to start with the main components that make up its overall structure. A well-designed backpack sketch should include the body, straps, handles, pockets, and compartments. To create a realistic and functional design, it's crucial to draw each component with accurate proportions and attention to detail. In this article, we'll explore the key elements of sketching a backpack, starting with the body, which provides the foundation for the entire design. We'll also discuss how to add straps and handles with realistic texture and detail, as well as incorporate pockets and compartments with functional design. By mastering these essential components, you'll be able to create a high-quality backpack sketch that showcases your artistic skills. First, let's begin with the foundation of the backpack design: drawing the body with accurate proportions.
Drawing the Body of the Backpack with Accurate Proportions
Drawing the body of the backpack with accurate proportions is a crucial step in creating a realistic and visually appealing drawing. To start, sketch a large rectangle with rounded edges, making sure it is tall rather than wide. The height of the rectangle should be roughly 1.5 to 2 times the width. Pay attention to the proportions of the backpack, as a well-balanced design will make your drawing look more authentic. The body of the backpack should be slightly curved, with the top and bottom edges being slightly narrower than the middle section. Use gentle, flowing lines to capture the contours of the backpack, avoiding sharp angles and harsh edges. As you refine your drawing, add subtle details such as seams, stitching, and texture to give your backpack depth and dimension. By carefully rendering the body of the backpack with accurate proportions, you will create a solid foundation for adding additional details and features, ultimately bringing your drawing to life.
Adding the Straps and Handles with Realistic Texture and Detail
Adding the straps and handles to your backpack drawing is a crucial step in creating a realistic and detailed design. To start, draw two long straps that extend from the top of the backpack to the bottom, making sure to curve them slightly to follow the natural shape of the bag. The straps should be slightly thicker at the top and taper down towards the bottom. Next, add two shorter straps that connect the main straps to the backpack, these are called stabilizer straps. These straps should be positioned about one-third of the way down from the top of the backpack and should be slightly angled to provide additional support. For the handles, draw two small loops that protrude from the top of the backpack, making sure to add some texture and detail to give them a more realistic look. You can add some stitching lines to the straps and handles to give them a more authentic appearance. Additionally, you can add some creases and folds to the straps to give them a more worn and used look. To take your drawing to the next level, you can add some realistic texture and detail to the straps and handles, such as the texture of the fabric or the metal hardware. By adding these details, you can create a more realistic and detailed backpack drawing that looks like it's ready to be worn.
Incorporating Pockets and Compartments with Functional Design
Incorporating pockets and compartments with functional design is a crucial step in sketching the main components of a backpack. A well-designed backpack should have multiple pockets and compartments to keep belongings organized, easily accessible, and protected. Start by sketching the main compartment, which should be large enough to fit a laptop, books, or other bulky items. Consider adding a padded sleeve or laptop compartment to provide extra protection. Next, add smaller pockets and compartments for storing smaller items such as pens, pencils, phone, wallet, and keys. These pockets can be placed on the front, sides, or top of the backpack, depending on the design. Additionally, consider adding a water bottle pocket or a hidden pocket for storing valuable items. When sketching these pockets and compartments, think about the functionality and accessibility of each one. For example, a phone pocket should be easily accessible and preferably located on the front or side of the backpack. A wallet pocket, on the other hand, can be placed in a more secure location, such as inside the main compartment or in a hidden pocket. By incorporating multiple pockets and compartments with functional design, you can create a backpack that is both stylish and practical.
Adding Details and Finishing Touches to Your Backpack Drawing
Adding the final details to your backpack drawing can elevate it from a simple sketch to a realistic and engaging piece of art. To achieve this, it's essential to focus on three key areas: enhancing the texture and pattern of the fabric or material, adding zippers, buckles, and other hardware with precision, and refining the overall shape and silhouette for a realistic look. By incorporating these elements, you can create a drawing that accurately captures the essence of a backpack. Let's start by exploring the first aspect, which is enhancing the texture and pattern of the fabric or material, as this will lay the foundation for adding the other details.
Enhancing the Texture and Pattern of the Fabric or Material
When it comes to adding texture and pattern to your backpack drawing, there are several techniques you can use to enhance the overall appearance of the fabric or material. One way to add texture is to use different line weights and hatching techniques to create a sense of depth and dimension. For example, you can use thick, bold lines to suggest the rough texture of canvas or denim, while thinner lines can be used to indicate the smoothness of nylon or polyester. You can also experiment with different patterns, such as stripes, polka dots, or plaid, to add visual interest to your drawing. To create a more realistic pattern, try using a ruler or other straightedge to draw straight lines, and then add subtle variations and imperfections to give the pattern a more organic feel. Additionally, you can use shading and cross-hatching techniques to create a sense of volume and texture, and to suggest the way the fabric or material folds and creases. By paying attention to the texture and pattern of the fabric or material, you can add a level of realism and detail to your backpack drawing that will make it stand out.
Adding Zippers, Buckles, and Other Hardware with Precision
Adding zippers, buckles, and other hardware to your backpack drawing requires precision and attention to detail. Start by identifying the type of hardware you want to add, such as zippers, buckles, or clips, and research their typical designs and proportions. Use a ruler or a straightedge to draw the hardware components, paying close attention to their shape, size, and placement on the backpack. For zippers, draw a long, thin rectangle with a small tab at one end, and add a series of small teeth along the edge. For buckles, draw a rectangular or oval shape with a prong or pin in the center, and add a strap or loop to attach it to the backpack. Use a fine-tip pen or a pencil to add texture and details to the hardware, such as rivets, screws, or stitching. To add a sense of realism, pay attention to the way the hardware interacts with the fabric of the backpack, such as the way a zipper curves around a seam or the way a buckle presses into the fabric. By adding these small details, you can create a more realistic and detailed backpack drawing that showcases your attention to detail and precision.
Refining the Overall Shape and Silhouette for a Realistic Look
Refining the overall shape and silhouette of your backpack drawing is crucial for achieving a realistic look. To do this, take a step back and evaluate the overall proportions and shape of your backpack. Check if the dimensions are accurate and if the shape is symmetrical. Make any necessary adjustments to the outline, paying attention to the curves and lines that define the shape of the backpack. Consider the type of backpack you are drawing and its intended use, as this will influence the shape and design. For example, a hiking backpack will have a more angular and rugged shape, while a school backpack will be more rounded and sleek. Refine the shape of the straps, pockets, and other features, ensuring they are in proportion to the rest of the backpack. Pay attention to the way the fabric folds and creases, adding subtle details that give your drawing depth and texture. By refining the overall shape and silhouette, you will create a solid foundation for adding details and finishing touches to your backpack drawing.