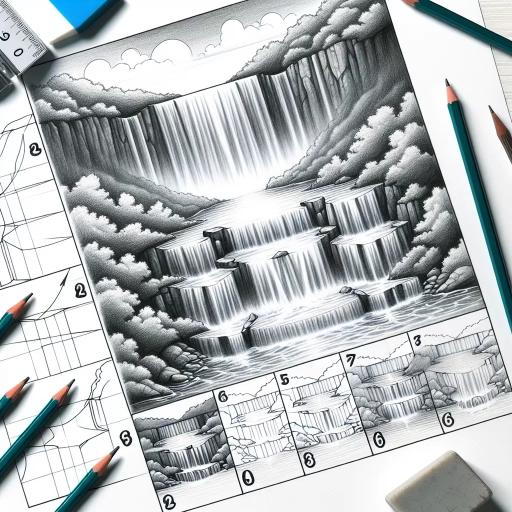
How To Draw A Waterfall
Drawing a waterfall can be a breathtakingly beautiful and serene subject to capture on paper. To create a stunning waterfall drawing, it's essential to understand the basics of drawing a waterfall, including the fundamental shapes and lines that make up this natural wonder. Once you have a solid foundation, you can add depth and dimension to your drawing, creating a sense of movement and energy. Finally, refining your drawing with advanced techniques can take your artwork to the next level, adding texture, detail, and realism. In this article, we'll explore these three key aspects of drawing a waterfall, starting with the basics. By understanding the fundamental elements of a waterfall, you'll be able to create a solid foundation for your drawing, and from there, you can build upon it to create a truly breathtaking piece of art. Let's begin by understanding the basics of drawing a waterfall.
Understanding the Basics of Drawing a Waterfall
Drawing a waterfall can be a challenging yet rewarding experience for artists of all skill levels. To create a realistic and captivating depiction of a waterfall, it's essential to understand the basics of drawing one. This involves observing the structure of a waterfall, choosing the right drawing tools and materials, and sketching the basic shape and proportion. By mastering these fundamental elements, artists can effectively capture the movement, texture, and beauty of a waterfall. In this article, we'll delve into the world of waterfall drawing, starting with the importance of observing the structure of a waterfall. By studying the way water flows, the shape of the rocks, and the surrounding environment, artists can gain a deeper understanding of the subject and create a more accurate and engaging drawing. Let's begin by exploring the structure of a waterfall and how it can inform our artistic approach.
Observing the Structure of a Waterfall
Observing the structure of a waterfall is a crucial step in drawing one accurately. A waterfall typically consists of three main parts: the top, the cascade, and the base. The top is where the water flows over the edge of a cliff or a steep slope, creating a lip or a crest. This is usually the calmest part of the waterfall, with smooth, flowing water. The cascade is the middle section, where the water drops down and creates a series of small waterfalls or a single, large one. This is often the most turbulent part of the waterfall, with water spraying and foaming as it hits the rocks below. The base is where the water collects and flows away, often creating a pool or a stream. When drawing a waterfall, it's essential to capture the movement and energy of the water, as well as the surrounding landscape and rocks. Observe how the light hits the water, creating highlights and shadows, and how the water interacts with the surrounding environment. By carefully observing the structure of a waterfall, you can create a more realistic and engaging drawing.
Choosing the Right Drawing Tools and Materials
When it comes to drawing a waterfall, having the right tools and materials can make all the difference in capturing the movement and beauty of the scene. To start, you'll need a range of pencils, including graphite, charcoal, and colored pencils. Graphite pencils are ideal for creating soft, delicate lines and shading, while charcoal pencils are better suited for bold, expressive strokes. Colored pencils can be used to add subtle color and texture to your drawing. In addition to pencils, you'll also need a sketchbook or drawing paper with a smooth finish to allow for easy blending and shading. A blending stump or tortillon can be used to smooth out rough edges and create soft, gradient-like transitions between colors. A sharpener and eraser are also essential for keeping your pencils sharp and correcting any mistakes. For added texture and interest, consider incorporating other materials into your drawing, such as watercolor paints, ink, or even collage elements. By choosing the right tools and materials, you'll be able to capture the dynamic movement and beauty of a waterfall in your drawing.
Sketching the Basic Shape and Proportion
When sketching the basic shape and proportion of a waterfall, it's essential to start with the overall composition and layout. Begin by lightly drawing a large rectangle or oval shape to represent the waterfall's boundaries. Consider the height and width of the waterfall, as well as the surrounding environment, such as rocks, trees, or cliffs. Divide the rectangle into thirds both horizontally and vertically to create a grid, which will help you achieve balance and proportion in your drawing. Next, sketch the basic shape of the waterfall, including the top and bottom edges, as well as the cascading water. Use simple shapes, such as triangles and curves, to block in the main forms. Pay attention to the proportions of the waterfall, ensuring that the top edge is wider than the bottom edge, and that the water flows smoothly from top to bottom. Consider the perspective and angle of the waterfall, taking into account the viewer's point of view. Finally, add some basic guidelines for the surrounding environment, such as the placement of rocks or trees, to help you achieve a sense of depth and context in your drawing. By sketching the basic shape and proportion of the waterfall, you'll establish a solid foundation for your drawing and set yourself up for success in capturing the intricate details and textures of this beautiful natural wonder.
Adding Depth and Dimension to Your Waterfall Drawing
Here is the introduction paragraph: When it comes to drawing a waterfall, capturing its dynamic movement and serene beauty can be a challenge. To add depth and dimension to your waterfall drawing, there are several techniques you can employ. By incorporating movement and flow with lines and shapes, using shading and texture to enhance realism, and incorporating the surrounding environment and details, you can create a visually stunning piece of art that transports the viewer to the scene. In this article, we will explore these techniques in more detail, starting with the foundation of creating movement and flow with lines and shapes, which is essential in capturing the dynamic energy of a waterfall.
Creating Movement and Flow with Lines and Shapes
Creating movement and flow with lines and shapes is a crucial aspect of drawing a captivating waterfall. To achieve this, start by using gentle, curved lines to suggest the movement of the water. These lines should be soft and fluid, with a sense of continuity and flow. As the water cascades down the rocks, the lines can become more dynamic and expressive, with a greater sense of energy and movement. To add depth and dimension to your drawing, use a range of line weights and textures to create a sense of layering and visual interest. Thicker lines can be used to suggest the rough, rocky terrain, while thinner lines can be used to indicate the smooth, flowing water. Shapes can also be used to create a sense of movement and flow, with rounded, organic shapes suggesting the soft, curved lines of the water, and more angular, geometric shapes suggesting the rough, rocky terrain. By combining these lines and shapes in a way that creates a sense of movement and flow, you can draw the viewer's eye through the drawing and create a sense of energy and dynamism. Additionally, consider using diagonal lines to create a sense of movement and flow, as these lines can help to lead the viewer's eye through the drawing and create a sense of energy and dynamism. By using a range of lines and shapes, and combining them in a way that creates a sense of movement and flow, you can create a captivating and engaging waterfall drawing that draws the viewer in and invites them to explore.
Using Shading and Texture to Enhance Realism
Using shading and texture can significantly enhance the realism of your waterfall drawing. Shading helps to create depth and dimension by suggesting the three-dimensional form of the rocks, trees, and water. By applying different shading techniques, such as hatching, cross-hatching, and stippling, you can create a range of values that give your drawing volume and texture. For example, you can use gentle hatching to suggest the softness of the water, while using more intense cross-hatching to indicate the roughness of the rocks. Texture can also be used to add realism to your drawing by suggesting the roughness of the rocks, the smoothness of the water, and the softness of the foliage. You can create texture by using different drawing tools, such as pencils, charcoal, and pastels, and by applying different techniques, such as stippling, hatching, and cross-hatching. By combining shading and texture, you can create a highly realistic and engaging waterfall drawing that draws the viewer in and invites them to explore the scene. Additionally, you can use atmospheric perspective to create a sense of depth and distance in your drawing, by using lighter values and softer edges in the background, and darker values and harder edges in the foreground. This will help to create a sense of depth and dimensionality in your drawing, and will make your waterfall drawing even more realistic and engaging.
Incorporating Surrounding Environment and Details
Incorporating the surrounding environment and details is crucial to adding depth and dimension to your waterfall drawing. To create a more immersive and realistic scene, consider including elements such as lush greenery, rocks, and trees in the surrounding area. Start by sketching the basic shapes of the trees and foliage, using gentle, curved lines to suggest the softness of the leaves and branches. Add texture and depth to the trees by incorporating knots, grooves, and other natural details. For the rocks, use a combination of smooth and rough lines to convey their varied textures, and consider adding some moss or lichen to give them a sense of age and weathering. To further enhance the sense of atmosphere, you can also include some mist or spray rising from the base of the waterfall, using soft, feathery lines to capture its gentle, ethereal quality. Additionally, consider adding some wildlife, such as birds or fish, to the scene to add a sense of movement and life. By incorporating these details and elements, you can create a rich, vibrant, and engaging waterfall drawing that draws the viewer in and invites them to explore the scene.
Refining Your Waterfall Drawing with Advanced Techniques
Refining your waterfall drawing requires a combination of technical skills and artistic vision. To take your artwork to the next level, it's essential to focus on three key areas: mastering the art of water and foam rendering, adding atmospheric perspective and distance, and enhancing the overall composition and balance. By refining these elements, you can create a captivating and realistic waterfall drawing that transports viewers to the heart of nature. In this article, we'll delve into advanced techniques for refining your waterfall drawing, starting with the crucial aspect of mastering the art of water and foam rendering. By learning how to accurately depict the movement and texture of water, you'll be able to create a sense of dynamism and energy in your artwork, drawing the viewer's eye to the focal point of the waterfall.
Mastering the Art of Water and Foam Rendering
Mastering the art of water and foam rendering is a crucial aspect of drawing a realistic waterfall. To achieve this, it's essential to understand the behavior of water and foam in different environments. Start by observing how water flows and foams in real-life scenarios, taking note of the patterns, textures, and movements. When drawing water, use gentle, flowing lines to convey the sense of movement and energy. Vary the line weights and textures to suggest the different depths and velocities of the water. For foam, use short, curved lines to capture its soft, airy texture. Experiment with different brushstrokes and techniques, such as hatching and cross-hatching, to create a range of values and textures that mimic the appearance of water and foam. To add depth and dimension to your drawing, pay attention to the way light interacts with the water and foam, creating highlights, shadows, and subtle color gradations. By mastering the art of water and foam rendering, you'll be able to create a captivating and realistic waterfall drawing that draws the viewer in.
Adding Atmospheric Perspective and Distance
Adding atmospheric perspective and distance to your waterfall drawing can elevate it from a simple representation to a breathtaking, immersive scene. Atmospheric perspective refers to the way objects appear lighter, cooler, and less detailed as they recede into the distance. To achieve this effect, start by softening the lines and edges of the waterfall and surrounding landscape as they fade into the background. Use gentle, feathery strokes to suggest the mist and spray that rises from the base of the falls, gradually becoming more diffuse and indistinct as it disappears into the distance. Next, pay attention to the color palette, gradually cooling and desaturating the hues as they recede into the background. Blues and purples can be used to create a sense of depth and distance, while warm colors like oranges and yellows can be used to draw the viewer's eye to the foreground. Finally, consider adding some subtle atmospheric effects, such as mist, fog, or haze, to enhance the sense of depth and distance in your drawing. By incorporating these techniques, you can create a waterfall drawing that not only captures the beauty of the subject but also draws the viewer in and invites them to explore the scene.
Enhancing the Overall Composition and Balance
Enhancing the overall composition and balance of your waterfall drawing is crucial to create a visually appealing piece of art. To achieve this, consider the rule of thirds, where you divide your paper into thirds both horizontally and vertically, creating nine equal parts. Place the main elements of your waterfall, such as the waterfall itself, rocks, and trees, along these lines or at their intersections. This will create a sense of balance and harmony in your drawing. Additionally, pay attention to the negative space around your waterfall, as it can help to create a sense of depth and atmosphere. You can also use the principles of symmetry and asymmetry to add visual interest to your drawing. Symmetry can create a sense of order and stability, while asymmetry can add a sense of movement and energy. Experiment with different compositions and arrangements to find the one that works best for your waterfall drawing. Furthermore, consider the use of leading lines, which can help to guide the viewer's eye through your drawing and create a sense of movement and flow. These lines can be created by the shape of the waterfall, the direction of the trees, or the flow of the water. By incorporating these elements, you can enhance the overall composition and balance of your waterfall drawing, creating a piece of art that is both visually appealing and engaging.