How Do You Take A Screenshot On A Hp Laptop
Taking a screenshot on a HP laptop is a straightforward process that can be accomplished in several ways. Whether you need to capture a full screen, a selected area, or a specific window, there are various methods to achieve this. In this article, we will explore three primary methods to take a screenshot on a HP laptop: using the Print Screen button, utilizing the Windows Snipping Tool, and employing keyboard shortcuts. Each of these methods offers a unique set of benefits and can be used in different situations. By the end of this article, you will be able to choose the method that best suits your needs. Let's start by exploring the first method, which is one of the most commonly used: Using the Print Screen Button.
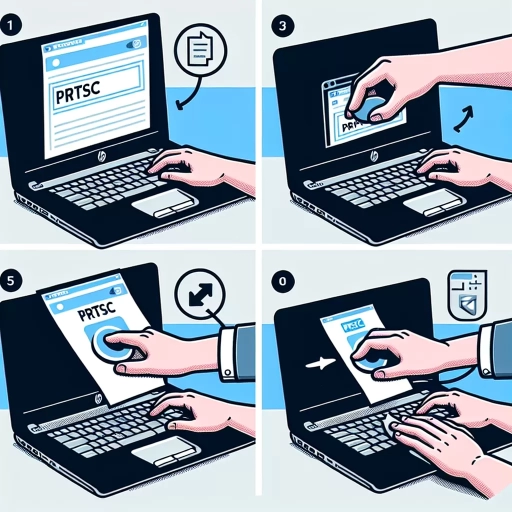
Using the Print Screen Button
The Print Screen button is a useful tool for capturing screenshots on your HP laptop. By using this button, you can easily take a snapshot of your entire screen or a selected area, which can be useful for a variety of purposes, such as creating tutorials, documenting errors, or sharing information with others. To use the Print Screen button effectively, you need to know where to find it on your HP laptop, how to copy the screenshot to the clipboard, and how to paste it into an image editing program. In this article, we will guide you through these steps, starting with locating the Print Screen button on your HP laptop.
Locating the Print Screen Button on Your HP Laptop
The print screen button, often abbreviated as PrtScn or PrtScr, is usually located on the top row of your HP laptop's keyboard, between the F12 key and the ScrLk key. It may be labeled as PrtScn, PrtScr, or Print Screen, depending on the model of your laptop. If you're having trouble finding it, look for a key with a similar label or a key with an icon that resembles a camera or a screenshot. On some HP laptops, the print screen button may be combined with another key, such as the Fn (function) key. In this case, you'll need to press the Fn key and the print screen button simultaneously to capture a screenshot. If you're still having trouble locating the print screen button, refer to your laptop's user manual or online documentation for specific instructions.
Copying the Screenshot to the Clipboard
When you press the Print Screen button, Windows captures a screenshot of the entire screen and copies it to the clipboard. This allows you to paste the screenshot into any application that supports images, such as Microsoft Paint, Adobe Photoshop, or even Microsoft Word. To copy the screenshot to the clipboard, simply press the Print Screen button, and then open the application where you want to paste the screenshot. Right-click inside the application and select "Paste" or use the keyboard shortcut Ctrl+V to paste the screenshot. Alternatively, you can also use the keyboard shortcut Ctrl+C to copy the screenshot to the clipboard after pressing the Print Screen button. This method is useful when you want to capture a screenshot and then edit it in an image editing software before saving or sharing it. By copying the screenshot to the clipboard, you can easily manipulate and enhance the image without having to save it as a file first. Additionally, copying the screenshot to the clipboard also allows you to take multiple screenshots and paste them into a single document or image, making it easier to create tutorials, presentations, or other visual content.
Pasting the Screenshot into an Image Editing Program
When you've captured your screenshot using the Print Screen button, the next step is to paste it into an image editing program. This is where you can edit, enhance, and customize your screenshot to your liking. To do this, open your preferred image editing software, such as Microsoft Paint, Adobe Photoshop, or GIMP. Once the program is open, click on the "Edit" menu and select "Paste" or use the keyboard shortcut Ctrl+V to paste the screenshot into the program. The screenshot will then appear in the editing window, where you can resize, crop, and manipulate it as needed. You can also add text, shapes, and other elements to the screenshot to highlight important information or to create a more visually appealing image. Additionally, you can adjust the brightness, contrast, and color balance of the screenshot to ensure it looks its best. Once you've made your desired edits, you can save the screenshot as a new file, either in its original format or in a different format such as JPEG or PNG. By pasting your screenshot into an image editing program, you can take your screenshot to the next level and make it a valuable tool for communication, documentation, or creative expression.
Using the Windows Snipping Tool
The Windows Snipping Tool is a powerful and versatile screenshot utility that allows users to capture and annotate images of their screen. With this tool, you can easily take screenshots of entire windows, selected regions, or even full screens. But how do you access and use the Snipping Tool on your HP laptop? In this article, we will explore the steps to access the Snipping Tool, select the type of screenshot you want to take, and save and share your screenshot. First, we will discuss how to access the Snipping Tool on your HP laptop, including the different methods to launch the tool and its location in the Start menu. By the end of this article, you will be able to use the Snipping Tool like a pro and take screenshots with ease. So, let's get started by accessing the Snipping Tool on your HP laptop.
Accessing the Snipping Tool on Your HP Laptop
To access the Snipping Tool on your HP laptop, you can follow a few simple steps. First, click on the Start button located at the bottom left corner of your screen. This will open the Start menu, where you can search for the Snipping Tool. Type "Snipping Tool" in the search bar, and it should appear in the search results. Click on the Snipping Tool icon to open the application. Alternatively, you can also find the Snipping Tool in the Accessories folder within the Start menu. Once you've opened the Snipping Tool, you can choose from four different snipping modes: Full Screen, Window, Rectangular Snip, and Free-form Snip. Select the mode that suits your needs, and then click and drag the crosshair pointer to capture the desired area of your screen. The captured image will then be displayed in the Snipping Tool window, where you can annotate, save, or share it as needed. By following these steps, you can easily access the Snipping Tool on your HP laptop and start capturing screenshots with ease.
Selecting the Type of Screenshot You Want to Take
When it comes to selecting the type of screenshot you want to take, the Windows Snipping Tool offers several options to suit your needs. The first option is the Full Screen Snip, which captures the entire screen, including all windows, icons, and the taskbar. This is useful when you want to capture a screenshot of your entire desktop or a full-screen application. The second option is the Window Snip, which allows you to capture a screenshot of a specific window or dialog box. This is useful when you want to capture a screenshot of a particular application or window without capturing the surrounding desktop. The third option is the Rectangular Snip, which allows you to capture a screenshot of a specific rectangular region of the screen. This is useful when you want to capture a screenshot of a specific area of the screen, such as a chart or a graph. The fourth option is the Free-form Snip, which allows you to capture a screenshot of any shape or size. This is useful when you want to capture a screenshot of a specific area of the screen that doesn't fit into a rectangular shape. Finally, the fifth option is the Delayed Snip, which allows you to capture a screenshot after a delay of 1-5 seconds. This is useful when you want to capture a screenshot of a menu or a tooltip that disappears quickly. By selecting the right type of screenshot, you can capture the exact image you need to convey your message or illustrate your point.
Saving and Sharing Your Screenshot
When you've captured the perfect screenshot using the Windows Snipping Tool, you'll want to save and share it with others. To save your screenshot, click on the "File" menu and select "Save As." Choose a location on your computer to save the image, such as your desktop or documents folder. You can also choose the file format, such as PNG, JPEG, or GIF. If you want to share your screenshot, you can click on the "Share" button and select from a variety of options, including email, social media, and messaging apps. You can also copy the screenshot to your clipboard and paste it into a document or email. Additionally, you can annotate your screenshot with text, arrows, and other markup tools to highlight important information. This feature is especially useful for creating tutorials, presentations, and other visual aids. By saving and sharing your screenshot, you can easily communicate complex information and ideas with others.
Using Keyboard Shortcuts
Using keyboard shortcuts can greatly enhance your productivity and efficiency when working on your computer. One of the most useful keyboard shortcuts is the ability to take a screenshot. There are several ways to take a screenshot using keyboard shortcuts, including using the Windows key + Print Screen shortcut, the Alt + Print Screen shortcut, and the Game Bar. In this article, we will explore these different methods and provide you with the information you need to start taking screenshots like a pro. First, we will discuss using the Windows key + Print Screen shortcut, which allows you to capture your entire screen and save it to your computer. This shortcut is especially useful for capturing full-screen images or videos. By using this shortcut, you can quickly and easily take a screenshot and save it to your computer for later use.
Using the Windows Key + Print Screen Shortcut
Using the Windows Key + Print Screen Shortcut is a convenient method to capture a screenshot on your HP laptop. To use this shortcut, simply press the Windows key and the Print Screen key simultaneously. The Windows key is usually located on the bottom left side of your keyboard, and the Print Screen key is often found on the top right side. When you press these two keys together, your laptop will automatically save a screenshot of your entire screen to the "Screenshots" folder in your Pictures folder. You can then access the screenshot by navigating to the "Screenshots" folder and viewing the image. This method is particularly useful if you want to capture a screenshot of your entire screen, including all windows and icons. Additionally, using the Windows Key + Print Screen Shortcut eliminates the need to paste the screenshot into an image editing program, as it is automatically saved as an image file. Overall, this shortcut provides a quick and easy way to capture screenshots on your HP laptop.
Using the Alt + Print Screen Shortcut
Using the Alt + Print Screen shortcut is a convenient way to capture a screenshot of the currently active window on your HP laptop. To use this method, simply press the Alt key and the Print Screen (PrtScn) key simultaneously. This will capture a screenshot of the window that is currently in focus, and the image will be copied to the clipboard. You can then paste the screenshot into an image editing program, such as Microsoft Paint, to save and edit the image. This method is particularly useful when you want to capture a screenshot of a specific window or dialog box, rather than the entire screen. Additionally, using the Alt + Print Screen shortcut can help to reduce clutter in your screenshot, as it will only capture the active window and not any surrounding windows or desktop icons. Overall, the Alt + Print Screen shortcut is a quick and easy way to capture a screenshot of a specific window on your HP laptop.
Using the Game Bar to Take a Screenshot
Using the Game Bar to take a screenshot is a convenient feature available on Windows 10 and 11 devices, including HP laptops. To access the Game Bar, press the Windows key + G on your keyboard. This will open the Game Bar overlay, which includes a screenshot button. Click on the screenshot button, which looks like a camera icon, to capture a screenshot of your entire screen. You can also use the Game Bar to record your screen, which can be useful for creating tutorials or demonstrations. Additionally, the Game Bar allows you to customize your screenshot settings, such as choosing where to save your screenshots and setting a default screenshot format. To take a screenshot using the Game Bar, simply press the Windows key + G, click on the screenshot button, and your screenshot will be saved to your designated folder. This method is particularly useful for gamers, as it allows you to capture screenshots of your gameplay without having to leave the game. However, it's also a convenient option for anyone looking for a quick and easy way to take a screenshot on their HP laptop.