How To Take Screenshot On Dell Laptop
Taking a screenshot on a Dell laptop is a straightforward process that can be accomplished in several ways. Whether you need to capture a full screen, a selected area, or a specific window, there are various methods to achieve this. In this article, we will explore three primary methods for taking screenshots on a Dell laptop: using keyboard shortcuts, utilizing the Snipping Tool, and leveraging the Game Bar. Each of these methods offers unique benefits and can be applied in different situations. For instance, keyboard shortcuts provide a quick and easy way to capture a full screen or a selected area, while the Snipping Tool offers more advanced features for editing and annotating screenshots. The Game Bar, on the other hand, is particularly useful for capturing screenshots of games and other full-screen applications. To get started, let's begin with the simplest and most widely used method: using keyboard shortcuts.
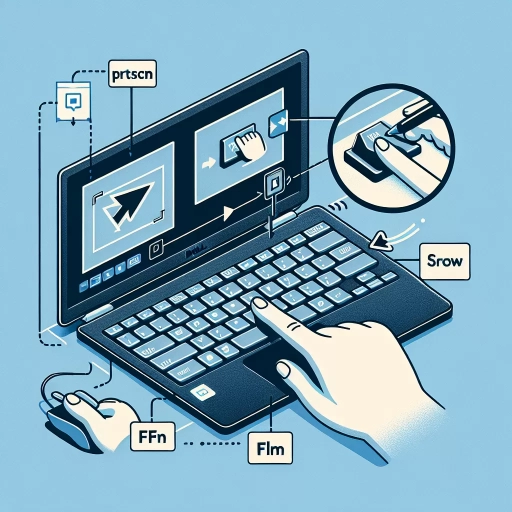
Using Keyboard Shortcuts
Using keyboard shortcuts can significantly improve your productivity and efficiency when working on a computer. By learning and utilizing these shortcuts, you can save time and effort, allowing you to focus on more important tasks. In this article, we will explore three essential keyboard shortcuts that can enhance your computing experience. We will discuss using the Print Screen button, which allows you to capture a screenshot of your entire screen. Additionally, we will cover using the Windows Key + Print Screen button, which enables you to capture a screenshot and automatically save it to a folder. Finally, we will examine using the Alt + Print Screen button, which allows you to capture a screenshot of a specific window. By mastering these shortcuts, you can streamline your workflow and become more proficient in your use of technology. Let's start by exploring the first shortcut, using the Print Screen button.
Using the Print Screen Button
Using the Print Screen button is a simple and quick way to capture a screenshot on your Dell laptop. To do this, locate the Print Screen button on your keyboard, usually abbreviated as "PrtScn" or "PrtScr". Press the Print Screen button, and it will capture the entire screen. The screenshot will be saved to the clipboard, allowing you to paste it into any image editing software, such as Microsoft Paint, or a document. If you want to capture a specific window, press the Alt key and the Print Screen button simultaneously. This will capture the currently active window. You can then paste the screenshot into an image editing software or a document. Alternatively, you can press the Windows key and the Print Screen button at the same time to capture the entire screen and automatically save it to the "Screenshots" folder in your Pictures folder. This method eliminates the need to paste the screenshot into an image editing software, making it a convenient option for those who want to quickly capture and save screenshots.
Using the Windows Key + Print Screen Button
Using the Windows Key + Print Screen button is a convenient method to capture a screenshot on your Dell laptop. To do this, simply press the Windows key and the Print Screen button simultaneously. The Windows key is usually located on the bottom left side of your keyboard, and the Print Screen button is often abbreviated as "PrtScn" and is located on the top right side of your keyboard. When you press these two keys together, your laptop will automatically save a screenshot of your entire screen to the "Screenshots" folder in your Pictures folder. You can then access this folder to view, edit, or share your screenshot as needed. This method is particularly useful if you want to capture a screenshot of your entire screen, including all windows and icons, without having to manually select a specific area or window. Additionally, using the Windows Key + Print Screen button is a quick and easy way to capture a screenshot, making it a great option for those who need to take screenshots frequently.
Using the Alt + Print Screen Button
Using the Alt + Print Screen button is a convenient way to capture a screenshot of a specific window on your Dell laptop. To do this, first, make sure the window you want to capture is active and in focus. Then, press the Alt key and the Print Screen (PrtScn) button simultaneously. This will capture a screenshot of the active window and save it to the clipboard. You can then open an image editing program, such as Microsoft Paint, and paste the screenshot into a new image. From there, you can edit and save the screenshot as desired. This method is particularly useful when you want to capture a screenshot of a specific window or dialog box, rather than the entire screen. Additionally, using the Alt + Print Screen button can help you avoid capturing unnecessary parts of the screen, such as the taskbar or other windows, which can make your screenshot look cluttered. By using this keyboard shortcut, you can quickly and easily capture high-quality screenshots of specific windows on your Dell laptop.
Using the Snipping Tool
The Snipping Tool is a powerful utility in Windows that allows users to capture and edit screenshots with ease. With its user-friendly interface and versatile features, it's an essential tool for anyone who needs to take screenshots regularly. To get started with the Snipping Tool, users need to open it, which can be done in a few simple steps. Once opened, users can select the screenshot mode that suits their needs, whether it's a full-screen capture, a window capture, or a rectangular snip. After capturing the screenshot, users can save it in various formats, including PNG, JPEG, and GIF. In this article, we will explore how to use the Snipping Tool effectively, starting with the first step: opening the Snipping Tool.
Opening the Snipping Tool
To open the Snipping Tool on your Dell laptop, you can follow these simple steps. First, click on the Start button located at the bottom left corner of your screen. This will open the Start menu, where you can search for the Snipping Tool. Type "Snipping Tool" in the search bar, and it should appear in the search results. Click on the Snipping Tool icon to open the application. Alternatively, you can also find the Snipping Tool in the Accessories folder within the Start menu. Once you've opened the Snipping Tool, you'll see a simple interface with options to create a new snip, open a saved snip, or exit the application. You can then choose the type of snip you want to create, such as a full screen, window, or rectangular snip, and the Snipping Tool will allow you to capture the desired area of your screen. With the Snipping Tool open, you're ready to start taking screenshots on your Dell laptop.
Selecting the Screenshot Mode
When selecting the screenshot mode, you have four options to choose from: Full Screen, Window, Rectangular Snip, and Free-form Snip. The Full Screen mode captures the entire screen, including all windows, icons, and the taskbar. This mode is useful when you want to capture a screenshot of your entire desktop or a full-screen application. The Window mode, on the other hand, allows you to capture a screenshot of a specific window, such as a browser or a document. This mode is useful when you want to capture a screenshot of a particular window without capturing the surrounding desktop. The Rectangular Snip mode allows you to capture a screenshot of a specific rectangular area of the screen. This mode is useful when you want to capture a screenshot of a specific section of the screen, such as a table or a chart. The Free-form Snip mode allows you to capture a screenshot of any shape or size, giving you the flexibility to capture a screenshot of any area of the screen. This mode is useful when you want to capture a screenshot of a specific area of the screen that doesn't fit into a rectangular shape. By selecting the right screenshot mode, you can capture the exact screenshot you need, making it easier to communicate your ideas or share information with others.
Saving the Screenshot
Saving the screenshot is a crucial step after capturing it using the Snipping Tool. Once you have taken the screenshot, you can save it to your desired location on your Dell laptop. To do this, click on the "File" menu in the Snipping Tool window and select "Save As." This will open the "Save As" dialog box, where you can choose the location, file name, and file type for your screenshot. You can save the screenshot as a JPEG, PNG, GIF, or BMP file, depending on your preference. It's recommended to save the screenshot in a location that is easy to access, such as the "Pictures" or "Documents" folder. You can also add tags or keywords to the screenshot to make it easier to search for later. Additionally, you can also save the screenshot to the clipboard, which allows you to paste it into other applications, such as email or word processing software. By saving the screenshot, you can keep a record of important information, share it with others, or use it for future reference.
Using the Game Bar
The Game Bar is a powerful tool in Windows 10 that allows gamers to capture screenshots, record gameplay, and even stream their games to the internet. With the Game Bar, you can easily take a screenshot of your game by using the Screenshot button, which can be accessed by pressing the Windows key + G. But before you can start taking screenshots, you need to open the Game Bar. In this article, we will explore how to use the Game Bar to take screenshots, including how to open the Game Bar, use the Screenshot button, and access the Screenshot folder. By the end of this article, you will be able to use the Game Bar like a pro and take amazing screenshots of your games. So, let's get started by opening the Game Bar.
Opening the Game Bar
Opening the Game Bar is a straightforward process that allows you to access various features and tools to enhance your gaming experience on your Dell laptop. To open the Game Bar, you can use the Windows key + G keyboard shortcut. This will instantly bring up the Game Bar overlay, which provides access to features such as screenshot capture, video recording, and performance monitoring. Alternatively, you can also open the Game Bar by searching for it in the Start menu or by clicking on the Xbox app icon in the system tray. Once the Game Bar is open, you can customize its settings to suit your preferences, such as adjusting the overlay's transparency, choosing which features to display, and setting up keyboard shortcuts. With the Game Bar open, you can easily take screenshots, record gameplay, and access other useful tools to enhance your gaming experience on your Dell laptop.
Using the Screenshot Button
Using the Screenshot Button is another convenient method to capture your screen on a Dell laptop. This method is particularly useful when you want to take a screenshot of the entire screen or a selected area. To use the Screenshot Button, locate the Print Screen (PrtScn) button on your keyboard, usually found between the F12 key and the ScrLk key. Press the PrtScn button, and a screenshot of the entire screen will be captured and saved to the clipboard. You can then open an image editing software like Microsoft Paint, right-click inside the window, and select "Paste" to view and edit the screenshot. Alternatively, you can press the Alt + PrtScn keys to capture a screenshot of the currently active window. The screenshot will be saved to the clipboard, and you can paste it into an image editing software or document. If you want to capture a selected area of the screen, press the Windows key + Shift + S keys, and a crosshair cursor will appear. Drag the crosshair cursor to select the area you want to capture, and the screenshot will be saved to the clipboard. Using the Screenshot Button is a quick and easy way to take screenshots on your Dell laptop, and it's a great alternative to using the Game Bar.
Accessing the Screenshot Folder
To access the screenshot folder on your Dell laptop, you can follow these simple steps. First, open the File Explorer by pressing the Windows key + E on your keyboard. Then, navigate to the Pictures folder, which is usually located in the This PC or Computer section. Within the Pictures folder, you should see a subfolder named Screenshots. This is where Windows stores all the screenshots you've taken using the Game Bar or the Print Screen button. You can also access the screenshot folder by typing "screenshots" in the Windows search bar and selecting the Screenshots folder from the search results. Alternatively, you can also use the shortcut Windows key + R to open the Run dialog box, type "%userprofile%\Pictures\Screenshots" and press Enter to directly access the screenshot folder. By accessing the screenshot folder, you can view, edit, and share your screenshots with ease.