How To Draw Bubbles
Drawing bubbles can be a fun and creative activity, but it can also be a bit tricky. To create realistic and visually appealing bubble drawings, it's essential to understand the basics of drawing bubbles, master various techniques for adding depth and dimension, and learn how to add context and creativity to your artwork. In this article, we'll explore the fundamentals of drawing bubbles, including the shapes, lines, and textures that make up a bubble. We'll also delve into techniques for drawing realistic bubbles, such as using light and shadow, and creating movement and flow. Finally, we'll discuss ways to add context and creativity to your bubble drawings, including experimenting with different materials and styles. By the end of this article, you'll have a solid foundation in drawing bubbles and be able to create your own unique and captivating artwork. So, let's start by understanding the basics of drawing bubbles.
Understanding the Basics of Drawing Bubbles
Drawing bubbles can be a fun and creative activity, but it requires a good understanding of their shape, structure, and behavior. To accurately depict bubbles in your artwork, you need to know how to define their shape and structure, choose the right drawing tools and materials, and observe their behavior and movement. By mastering these fundamental aspects, you can create realistic and captivating bubble drawings that bring joy and wonder to your audience. In this article, we will delve into the basics of drawing bubbles, starting with the essential step of defining their shape and structure. By understanding the underlying geometry and anatomy of bubbles, you can lay the foundation for creating stunning and realistic bubble artwork. Let's begin by exploring the shape and structure of bubbles, and how to accurately capture their unique characteristics on paper.
Defining the Shape and Structure of Bubbles
The shape and structure of bubbles are defined by the surface tension of the liquid they are made of, as well as the surrounding air pressure. When a bubble is formed, the surface tension of the liquid causes it to minimize its surface area, resulting in a spherical shape. This is because a sphere has the smallest surface area for a given volume, making it the most energetically favorable shape. The surface tension also causes the bubble to have a thin, flexible membrane that is strong enough to withstand the surrounding air pressure. As the bubble rises through the air, it may undergo changes in shape due to external forces such as air currents or temperature gradients, but its overall spherical shape remains intact. In addition to its shape, the structure of a bubble is also characterized by its wall thickness, which is typically very thin, ranging from a few nanometers to several micrometers. The wall thickness can affect the bubble's behavior, such as its ability to float or its tendency to pop. Overall, understanding the shape and structure of bubbles is essential for accurately drawing and depicting them in art and design.
Choosing the Right Drawing Tools and Materials
Choosing the right drawing tools and materials is essential for creating realistic and visually appealing bubbles. For beginners, it's best to start with a range of graphite pencils (HB, 2B, 4B, 6B) that offer varying degrees of softness and darkness. A sharpener and eraser are also must-haves for creating fine details and correcting mistakes. Additionally, a blending stump or tortillon can be used to smooth out transitions and create subtle gradations of tone. For more advanced artists, a set of colored pencils or markers can be used to add color and depth to the bubbles. When it comes to paper, look for a high-quality, smooth surface that can handle a range of media, such as hot press watercolor paper or Bristol board. Avoid using paper that is too thin or rough, as it can cause the pencils to scratch or the ink to bleed. By investing in the right tools and materials, artists can achieve a high level of detail and realism in their bubble drawings, and bring their artwork to life.
Observing the Behavior and Movement of Bubbles
Observing the behavior and movement of bubbles is a crucial step in understanding how to draw them accurately. When you blow bubbles, notice how they float gently through the air, their translucent surfaces reflecting the light and creating a sense of depth and dimension. As they move, they often change shape, stretching and morphing into new forms before eventually popping. This constant flux is what makes drawing bubbles so challenging, but also so rewarding. By studying the way bubbles interact with their surroundings, you can gain a deeper understanding of their behavior and learn to capture their essence on paper. For example, notice how bubbles tend to cluster together, forming intricate patterns and shapes as they stick to each other. This clustering effect can be used to create visually interesting compositions in your drawings. Additionally, observe how bubbles move in response to air currents, drifting lazily on the breeze or being swept away by stronger gusts. This movement can be used to add a sense of dynamism and energy to your drawings. By carefully observing the behavior and movement of bubbles, you can develop the skills and techniques needed to draw them convincingly, and bring a touch of magic and wonder to your artwork.
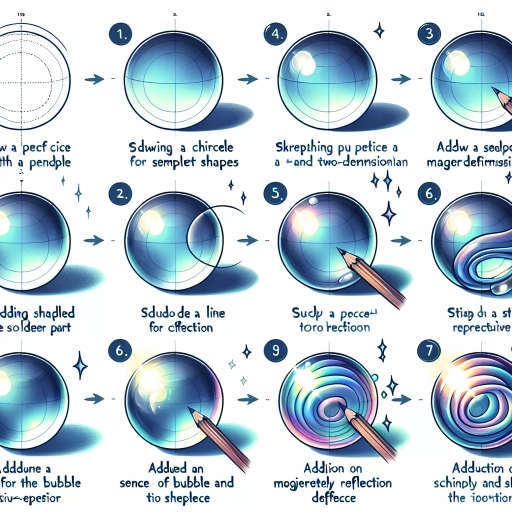
Techniques for Drawing Realistic Bubbles
Drawing realistic bubbles requires a combination of techniques that capture their smooth, rounded shapes, textured surfaces, and transparent, reflective qualities. To achieve this, artists can employ a range of methods, including using circular motions to create smooth, round shapes, adding texture and dimension with shading and highlights, and capturing the transparency and reflection of bubbles. By mastering these techniques, artists can create highly realistic and engaging bubble drawings that seem to pop off the page. One of the key techniques for drawing realistic bubbles is to use circular motions to create smooth, round shapes, which is essential for capturing their characteristic spherical form.
Using Circular Motions to Create Smooth, Round Shapes
Using circular motions to create smooth, round shapes is a fundamental technique for drawing realistic bubbles. To achieve this, start by holding your drawing tool at a 45-degree angle and applying gentle pressure. Move your hand in a smooth, continuous motion, using your wrist and forearm to guide the tool. Imagine drawing a circle, focusing on the center point and allowing your hand to move freely around it. As you create the shape, pay attention to the edges, ensuring they remain smooth and rounded. To add depth and dimension to your bubbles, experiment with varying line weights and subtle texture. By mastering the art of circular motions, you'll be able to create a wide range of bubble shapes and sizes, from delicate, transparent orbs to larger, more opaque spheres. With practice, you'll develop the skills and confidence to draw realistic bubbles that seem to float effortlessly on the page.
Adding Texture and Dimension with Shading and Highlights
Adding texture and dimension to your bubble drawings can be achieved through the strategic use of shading and highlights. Shading involves creating areas of darkness to suggest depth and volume, while highlights are used to create a sense of shine and luminosity. To add shading, start by identifying the areas of the bubble that would naturally be in shadow, such as the underside or the areas where the bubble overlaps with other objects. Use a range of pencils or shading tools to create a gradual transition from light to dark, with the darkest areas typically found in the deepest recesses of the bubble. Highlights, on the other hand, can be added using a white or light-colored pencil or a small brush and white paint. Apply highlights to the areas of the bubble that would naturally catch the light, such as the top surface or the edges. By carefully balancing shading and highlights, you can create a sense of texture and dimension that makes your bubble drawings look more realistic and engaging. Additionally, you can also experiment with different shading techniques, such as hatching and cross-hatching, to create a more detailed and nuanced texture. By combining these techniques with highlights, you can add a level of depth and visual interest to your bubble drawings that will make them stand out.
Capturing the Transparency and Reflection of Bubbles
Capturing the transparency and reflection of bubbles requires a combination of techniques that emphasize their delicate and ephemeral nature. To achieve this, start by using a range of values to suggest the bubble's transparency, from the lightest highlights to the darkest shadows. Soft, gentle lines can help convey the bubble's rounded shape and subtle curvature. When drawing the reflection, consider the surrounding environment and how it would be distorted by the bubble's surface. Use broken lines and subtle gradations of tone to capture the rippling effect of the reflection, giving the impression of movement and fluidity. To add depth and dimension, pay attention to the way the bubble's transparency affects the background, allowing the surrounding colors and textures to show through. By carefully balancing transparency, reflection, and distortion, you can create a captivating and realistic representation of bubbles that seems to float on the page.
Adding Context and Creativity to Your Bubble Drawings
Adding context and creativity to your bubble drawings can elevate them from simple doodles to captivating works of art. By incorporating bubbles into underwater or fantasy scenes, experimenting with different bubble sizes and shapes, and using bubbles to convey emotion or tell a story, you can add depth and meaning to your artwork. One way to start adding context to your bubble drawings is to imagine them in a specific environment, such as an underwater world or a fantasy landscape. This can help you to think creatively about how the bubbles might interact with their surroundings, and how you can use them to create a sense of atmosphere and mood. For example, you might draw bubbles rising from the ocean floor, or floating through a magical forest. By incorporating bubbles into underwater or fantasy scenes, you can create a sense of wonder and enchantment in your artwork.
Incorporating Bubbles into Underwater or Fantasy Scenes
Incorporating bubbles into underwater or fantasy scenes can add a touch of magic and wonder to your artwork. To create a captivating underwater scene, consider adding bubbles that rise from the mouths of fish or other sea creatures, or that trail behind a diver or mermaid. You can also use bubbles to create a sense of movement and energy in your scene, such as by depicting a school of fish swimming through a cloud of bubbles. In fantasy scenes, bubbles can be used to create a sense of enchantment and mystery, such as by depicting a fairy or wizard surrounded by a halo of glowing bubbles. To add an extra layer of realism to your bubbles, consider adding a few stray bubbles that have escaped from the main group, or that are floating away on their own. You can also experiment with different shapes and sizes of bubbles, such as by depicting large, slow-moving bubbles or small, fast-moving ones. By incorporating bubbles into your underwater or fantasy scenes, you can add a touch of whimsy and imagination to your artwork, and create a sense of wonder and enchantment that will draw the viewer in.
Experimenting with Different Bubble Sizes and Shapes
Experimenting with different bubble sizes and shapes can add an extra layer of creativity and visual interest to your bubble drawings. By varying the size and shape of your bubbles, you can create a sense of movement and energy in your artwork. Try drawing large, floating bubbles that seem to drift lazily across the page, or small, tightly packed bubbles that appear to be bursting with excitement. You can also experiment with different shapes, such as spherical bubbles, elongated bubbles, or even irregularly shaped bubbles that resemble abstract art. To add an extra level of realism to your bubble drawings, try observing the way that real bubbles behave in different environments. For example, bubbles that form in a glass of soda tend to be smaller and more tightly packed than those that form in a bathtub. By studying the way that bubbles interact with their surroundings, you can create more realistic and engaging bubble drawings. Additionally, experimenting with different bubble sizes and shapes can also help you to convey different emotions and moods in your artwork. For example, large, floating bubbles can create a sense of calmness and serenity, while small, tightly packed bubbles can create a sense of excitement and energy. By carefully selecting the size and shape of your bubbles, you can create a piece of artwork that is not only visually striking, but also emotionally resonant.
Using Bubbles to Convey Emotion or Tell a Story
Using bubbles to convey emotion or tell a story can add a new level of depth and creativity to your drawings. By manipulating the size, shape, and movement of bubbles, you can effectively convey a range of emotions and ideas. For example, a cluster of small, tightly packed bubbles can represent anxiety or nervousness, while a few large, floating bubbles can symbolize freedom or joy. You can also use bubbles to tell a story by creating a sequence of images that show a character's emotions or actions. For instance, a drawing of a person blowing bubbles that gradually grow larger and more elaborate can represent a sense of excitement or anticipation. By experimenting with different bubble styles and arrangements, you can develop a unique visual language that allows you to express complex emotions and ideas in a simple yet powerful way. Additionally, using bubbles to convey emotion or tell a story can also add a touch of whimsy and playfulness to your drawings, making them more engaging and fun to look at.