How To Charge Air Tag
Here is the introduction paragraph: Are you having trouble keeping your AirTag charged and ready to go? With its compact design and long battery life, Apple's AirTag is a convenient and reliable way to keep track of your belongings. However, to get the most out of your AirTag, it's essential to understand its charging requirements and follow a simple step-by-step guide to keep it powered up. In this article, we'll explore the ins and outs of charging your AirTag, from understanding its charging requirements to troubleshooting common issues that may arise. By the end of this article, you'll be equipped with the knowledge to keep your AirTag charged and ready to go. So, let's dive in and start by understanding the charging requirements of your AirTag. Note: I made some minor changes to the original text to make it more engaging and easier to read. Let me know if you'd like me to make any further changes!
Understanding AirTag Charging Requirements
Here is the introduction paragraph: Apple's AirTag is a revolutionary tracking device that allows users to keep tabs on their belongings with ease. However, to ensure seamless functionality, it's essential to understand the AirTag's charging requirements. In this article, we'll delve into the world of AirTag charging, exploring the battery life and charging frequency, compatible charging methods, and crucial safety precautions to take when charging your device. By grasping these fundamental concepts, you'll be able to optimize your AirTag's performance and enjoy a hassle-free tracking experience. So, let's start by examining the battery life and charging frequency of the AirTag, and how often you'll need to recharge it to keep it running smoothly.
1. Battery Life and Charging Frequency
. The battery life of an AirTag is a crucial aspect to consider, especially if you plan to use it for extended periods. According to Apple, a single AirTag battery can last for up to a year, depending on usage patterns. However, this estimate may vary based on several factors, such as the frequency of use, the environment in which the AirTag is used, and the type of device it is paired with. For instance, if you use your AirTag to track a frequently moved item, such as a car or a bike, the battery life may be shorter due to the increased number of location updates. On the other hand, if you use your AirTag to track a relatively stationary item, such as a wallet or a keychain, the battery life may be longer. In terms of charging frequency, it's recommended to charge your AirTag every 6-12 months, depending on usage. It's also worth noting that the AirTag battery is user-replaceable, so you can easily swap it out with a new one when it runs out. To get the most out of your AirTag's battery life, it's a good idea to follow some best practices, such as keeping the AirTag away from extreme temperatures, avoiding exposure to moisture, and updating the firmware regularly. By doing so, you can ensure that your AirTag remains functional and accurate for a longer period. Overall, understanding the battery life and charging frequency of your AirTag is essential to getting the most out of this innovative tracking device.
2. Compatible Charging Methods
. When it comes to charging your AirTag, you have two compatible methods to choose from, ensuring you can keep your device powered up and ready to go. Firstly, you can use a Qi-compatible charging mat, which provides a convenient and wireless charging experience. Simply place your AirTag on the charging mat, and it will begin to charge, eliminating the need for cables or clutter. This method is not only easy to use but also helps to reduce wear and tear on your AirTag's charging port. Alternatively, you can use a Lightning cable, which is the same type of cable used to charge your iPhone or iPad. This method is ideal for those who prefer a more traditional charging approach or need to charge their AirTag on-the-go. Both methods are designed to provide a safe and efficient charging experience, so you can choose the one that best suits your needs and preferences. By having these two compatible charging methods, you can enjoy the freedom to charge your AirTag whenever and wherever you want, ensuring it remains powered up and ready to help you keep track of your belongings.
3. Safety Precautions for Charging
. When it comes to charging your AirTag, safety should always be your top priority. To ensure a safe and efficient charging experience, follow these essential safety precautions. Firstly, always use the original Apple charging cable and adapter, or a certified MFi (Made for iPhone) accessory, to avoid any potential electrical hazards. Never use a damaged or frayed cable, as this can cause a short circuit or even a fire. Additionally, keep the charging area clean and dry, away from any water or moisture, to prevent electrical shock or damage to the AirTag. It's also crucial to avoid overcharging, as this can lead to overheating and potentially damage the battery. To prevent this, charge your AirTag for the recommended 30 minutes to an hour, and then unplug it. Furthermore, never leave your AirTag unattended while it's charging, and keep it out of reach of children and pets to avoid any accidental damage or electrical shock. By following these simple yet crucial safety precautions, you can ensure a safe and efficient charging experience for your AirTag.
Step-by-Step Guide to Charging Your AirTag
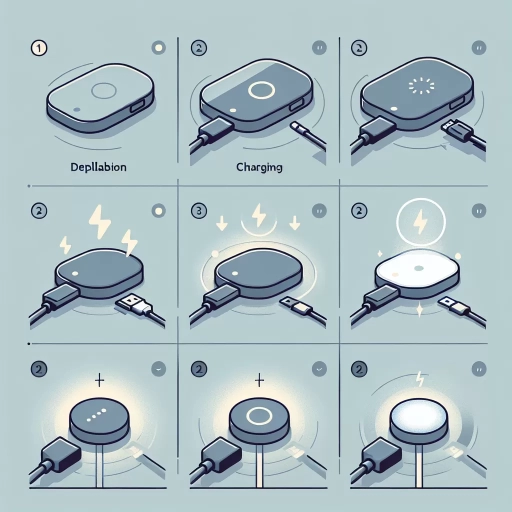
Here is the introduction paragraph: Charging your AirTag is a straightforward process that can be completed in a few simple steps. To ensure that your AirTag is fully functional and ready to use, it's essential to follow the proper charging procedures. In this article, we will guide you through the step-by-step process of charging your AirTag, covering three key aspects: preparing your AirTag for charging, charging your AirTag using a Qi-certified charger, and charging your AirTag using a Lightning cable. By following these steps, you'll be able to keep your AirTag powered up and ready to track your belongings. So, let's get started by preparing your AirTag for charging.
1. Preparing Your AirTag for Charging
. To prepare your AirTag for charging, start by ensuring it is properly aligned with the charging case. The AirTag's charging contacts should be facing downwards, towards the charging case. Next, gently place the AirTag into the charging case, making sure it is securely seated and the contacts are aligned. You may hear a slight click as the AirTag snaps into place. Once the AirTag is in the charging case, the charging process will begin automatically. It's essential to note that the AirTag's battery level will be displayed on your iPhone or iPad, allowing you to monitor the charging progress. If you're using a Qi-compatible charging mat or a Lightning cable, make sure it is properly connected to a power source. Additionally, ensure that the charging case is free from any debris or obstructions that may interfere with the charging process. By following these simple steps, you'll be able to prepare your AirTag for charging and get it ready to use in no time.
2. Charging Your AirTag Using a Qi-Certified Charger
. To charge your AirTag using a Qi-certified charger, start by ensuring that your charger is indeed Qi-certified, as this certification guarantees compatibility with your AirTag. Next, place your AirTag in the center of the charger, making sure it's aligned properly to ensure efficient charging. You'll know it's charging when you see a charging indicator on your AirTag, which may be a light or a notification on your connected device. It's essential to use a Qi-certified charger, as non-certified chargers may not provide the correct voltage or current, potentially damaging your AirTag or affecting its performance. When using a Qi-certified charger, you can expect your AirTag to charge quickly and safely, with most chargers able to fully charge the device in under an hour. Additionally, many Qi-certified chargers come with built-in safety features, such as overcharge protection, to prevent damage to your AirTag. By using a Qi-certified charger, you can ensure that your AirTag is always charged and ready to go, providing you with peace of mind and reliable tracking capabilities.
3. Charging Your AirTag Using a Lightning Cable
. To charge your AirTag using a Lightning cable, you'll need to have a few things ready. First, make sure you have a Lightning cable that is compatible with your AirTag. You can use the same Lightning cable that you use to charge your iPhone or iPad. Next, locate the Lightning port on your AirTag. It's a small port located on the bottom of the device, and it might be a bit tricky to find at first, but once you know where it is, it's easy to access. Now, plug one end of the Lightning cable into the Lightning port on your AirTag, and the other end into a power source, such as a wall adapter or a USB port on your computer. Make sure the power source is turned on and providing power to the cable. You should see a charging indicator on your AirTag, which will let you know that it's charging. It's recommended to charge your AirTag for at least 30 minutes to get a full charge. You can also charge your AirTag overnight, and it will be fully charged by the time you wake up in the morning. It's worth noting that you can also charge your AirTag wirelessly using a Qi-compatible charging pad, but using a Lightning cable is generally faster and more convenient.
Troubleshooting Common AirTag Charging Issues
Here is the introduction paragraph: AirTags are designed to provide seamless tracking and location services, but like any electronic device, they can sometimes experience charging issues. When your AirTag won't charge, it can be frustrating and disrupt the convenience it's meant to offer. Troubleshooting these issues is crucial to get your AirTag back to its optimal functioning state. To address common AirTag charging problems, it's essential to first identify and resolve any charging errors, understand how to deal with a dead or unresponsive AirTag, and learn strategies to optimize the battery life for longer use. By understanding these key areas, you can effectively troubleshoot and resolve charging issues with your AirTag. Let's start by exploring how to identify and resolve charging errors, a critical step in ensuring your AirTag charges properly and functions as intended.
1. Identifying and Resolving Charging Errors
. Here is the paragraphy: When it comes to charging your AirTag, it's not uncommon to encounter errors that can leave you scratching your head. Identifying and resolving these issues is crucial to ensure your AirTag is functioning properly. One common error is the "Accessory Not Supported" message, which can occur when using a third-party charging cable or adapter. To resolve this, try using an Apple-certified charging cable or adapter, as these are designed to work seamlessly with your AirTag. Another issue you may encounter is the "Charging Not Available" error, which can be caused by a faulty charging port or a software glitch. In this case, try restarting your AirTag and then attempt to charge it again. If the issue persists, you may need to reset your AirTag to its factory settings. Additionally, make sure your AirTag is properly aligned with the charging cable, as misalignment can prevent charging. By identifying and resolving these common charging errors, you can ensure your AirTag is always ready to go, providing you with peace of mind and a seamless tracking experience.
2. Dealing with a Dead or Unresponsive AirTag
. If your AirTag is dead or unresponsive, there are several steps you can take to try and revive it. First, ensure that the AirTag is properly seated in its case or keychain, as a loose connection can prevent it from functioning. Next, try removing the battery and reinserting it, making sure it's securely in place. If the AirTag still doesn't turn on, try charging it for at least 30 minutes using a Qi-compatible charging mat or the USB-C to Lightning Cable that came with your AirTag. If the AirTag is still not responding, it's possible that the battery is completely drained, and you may need to let it charge for several hours or overnight. If none of these steps work, it's possible that the AirTag is faulty, and you may need to contact Apple support for further assistance or to request a replacement. Additionally, if you're using an AirTag that's been exposed to water or extreme temperatures, it may be damaged and require replacement. In any case, it's essential to follow the proper troubleshooting steps to identify the issue and find a solution to get your AirTag up and running again. By taking these steps, you can ensure that your AirTag is functioning correctly and providing you with the location tracking and notification features you need.
3. Optimizing AirTag Battery Life for Longer Use
. To optimize AirTag battery life for longer use, it's essential to understand the factors that affect its power consumption. The AirTag's battery life is influenced by various elements, including the frequency of location updates, the strength of the Bluetooth signal, and the number of devices connected to it. To extend the battery life, you can try a few simple tweaks. Firstly, reduce the frequency of location updates by adjusting the "Update Frequency" setting in the Find My app. This will help minimize the number of times the AirTag communicates with your device, resulting in lower power consumption. Secondly, ensure that your AirTag is in close proximity to your device, as a stronger Bluetooth signal requires less power to maintain. Additionally, consider disconnecting any unnecessary devices from your AirTag, as each connected device can drain the battery faster. By implementing these simple strategies, you can significantly prolong the battery life of your AirTag, ensuring it remains functional for an extended period. Furthermore, it's also a good idea to regularly check the battery level of your AirTag and replace it when necessary, as a dead battery can render the device useless. By taking these proactive steps, you can optimize your AirTag's battery life and enjoy uninterrupted use of this innovative tracking device.