How To Draw A Truck
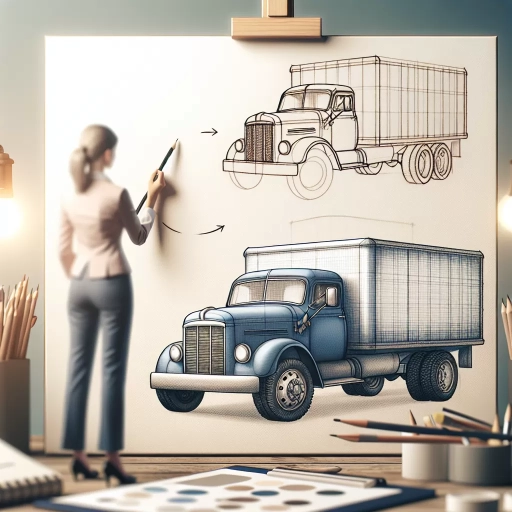 Drawing a truck doesn't have to be a daunting task, even for beginners. In this enlightening and engaging article, we're going to break down the process into simplified steps to help you create your own masterpiece. Our journey begins with understanding the basic anatomy of a truck, an essential aspect that provides a solid foundation on which you can confidently build. Next, we will delve into the specifics of adding intricate details to your sketch to give your truck a life-like representation. Lastly, we'll equip you with tips and techniques to finalize and polish your truck drawing, turning it into a finished piece of art that you can be proud of. This approach makes the process of drawing not just more manageable, but also genuinely enjoyable. Let's jump-start this exciting artistic journey with our first stop, understanding the basics of truck anatomy.
Understanding the Basics of Truck Anatomy
Understanding the Basics of Truck Anatomy is a crucial process, especially for individuals keen on truck design, drawing, and those interested in getting comprehensive knowledge about this massive vehicle. This compelling article is meant to educate, inform and engage you on the nitty-gritty of truck anatomy. We begin with a comprehensive overview of the Key Features of a Typical Truck. This segment unveils the significant components that characterize a standard truck. Armed with this knowledge, one can easily identify different truck types and understand how these features affect trucks' overall performance and functionality. Our second focus is on the Importance of Proportion and Scale in Truck Drawing. This part emphasizes how proportionality and scaling affect the authenticity of the drawn truck image and ways to achieve them for realistic impressions. Lastly, the article takes readers through a detailed journey on the Steps to Sketch the Basic Structure of a Truck. Here, you will learn the fundamental steps necessary to draw a simple yet detailed structure of your favorite truck. Now, fasten your seatbelts as we drive into the key features of a typical truck.
Key Features of a Typical Truck
When exploring the process of drawing a truck, it's important to grasp the understanding of a typical truck's key features. This knowledge will not only inform your artwork but also deepen your appreciation for these majestic machines of transport. Starting from the front, the most prominent feature of a truck is its cabin where the driver resides. Trucks usually range from single-cab styles (seating two to three people) to crew cab styles which accommodate up to six occupants. The size and style of the cabin can often denote the type and functionality of the truck. Larger cabins often signify heavy-duty trucks used for tough jobs and long hauls. The truck's front is also characterized by a massive grille and large headlights, necessary for the rig's better visibility due to its bulky size. A distinct feature, the hood, often long and flat, houses the powerful engine that propels the truck. This positioning of the engine allows easy access for maintenance and repairs. Moving to the side, we notice large, sturdy tires, specially designed to carry heavy loads and to withstand varying terrains. Their size and robust construction reflect the power and durability a truck possesses. Trucks also feature large side mirrors for improved visibility. They help the driver keep an eye on the trailer and other vehicles due to the truck's extended length. At the back, the essential feature you'd observe is the truck bed. This open-top, rear cargo area varies in terms of size and functionality. Basic models are generally used for transporting an array of goods, while special variants could carry specific freight like liquids or refrigerated items. Moreover, a truck's suspension system is equally notable. Due to the heavy loads it usually carries, a robust and resilient suspension system is vital in absorbing shocks and ensuring a smoother drive. Embellishing the uniqueness of a truck are its exterior aesthetics. From rugged lines accentuating its durability to softer contours for a modern appeal, the design elements contribute to its visual identity. In summary, a typical truck is a carefully organized conglomeration of various parts, each having their unique role in appearance and functionality. Understanding these key features not only aids in the accurate portrayal of a truck in a drawing but also fosters a deeper comprehension of the vehicle's operational dynamics. Optimizing these details in your artwork will inevitably lead to a more authentic and compelling representation of a truck.
Importance of Proportion and Scale in Truck Drawing
Understanding the importance of proportion and scale in truck drawing is an integral part of mastering the basics of truck anatomy. When viewed in perspective, all parts of the truck are not of the same size and do not have the same aspect ratio. For instance, the size of the cab compared to the wheels and trailer plays a significant role in achieving a realistic representation. This makes maintaining the correct proportions of these components crucial to the overall appearance of the truck illustration. Using a scale is another critical element. A scale helps to ensure each aspect of the truck, such as the cab, wheelbase, chassis, and trailer, corresponds accurately to its real-world counterpart. Drawing without a scale can lead to inconsistencies and incongruences that can affect the quality and accuracy of the drawing. Scale allows for a more precise representation, enhancing the realism of the drawing and providing viewers with a clear and accurate picture of a truck's anatomy. The concept of scale and proportion does not just contribute to realism, but it also enhances the visual appeal of your drawing. A truck with disproportioned components can appear unnatural and unconvincing, diverting the attention of the viewer from appreciating the finer details of your artwork. Conversely, a well-proportioned and scaled truck drawing captures attention, communicates effectively, and conveys a sense of mastery and understanding of the subject. Also, it's important to note that proportion and scale can be creatively manipulated to serve particular artistic purposes. One can deliberately distort proportions to create a stylized version of a truck or exaggerate certain elements for dramatic effect. When done deliberately and skillfully, such deviations can add a unique charm and distinctive character to your drawings. Creating a connection with the viewer is central to digital storytelling, and mastery of proportions and scale in truck drawing can indeed help you tell your story more effectively. It brings out the nuances of your subject matter, establishes visual harmony, and engages your viewers, creating an immersive, memorable experience. Thus, maintaining proper proportions and scale is not just about achieving technical accuracy. It's a crucial element that contributes to your drawing’s overall appeal, narrative strength, and emotional impact, bringing your work to life.
Steps to Sketch the Basic Structure of a Truck
The ability to sketch the basic structure of a truck is the backbone of understanding truck anatomy in art. The first step involves outlining the truck's fundamental shape, essentially a combination of rectangles and squares. Begin with the body, which forms the largest part of the truck, represented as a long rectangle followed by a smaller square or rectangle for the truck's cab. These overlapping shapes give the initial structure of its frame. Secondly, express detail to the truck's components such as the wheels, cabin, lights, windows, and cargo space. Each wheel can be outlined as a perfect circle or oval, depending on the angle. The axle's placement should be proportional to the truck's body, helping balance the overall sketch. When sketching the cabin, emphasis on the front shield, door, and windows gives the vehicle its recognizable characteristics. A smaller rectangle within the truck's cab design can illustrate the windscreen, while the door and side windows would fall into the cab's shape. Thirdly, detailing and contouring bring the sketch to life. This step helps your viewer move from a two-dimensional perception to a three-dimensional view, highlighting the truck's unique components. You can add depth by defining the truck's front view like the grille, headlights, and bumper. The cargo space will also need intricate detailing, depending on the type of truck you intend to sketch. The fourth step involves shading and tone variation. Shading is an incredible tool to emphasize the truck's metallic surface and the play of light and shadow on the vehicle. Deciding your light source direction helps determine the areas that will receive heavy shading versus those left lighter. Remember to remain consistent with your lighting throughout the sketch for a more realistic portrayal. Lastly, finalizing your sketch is an essential step towards creating an accurate and exciting art piece. Go through each section and refine any hasty lines, erase any unnecessary marks, and deepen your shading as needed. Mastering these steps doesn't just equip you with the skill to draw a truck, but shapes your understanding of the basics of truck anatomy. It opens your eyes to the truck's peculiarities, its nuances, and the fundamental elements that unite to form the machine's whole. It teaches patience, precision, and perceives shapes beyond their superficial view, defining the pivot of learning how to draw a truck.
Adding Details to Your Truck Sketch
Drawing a truck is more than just sketching the basic shape; it's about capturing the nitty-gritty details that make your illustration stand out. To guide you on this creative journey, this article will explore three significant aspects: how to add various truck components to your sketch, techniques for drawing wheels and tires, and the importance of shading and texturing in adding realism. Each of these elements helps to build a comprehensive and engaging sketch, making your artwork more lifelike and appealing. Adding details to your truck sketch infuses the image with character, breathing life into a simple outline. The process of incorporating various truck components to your sketch gives your truck its identity and unique characteristics that distinguish one truck from another. Mastering wheel and tire drawing techniques not only enhances your sketch's realism but also contributes to the depth and perspective of the artwork. Meanwhile, the intricate delicate shading and texturing give dimension and a three-dimensional feel to your drawing. Now, let's put pencil to paper and bring your truck to life as we delve into adding various truck components to your sketch.
How to Add Various Truck Components to Your Sketch
A significant component that gives your truck sketch an edge of realism is the level of intricate details incorporated into the initial drawing. Tailoring different truck elements competently plays an essential part in fostering depth and interest to your artwork. The process of adding truck components is not as challenging as it sounds, provided you follow the right technique. Let's explore how to incorporate these details to elevate your sketching perception. To start with, you will need to sketch the truck base. Once you have your base, adding the wheels is the next step. Draw two elliptic shapes for each wheel, with one smaller than the other to give it a 3D look. Make sure to locate the wheels correctly since they play a crucial part in defining the truck's realism. Next, draw the truck bed, the cab, and the front hood. It might take a few attempts to get the proportions right. Make sure to factor in the vehicle make and model since trucks differ significantly when it comes to these details. Each part should look coherent and not randomly put together. The truck's details do not stop at its outline. Infuse grit and grace by sketching the doors, windows, grilles, headlights, tail lights, exhaust pipes and mirrors. Each of these elements add to the truck's character. The door handles and window lines, for example, need to be straight and parallel, reflecting proper alignment. Be very attentive when drawing these details to ensure they are proportionate to the rest of the truck. In the case of the exhaust pipe, remember to position it close to the truck's bed. Its depiction brings forth a sense of power and rawness that is very characteristic of a truck. Sketching the grille is another critical step as it helps to breathe life into the truck, making it appear more rugged. Always remember that your truck sketch is a story you narrate through your art. The details that you add communicate the truck's history and its journey. Rust patterns on the truck body can symbolize an old, rugged truck that has traveled long and arduous paths. Similarly, a fresh paint job and gloss shine can signify an upscale model, fresh off the showroom floor. In conclusion, it is these intricate details that make the sketch more than just a two-dimensional representation. They inject life into the sketch, transforming it into a blueprint of a truck's story. The process might be meticulous, but the end result will undoubtedly be worth your patience and perseverance. So grab a sketchbook, put these principles into practice and watch your truck sketch come to life.
Techniques for Drawing Wheels and Tires
Importance of Shading and Texturing in Adding Realism
The importance of shading and texturing in enhancing realism cannot be overstated when you're adding details to your truck sketch. These artistic techniques breathe life into an otherwise flat piece, infusing it with depth and dimension. Shading allows you to depict the interplay between light and shadow, a fundamental aspect that gives an object its form and volume. For instance, in your truck sketch, shading can replicate the way sunlight casts shadows across the truck's body or the reflective gleam on the metallic parts. This not only accentuates the curvature, angles, and intricate mechanical elements of the truck but also gives it a sheen of reality — as if the truck could rumble to life and drive out of the canvas at any moment. Meanwhile, texturing breathes tactile realism into your artwork. The truck is not comprised of smooth, indistinguishable surfaces. The roughness of tires, the gritty feel of the truck bed, the sleek smoothness of the windows, or the brushed feel of the truck's body — all bring unique textures. Texturing these elements accurately can make the viewer almost 'feel' these surfaces, adding another layer of depth and realism to your creation. Consequently, shading and texturing are crucial companions to your strokes and outlines. They aren't just technicalities or afterthoughts. They are the 'storytellers' that color in authentic details and emotions into your artwork, converting from just being shapes on paper to something that resonates with the viewer, something real. Without them, your truck sketch will lack the necessary depth and realism and fail to bring out your artistic truth. Therefore, make sure to wield shading and texturing with the same importance as you do your sketching pencils, because the truck you are drawing isn’t just a vehicle — it's a visual narrative, a story waiting to be told in highlighted nuances and minute, textured details.
Finalizing and Polishing Your Truck Drawing
If you're a budding artist or a prolific sketcher wanting to perfect your ability to portray the power and precision of trucks in your drawings, this piece will be your practical guide. Wondering how can you make your truck drawings stand out? This article will not just enlighten you on how to erase guidelines and define the final lines but also provide you with expert tips for coloring your masterpiece. In addition, we will delve into the creative process of enhancing your drawing with the integration of background elements. For your art to be realistic and compelling, polishing of your work extends beyond the truck itself. Starting off with 'Erasing Guidelines and Defining the Final Lines', we will introduce the initial stage in finalizing your creation, where meticulous attention to detail will be your prime tool. This process, while clearing up your art piece, brings about defined final lines that will give life to your truck drawing. The journey to creating a captivating truck sketch begins here.
Erasing Guidelines and Defining the Final Lines
As you move towards finalizing and polishing your truck drawing, erasing guidelines and defining the final lines is a critical step in the process. Be cognizant of each line's position and its correlation with the overall structure of the drawing. Initially, the guidelines serve as crucial elements, offering a preliminary outline that shapes the draft of your truck. However, as your sketch takes a more defined form, these guidelines gradually lose their utility as they tend to blur the clarity of the final drawing. That's when you gently erase them, ensuring you don't smudge or distort the outlined truck in the process. Accurate erasing is pivotal to a clean and crisp outcome of the truck sketch. It's advisable to use an eraser that doesn't leave behind residue or impact the paper's quality, causing potential damage that can mar the sketch's integrity. Once the guidelines are neatly erased, we enter the stage of defining the final lines. This stage is where precision and a steady hand come into play. Every curve and angle of the truck, including the contours of the body, the circular arcs of the wheels, the rigid rectangle of the cargo area, and the front structures like the headlight and grille, all need to be implemented with finesse. Defining the final lines isn't merely about tracing but also about adding depth and dimension to your truck drawing. This process involves adjusting line thickness to create perspective, shadow, and weight. For example, lines closer to the viewer should be thicker than those farther away, providing a sense of depth to the image. Moreover, for a more realistic and polished outcome, consider replicating the unique details relevant to the model of the truck you aim to draw. Whether it's the logo in the front, the tread pattern on the tires, or maybe the side-view mirrors, the defined final lines should capture these elements to bring your truck drawing to life. In conclusion, the process of erasing guidelines and defining final lines is an art in itself, requiring precision, understanding of perspectives, and keen attention to details. With persistent practice and patience, you can master this step, giving your truck drawings a professional, polished touch.
Tips for Coloring Your Truck Drawing
Coloring Your Truck Drawing is an exciting stage of the sketching process that can truly enhance your masterpiece's visual appeal. While drawing is a skill, the art of coloring is a technique you need to master to ensure your truck drawing stands out. To make your truck drawing vibrant and appealing, adopting a few smart coloring tips can be a game changer. Firstly, select the best coloring mediums for your project. Pencil crayons are a popular choice for beginners for their versatility and ease of control. They allow you to easily layer colors, create shades and gradients – this is particularly crucial in truck drawings where you want to depict realistic light and shadow effects. On the other hand, professionals might opt for markers or paint, as they give a smoother finish and boast bright, eye-catching colors. Secondly, it's important to understand the color theory. Utilize colors that complement each other and, particularly in a truck drawing, colors that accurately represent your desired truck model. For example, a vintage truck might be portrayed best in rusty browns and oranges, whereas a modern fire truck would demand bold reds and grays. Regardless of the color palette, remember to also leave white spaces where necessary to suggest reflections and create a three-dimensional feel. Thirdly, focus on the texture. Different parts of the truck have various textures – glossy paint job, metal rims, rubber tires, and gleaming glass windows. Not just different colors, these features also demand different shading and coloring techniques. Pay attention to these details, and don't hesitate to use mixed media if necessary. For instance, a light watercolor wash can depict the smooth metal body, while colored pencils can give the tires their rugged look. Lastly, always start light and gradually build up intensity and depth. Consider putting a base layer of lighter color that you can overlay with darker shades. It's easier to add color than to take it away. Don't rush the coloring process - patience is, indeed, your best friend here. Coloring requires a blend of knowledge, practice, and creativity. It is the stage where your truck truly comes to life, and every detail counts. So, arm yourself with the right coloring tools, understand the nuances of color and texture, and remember: coloring is as much an art as drawing itself. Keep practicing and perfecting your skills, and with time, your colored truck drawings will be more than just sketches - they will be vibrant, detailed works of art.
Enhancing Your Truck Drawing with Background Elements
Enhancing your truck drawing with background elements can significantly boost your final presentation's visual can significantly impact your final presentation's visual ambience, making your truck not just a mere solitary figure but a part of an engaging story. Choosing the right background elements can give your truck a context, amplifying the overall effect of your drawing and the implied narrative behind it. Consider first the scenario where your truck is set. A truck driving through a bustling city would be best accompanied by skyscrapers, traffic, and flashing neon signs. On the other hand, a truck cruising down a serene countryside road may have lavish trees, sprawling fields, and a soft sunset in the background. The effective placement of atmospheric elements such as weather conditions, lighting, and shadows can also infuse a particular mood into the scene, reinforcing your truck's story. Further, remind yourself that these background elements should be detailed enough to contribute to the overall story, yet subtle enough to not steal the spotlight from the truck. The background elements should serve to enhance and frame your truck drawing, not overshadow it. This balance indeed demands a certain finesse, and achieving this can be a fruitful exercise in expanding your sketching skills. One helpful strategy for background composition is the use of depth. Background elements significantly farther from the "viewer" can be drawn smaller and with lesser detail to create a perspective of distance. Combine this with a careful use of shading for separating the foreground (where your truck is) and the background elements, and you can create an illusion of three-dimensionality, making your drawing pop out and appear lifelike. Overall, enhancing your truck drawing with background elements can elevate your drawing from being a simple sketch to a comprehensive illustration that engages the viewer. As a concluding thought, remember that every artist has their unique techniques and storytelling approach. Don't be afraid to experiment and develop your style. Through practice and persistence, you can make every pencil stroke add to the unfolding saga of your truck drawing. Remember that Finalizing and Polishing your Truck Drawing doesn't only mean refining your truck sketch but also paying attention to these supporting details that bring your artwork to life. Take this opportunity to enhance your skills—learn, draw, and most importantly, enjoy the process.