How To Blur Parts Of A Photo
Understanding the Basics of Photo Editing
The Importance of Understanding Photo Editing Basics
Editing photos is not just about tracing the elements and deleting unnecessary parts; it’s about creating a story or conveying a certain message. Just like any painting or artwork, photos can communicate emotions, narrate an event, or construct a perspective. To effectively create this, you need a solid grasp of the essential tools and principles of photo editing. Knowing the basics will help you understand the "why" behind every "how".
- Understanding the basic editing processes gives you a clearer idea of what you can do with a photo.
- Knowing the necessary tools and their function contributes to the efficiency of photo editing.
- Having a grasp of the basic principle teams you with the skill for experimenting with various creative effects.
Introduction to Photo Blur
Blurring is among the most common techniques in photo editing that can make a significant difference in the total outcome of the image. The technique is used mainly for two reasons—to create an artistic effect like depth of field or to obscure a part of the photo not meant to be seen.
- Blurring the background can help to put emphasis on the subject in focus.
- Adding a motion blur can create a dynamic effect of movement.
- Blurring sensitive elements in the photo can protect privacy.
Choosing the Right Photo Editing Software
The best photo editing applications offer a wide range of features and are user-friendly, even for beginners. Every photo editing application has its strengths and weaknesses, but a good one should at least allow users to perform basic edits, such as cropping, resizing, and adjustments on color and exposure, as well as various effects and filters, including blurs.
- Sophisticated software like Adobe Photoshop or Lightroom comes with advanced features for high-quality results.
- Free or much cheaper alternatives like Snapseed and Pixlr also provide sufficient functionality for non-professionals.
- Choosing the right software depends on your needs and level of experience in photo editing.
The Process of Blurring Parts of A Photo
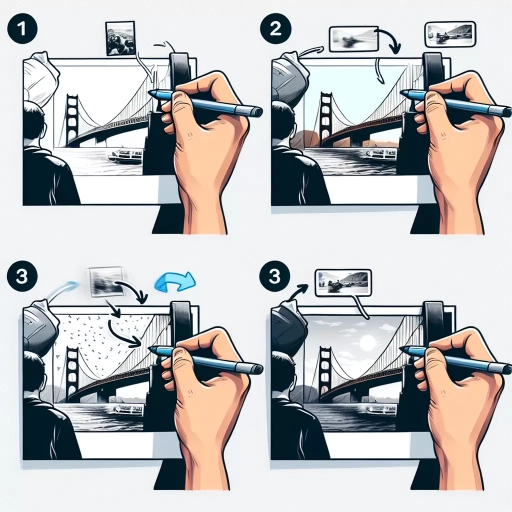
Steps to Blur Specific Parts of an Image
Blurring part of a photo can be accomplished in just a few steps. Using the built-in tools of the photo editing software, one can easily apply a blur to a portion of the image. This technique is particular beneficial in cases where a distraction in the scene draws attention away from the subject or when some parts necessitate concealment for privacy reasons.
- Both the lasso tools and the marquee tools are suitable for selecting the area to be blurred.
- Effect or filter menus usually contain multiple types of blurs such as Gaussian blur, lens blur, or motion blur.
- The amount or intensity of blur can be adjusted according to the desired outcome.
Finishing Touches and Adjustments after the Initial Blur
Blurring a portion of a photograph is a relatively straightforward process, but the final result might not be perfect from just blurring alone. After the initial application of a blur, there can sometimes be unnatural edges or an obvious delineation. Additional steps such as feathering the edges or reducing the opacity can give the blur a more natural appearance.
- The feather tool can smooth out the edges between the blurred and clear parts.
- Reducing the opacity of the layer with the blur can make the transition more gradual.
- In some cases, adding a layer mask can provide even more control over the area affected by the blur.
Things to Consider When Blurring Photos
Choosing the Right Blur Type
In editing photos, various types of blur effects can be used, each creating a different outcome. Gaussian blur, for example, is a commonly used effect where every pixel within the selected area is blended with the surrounding pixels. The amount of blur varies based on the Gaussian distribution or Bell Curve. Lens blur, on the other hand, blurs the image in a way that appears as though the image was taken with a camera lens. Motion blur imparts a sense of movement or speed.
- A Gaussian blur is ideal for most cases where the photo requires a basic, soft blur.
- Lens blur works best for creating depth of field effects or highlighting a subject.
- Motion blur is excellent for adding liveliness and excitement to an otherwise static image.
Prioritizing the Photo's Quality
While the blur effect can be a great way to improve an image or to add an artistic touch, it is vital to ensure that the quality of the image is not compromised. Overdoing the blur effect can make the photo look unrealistic or distract from the main subject. It's also essential to keep the original photo in high resolution, since blurring can sometimes reduce the detail of the image.
- Adding a blur effect should enhance the image, not diminish its quality.
- Ensure that the photo looks natural and the focus remains on the main subject.
- Always keep a copy of the original photo in case the edited version does not turn out as expected.
Respecting Privacy Concerns
Blurring can also be used to protect individual privacy. Whenever there are identifiable individuals, private properties, or sensitive materials in a photo, it is crucial to respect their privacy. This is particularly essential for professional photographers or anyone planning to share the photos publicly. Blurring can provide a simple solution to obscure these elements while still maintaining the photo's overall composition.
- Blur can be applied to faces, license plates, addresses, or other identifying information in a photo.
- Permission should also be sought when needed, especially when publishing photos publicly.
- Even a small act like blurring parts of a photo can make a huge difference in upholding ethical practices in photography and editing.