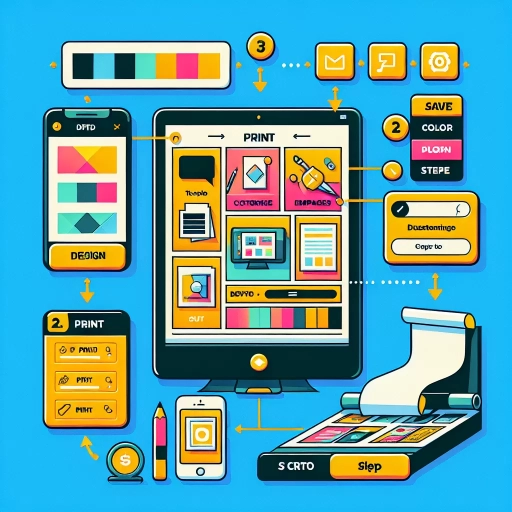
How To Print In Canva
Here is the introduction paragraph: Are you looking to create stunning prints with Canva? With its user-friendly interface and vast design capabilities, Canva has become a go-to platform for designers and non-designers alike. However, printing in Canva can be a bit tricky, especially for those who are new to the platform. In this article, we will guide you through the process of printing in Canva, from getting started with the basics to designing for print and finally exporting and printing your design. We will start by getting you familiar with the Canva printing process, then dive into the design aspects, and finally show you how to export and print your design. To get started, let's begin with the basics and explore how to get started with Canva printing.
Getting Started with Canva Printing
Here is the introduction paragraph: Getting started with Canva printing can seem daunting, but with the right guidance, you can unlock a world of creative possibilities. To begin, it's essential to understand Canva's printing capabilities, including the various paper types, sizes, and finishes available. Once you have a grasp of what Canva can do, you'll need to set up your account for printing, which involves linking a payment method and configuring your print settings. Finally, choosing the right paper and printing options is crucial to achieving the desired look and feel for your prints. In this article, we'll dive into each of these topics, starting with a comprehensive overview of Canva's printing capabilities.
Understanding Canva's Printing Capabilities
Understanding Canva's printing capabilities is essential to ensure that your designs are printed correctly and to the highest quality. Canva offers a wide range of printing options, including business cards, brochures, flyers, posters, and more. The platform allows you to choose from various paper types, sizes, and finishes, giving you complete control over the final product. Canva's printing capabilities also include bleed settings, which enable you to add a margin around your design to prevent important elements from being cut off during the printing process. Additionally, Canva provides a range of templates and design tools to help you create professional-looking designs that are optimized for printing. By understanding Canva's printing capabilities, you can ensure that your designs are printed correctly and effectively, making it an essential step in the design process.
Setting Up Your Canva Account for Printing
Setting up your Canva account for printing is a straightforward process that requires a few simple steps. First, sign up for a Canva account if you haven't already, and log in to your dashboard. Next, click on the "Create a design" button and select the type of print product you want to create, such as a business card, brochure, or poster. Choose a template or start from scratch, and customize your design using Canva's intuitive drag-and-drop editor. Once you're happy with your design, click on the "Download" button and select the "Print-friendly PDF" option. This will ensure that your design is optimized for printing and includes the necessary bleed and trim marks. Finally, review your design carefully to ensure that it meets your printing requirements, and make any necessary adjustments before sending it to the printer. By following these steps, you can set up your Canva account for printing and start creating high-quality print products with ease.
Choosing the Right Paper and Printing Options
When it comes to printing with Canva, choosing the right paper and printing options is crucial to ensure your designs look their best. The type of paper you select can greatly impact the overall appearance and feel of your printed materials. For instance, if you're printing business cards, you'll want to opt for a sturdy, high-quality paper that exudes professionalism. On the other hand, if you're printing flyers or brochures, a lighter weight paper may be more suitable. Canva offers a range of paper types and weights to choose from, including matte, glossy, and textured options. You can also select from various paper sizes, including standard sizes like A4 and A3, as well as custom sizes to fit your specific needs. In addition to paper options, Canva also allows you to choose from different printing options, such as single-sided or double-sided printing, and various folding options, such as tri-fold or accordion fold. By carefully selecting the right paper and printing options, you can ensure your printed materials look polished and professional, and effectively communicate your message to your audience.
Designing for Print in Canva
Designing for print in Canva can be a daunting task, especially for those who are new to graphic design. However, with the right tools and techniques, you can create stunning print materials that capture your audience's attention. To get started, it's essential to understand the basics of designing for print, including using pre-made templates, customizing your design for print-friendly colors and fonts, and adding bleed and margins to your design. By mastering these skills, you can ensure that your print materials look professional and polished. In this article, we'll explore these key concepts in more detail, starting with the benefits of using Canva's pre-made templates for print. With Canva's vast library of templates, you can quickly and easily create a design that's tailored to your specific print project, whether it's a business card, brochure, or poster. By leveraging these templates, you can save time and focus on the creative aspects of your design. Let's dive in and explore how to use Canva's pre-made templates for print.
Using Canva's Pre-Made Templates for Print
Using Canva's pre-made templates for print is a great way to create professional-looking designs without having to start from scratch. Canva offers a wide range of templates for various print materials, including business cards, brochures, flyers, posters, and more. These templates are designed to meet standard print dimensions and resolutions, ensuring that your designs will look great when printed. To use a pre-made template, simply browse Canva's template library, select the type of print material you want to create, and choose a template that suits your needs. You can then customize the template by adding your own text, images, and graphics, and adjusting the layout and design elements to fit your brand. Canva's drag-and-drop interface makes it easy to make changes and see the results in real-time. Additionally, Canva's templates are fully editable, so you can make as many changes as you need to get the design just right. By using Canva's pre-made templates for print, you can save time and effort, and focus on creating a design that effectively communicates your message and represents your brand. Whether you're creating a business card, a flyer, or a poster, Canva's pre-made templates for print can help you achieve professional-looking results without requiring extensive design experience.
Customizing Your Design for Print-Friendly Colors and Fonts
When designing for print in Canva, it's essential to customize your design for print-friendly colors and fonts to ensure your final product looks professional and visually appealing. To start, select a color palette that is CMYK-friendly, as this color mode is specifically designed for printing. Avoid using RGB colors, as they may not translate well to print. Instead, choose colors from Canva's built-in color palette or create your own custom colors using the CMYK color model. Additionally, consider using Pantone colors, which are specifically designed for printing and can help ensure accurate color representation. When it comes to fonts, choose fonts that are clear and easy to read, even at small sizes. Avoid using fonts that are too ornate or decorative, as they may not print clearly. Instead, opt for simple, sans-serif fonts like Arial, Helvetica, or Open Sans. You can also use Canva's font pairing tool to find the perfect font combination for your design. Furthermore, make sure to check the font size and line spacing to ensure that your text is readable and visually appealing. By customizing your design for print-friendly colors and fonts, you can ensure that your final product looks professional and polished, making it perfect for business cards, brochures, flyers, and other printed materials.
Adding Bleed and Margins to Your Design
When designing for print in Canva, it's essential to consider the bleed and margins of your design to ensure a professional finish. Bleed refers to the area of your design that extends beyond the trim line, allowing for a seamless transition between the design and the edge of the paper. Margins, on the other hand, are the areas between the design and the trim line, providing a buffer zone to prevent important elements from being cut off. To add bleed and margins to your design in Canva, start by selecting the "File" menu and clicking on "Page Design." From there, click on the "Bleed" tab and enter the desired bleed amount, typically 0.125 inches for standard printing. Next, click on the "Margins" tab and set the top, bottom, left, and right margins to the desired size, usually 0.25 inches for a standard margin. You can also use the "Snap to Grid" feature to ensure your design elements are aligned with the bleed and margin lines. Additionally, you can use the "Safe Zone" feature to highlight the area within the margins, making it easier to position critical design elements. By adding bleed and margins to your design, you'll ensure a polished and professional finish, and avoid any unwanted cropping or trimming during the printing process.
Exporting and Printing Your Canva Design
Once you've finalized your Canva design, it's time to export and print it. Exporting and printing your design can be a bit tricky, but with the right steps, you can achieve professional-looking results. To ensure your design looks great in print, you'll need to export it as a print-ready PDF, which involves selecting the right settings and file format. Additionally, you'll need to upload your design to a printing service or printer, which requires some technical know-how. Finally, be prepared to troubleshoot common printing issues that may arise, such as blurry text or incorrect colors. In this article, we'll walk you through the process of exporting and printing your Canva design, starting with the crucial step of exporting your design as a print-ready PDF.
Exporting Your Design as a Print-Ready PDF
Exporting your design as a print-ready PDF is a crucial step in the printing process. To do this, go to the "File" menu and select "Download" or "Export" depending on your Canva plan. Then, choose "PDF - Print" from the file type options. Make sure to select the "CMYK" color mode, as this is the standard color mode used in printing. You can also choose to include bleed, which is the area of the design that extends beyond the trim line. This ensures that your design looks professional and polished when printed. Additionally, you can select the resolution and compression settings to ensure that your design is high-quality and print-ready. Once you've made your selections, click "Download" or "Export" to save your design as a print-ready PDF. This PDF can then be sent to a printer or printing service, or used to print your design in-house. By following these steps, you can ensure that your Canva design is exported correctly and looks great when printed.
Uploading Your Design to a Printing Service or Printer
Uploading your design to a printing service or printer is a straightforward process that requires a few simple steps. First, ensure that your design is complete and finalized in Canva, and that you have exported it in the correct file format for printing, such as PDF or JPEG. Next, navigate to the website of your chosen printing service, such as Vistaprint, FedEx Office, or Staples, and select the type of print product you want to order, such as business cards, brochures, or posters. Then, click on the "Upload Your Design" button and select the file you exported from Canva. The printing service will review your design for printability and provide you with a proof to review and approve before production begins. If you're printing at home, simply connect your printer to your computer, select the print settings, and click print. Make sure to choose the correct paper size, orientation, and print quality to ensure your design looks its best. Additionally, consider using a high-quality paper or cardstock to enhance the overall appearance of your printed design. By following these simple steps, you can easily upload your design to a printing service or printer and bring your Canva creation to life.
Troubleshooting Common Printing Issues in Canva
Troubleshooting common printing issues in Canva can be a frustrating experience, but there are several steps you can take to resolve the problem. First, check your design's resolution and ensure it's set to 300 DPI, as this is the standard for high-quality printing. If your design is not at the correct resolution, it may appear pixelated or blurry when printed. Next, verify that your design is the correct size for your printing needs. Canva provides a range of pre-set templates and sizes, but if you're creating a custom design, make sure to check the dimensions before exporting. Additionally, check the color mode of your design, as Canva defaults to RGB, but most printers use CMYK. If your design is in RGB, it may not print accurately, so be sure to convert it to CMYK before exporting. Another common issue is font compatibility, so ensure that any fonts used in your design are embedded or converted to outlines to prevent font substitution during printing. Finally, check the file format you're exporting in, as some formats, such as PNG, may not be suitable for printing. By following these steps, you can troubleshoot common printing issues in Canva and ensure your designs print beautifully.