How To Change Google Home Wifi
Here is the introduction paragraph: Changing the WiFi network on your Google Home device can be a straightforward process, but it requires some preparation and troubleshooting to ensure a smooth transition. In this article, we will guide you through the steps to change your Google Home WiFi network, from preparation to troubleshooting common issues that may arise after the change. To start, it's essential to prepare your device and network for the change, which we will cover in the first section, Preparation for Changing Google Home WiFi. We will then walk you through the process of changing the WiFi network on your Google Home device, followed by troubleshooting tips to resolve any issues that may occur after the change. By the end of this article, you will be able to successfully change your Google Home WiFi network and enjoy uninterrupted smart home functionality. Let's begin with the preparation process.
Preparation for Changing Google Home WiFi
Here is the introduction paragraph: Changing the WiFi network on your Google Home device can be a bit tricky, but with the right steps, you can do it smoothly. To ensure a seamless transition, it's essential to prepare your device beforehand. In this article, we will guide you through the necessary steps to prepare your Google Home for a WiFi change. First, you need to check the Google Home app for updates to ensure you have the latest features and improvements. Additionally, restarting the Google Home device can help resolve any connectivity issues and prepare it for the new network. Lastly, ensuring the new WiFi network is available and stable is crucial for a successful transition. By following these steps, you can ensure a hassle-free experience when changing your Google Home WiFi. So, let's start by checking the Google Home app for updates.
Check the Google Home App for Updates
To ensure a seamless experience when changing your Google Home WiFi, it's essential to check the Google Home app for updates before making any changes. The Google Home app is the central hub for managing your Google Home device, and keeping it up-to-date is crucial for optimal performance. To check for updates, open the Google Home app on your mobile device, navigate to the "Account" or "Settings" section, and look for the "App updates" or "Update" option. If an update is available, tap on it to download and install the latest version. This ensures that you have the most recent features, bug fixes, and security patches, which can help prevent any potential issues when changing your WiFi network. Additionally, updating the app may also provide new features or improvements that can enhance your overall Google Home experience. By taking a minute to check for updates, you can ensure that your Google Home app is running smoothly and efficiently, making it easier to change your WiFi network without any hiccups.
Restart the Google Home Device
To restart the Google Home device, you can follow these simple steps. First, locate the Google Home device and make sure it is turned on. Next, unplug the power cord from the back of the device. Wait for about 10 seconds to allow any residual power to drain. Then, plug the power cord back into the device. The Google Home device will automatically restart and begin booting up. You will know it is restarting when you hear the device's startup sound. Once the device has restarted, you can proceed with changing the WiFi network. Alternatively, you can also restart the Google Home device using the Google Home app. To do this, open the Google Home app on your mobile device, select the Google Home device you want to restart, and tap on the three vertical dots on the top right corner of the screen. From the menu, select "Restart" and confirm that you want to restart the device. The Google Home device will then restart and be ready for you to change the WiFi network. Restarting the Google Home device is an essential step in changing the WiFi network, as it ensures that the device is properly disconnected from the old network and ready to connect to the new one.
Ensure the New WiFi Network is Available
To ensure the new WiFi network is available, start by checking the WiFi network name (SSID) and password on your router or modem. Make sure you have the correct credentials, as this information will be required to connect your Google Home device to the new network. Next, restart your router to ensure it is broadcasting the new network name. You can do this by unplugging the power cord, waiting for 30 seconds, and then plugging it back in. Once your router is back online, use a device such as a smartphone or laptop to connect to the new WiFi network. This will verify that the network is available and functioning properly. If you encounter any issues, check your router's settings to ensure the WiFi network is enabled and broadcasting its name. Additionally, ensure that your router is placed in a central location to provide the best coverage throughout your home. By taking these steps, you can confirm that your new WiFi network is available and ready for use with your Google Home device.
Changing WiFi Network on Google Home
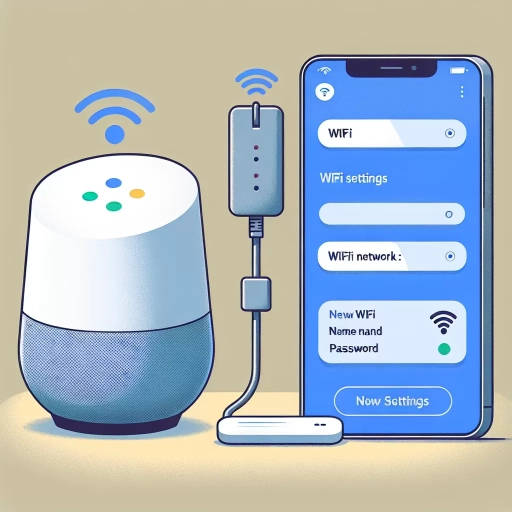
Changing the WiFi network on your Google Home device is a straightforward process that can be completed in a few simple steps. To start, you will need to open the Google Home app and navigate to the settings menu. This is where you will find the option to change your WiFi network. Once you have accessed the settings menu, you will need to select the Google Home device that you want to change the WiFi network for. From there, you will be able to choose the new WiFi network that you want to connect to. Finally, you will need to enter the password for the new WiFi network to complete the process. By following these steps, you can easily change the WiFi network on your Google Home device and ensure that it remains connected to the internet. To get started, open the Google Home app and navigate to settings.
Open the Google Home App and Navigate to Settings
To change the WiFi network on your Google Home device, start by opening the Google Home app on your mobile device. Once the app is open, navigate to the settings section. This can be done by tapping on the hamburger menu icon, usually located in the top left corner of the screen, and then selecting "Settings" from the drop-down menu. Alternatively, you can also access the settings by tapping on the account icon, usually represented by a person's silhouette, and then selecting "Settings" from the subsequent menu. Within the settings section, you will find a variety of options to customize and manage your Google Home device, including the WiFi network settings. From here, you can proceed to change the WiFi network on your Google Home device by following the on-screen instructions.
Select the Google Home Device and Choose WiFi
To change the WiFi network on your Google Home device, start by opening the Google Home app on your smartphone or tablet. Once the app is open, tap on the account icon in the top right corner, then select the Google Home device you want to update. Next, tap on the settings icon, represented by a gear or cog, and scroll down to the "Wi-Fi" section. Here, you'll see the current WiFi network your Google Home is connected to. To change this, tap on the "Forget network" option, which will disconnect your Google Home from the current network. Now, go back to the Google Home app's home screen and tap on the "+" icon to set up a new device, then select the Google Home device you want to update. Choose the new WiFi network you want to connect to from the list of available networks, and enter the password to complete the connection. Your Google Home device will now be connected to the new WiFi network.
Enter the New WiFi Network Password
To change the WiFi network on your Google Home, you'll need to enter the new WiFi network password. This is a crucial step in the process, as it ensures that your Google Home device can connect to the new network securely. When you're prompted to enter the new WiFi network password, make sure to type it in correctly, paying close attention to uppercase and lowercase letters, as well as any special characters. If you're unsure about the password, you can always check with your internet service provider or the person who set up the network. Once you've entered the correct password, your Google Home will attempt to connect to the new network. If the connection is successful, you'll receive a confirmation message, and you can start using your Google Home with the new WiFi network. It's worth noting that if you're using a guest network or a network with a captive portal, you may need to complete an additional step to connect to the internet. In this case, you'll need to open a web browser on a device connected to the same network and complete the required steps to access the internet.
Troubleshooting Common Issues After Changing WiFi
If you've recently changed your WiFi network and are experiencing issues with your Google Home device, don't worry, you're not alone. Many users face common problems after switching to a new WiFi network, but fortunately, most of these issues can be easily resolved with some basic troubleshooting steps. To get your Google Home device up and running smoothly again, start by checking the WiFi network connection to ensure it's stable and working properly. If that doesn't work, try restarting the Google Home device again to see if it resolves the issue. In some cases, you may need to reset the Google Home device to its factory settings to start fresh. By following these simple steps, you can quickly identify and fix the problem, and get back to enjoying your Google Home device. So, let's start by checking the WiFi network connection.
Check the WiFi Network Connection
When troubleshooting common issues after changing your WiFi network, it's essential to start by checking the WiFi network connection. Ensure that your Google Home device is connected to the correct network by checking the WiFi settings on your device. You can do this by opening the Google Home app, tapping on the device, and then selecting "Settings" followed by "WiFi." If you're not connected to the correct network, select the correct network from the list of available options and enter the password to connect. Additionally, restart your router and modem to ensure that the new network settings are applied correctly. If you're still experiencing issues, try moving your Google Home device closer to the router to improve the signal strength. You can also check the WiFi network's speed and stability using online tools or apps to ensure that it's not the cause of the problem. By checking the WiFi network connection, you can identify and resolve any connectivity issues that may be preventing your Google Home device from working correctly.
Restart the Google Home Device Again
Restarting your Google Home device is a simple yet effective way to resolve connectivity issues after changing your WiFi network. To restart your Google Home, unplug the power cord from the back of the device, wait for about 10 seconds, and then plug it back in. This will force the device to reboot and reconnect to your new WiFi network. Alternatively, you can also use the Google Home app to restart your device. Open the app, go to the device settings, and look for the "Restart" option. Tap on it, and your Google Home will restart automatically. Restarting your Google Home device can help resolve issues such as dropped connections, poor audio quality, and unresponsive voice commands. It's also a good idea to restart your router and modem at the same time to ensure that your entire network is refreshed and working properly. By restarting your Google Home device, you can ensure a smooth and seamless transition to your new WiFi network.
Reset the Google Home Device to Factory Settings
To reset the Google Home device to its factory settings, you'll need to perform a few simple steps. First, locate the microphone switch on the back of the device and toggle it to the "off" position. Next, press and hold the microphone button for about 10 seconds until you hear a voice prompt confirming that the device is resetting. Alternatively, you can also reset the device using the Google Home app. Open the app, navigate to the device settings, and look for the "More" menu. From there, select "Factory reset" and follow the on-screen instructions to complete the process. It's essential to note that resetting the device will erase all of its current settings, including your WiFi network information, so you'll need to set it up again from scratch. If you're experiencing issues with your Google Home device after changing your WiFi network, resetting it to its factory settings can often resolve connectivity problems and get your device up and running smoothly again.