How To Use Nespresso Milk Frother
Here is the introduction paragraph: Are you ready to elevate your coffee game with the Nespresso milk frother? This innovative device is designed to help you create professional-quality milk froth at home, but it can be intimidating if you're new to using it. To get the most out of your Nespresso milk frother, it's essential to understand how it works, prepare it for use, and operate it correctly. In this article, we'll take you through a step-by-step guide on how to use your Nespresso milk frother, starting with the basics. First, let's dive into understanding the Nespresso milk frother and its components, which will set the foundation for preparing and operating it effectively.
Understanding the Nespresso Milk Frother
Here is the introduction paragraph: The Nespresso milk frother is a popular addition to many coffee lovers' kitchens, allowing users to create a variety of coffee drinks with ease. But what makes this device so special, and how can you get the most out of it? To understand the Nespresso milk frother, it's essential to break down its components and accessories, explore the different types of frothers available, and examine the key features and benefits that set it apart from other milk frothing devices. By doing so, you'll be able to unlock the full potential of your Nespresso milk frother and take your coffee game to the next level. Let's start by taking a closer look at the components and accessories that make up this innovative device.
Components and Accessories
The Nespresso milk frother comes with several components and accessories that make it easy to use and clean. The main components include the frothing jug, the base, and the steam wand. The frothing jug is where you pour the milk, and it has a built-in thermometer that helps you achieve the perfect temperature for frothing. The base is the main unit that houses the motor and the heating element, and it's where you plug in the frother. The steam wand is a long, thin tube that you use to froth the milk, and it's usually made of stainless steel or silicone. In addition to these main components, the Nespresso milk frother also comes with several accessories, such as a cleaning brush, a descaling solution, and a user manual. The cleaning brush is used to clean the steam wand and the frothing jug, while the descaling solution is used to remove mineral deposits that can build up inside the frother. The user manual provides step-by-step instructions on how to use the frother, as well as tips and tricks for achieving the perfect froth. Overall, the components and accessories of the Nespresso milk frother are designed to make it easy to use and maintain, and they're an essential part of the overall frothing experience.
Types of Nespresso Milk Frothers
There are several types of Nespresso milk frothers available in the market, each with its unique features and benefits. The Aeroccino is a popular and compact frother that can froth milk to the perfect temperature and texture. It is easy to use and clean, making it a great option for those who want a hassle-free experience. The Aeroccino 3 is an upgraded version of the original, with additional features such as automatic shut-off and a larger capacity. The Aeroccino 4 is another option that offers advanced features like automatic temperature control and a sleek design. For those who want a more premium experience, the Creatista Plus is a high-end frother that offers advanced features like automatic temperature control, a large capacity, and a sleek design. It also comes with a built-in steam wand, allowing for more creative control over milk frothing. Additionally, there are also Nespresso-compatible milk frothers from third-party brands, such as Breville and De'Longhi, which offer similar features and benefits at a lower price point. Ultimately, the type of Nespresso milk frother that is right for you will depend on your specific needs and preferences.
Key Features and Benefits
The Nespresso Milk Frother is a versatile and user-friendly device that offers several key features and benefits, making it an ideal addition to any coffee lover's kitchen. One of its standout features is its automatic frothing system, which allows users to create a variety of milk textures and temperatures with ease. This feature is particularly useful for those who enjoy cappuccinos, lattes, and other milk-based coffee drinks. Additionally, the frother's compact design and sleek aesthetic make it a stylish and space-saving addition to any countertop. Another benefit of the Nespresso Milk Frother is its ease of use, with a simple and intuitive interface that makes it easy to navigate and operate. The device also features a built-in thermometer, which ensures that the milk is heated to the perfect temperature for frothing. Furthermore, the frother is easy to clean and maintain, with a detachable milk container and a non-stick coating that prevents milk from sticking to the sides. Overall, the Nespresso Milk Frother is a convenient and high-quality device that offers a range of benefits and features that make it an excellent choice for anyone looking to elevate their coffee game.
Preparing the Nespresso Milk Frother for Use
To get the most out of your Nespresso milk frother, it's essential to prepare it properly before use. This involves several key steps that ensure your frother is clean, assembled correctly, and ready to handle the type of milk you prefer. First, cleaning and maintenance are crucial to prevent any bacterial growth and maintain the frother's performance. Regularly cleaning the frother after each use and descaling it every three to six months will keep it in good working condition. Additionally, assembling the frother correctly is vital to ensure it functions as intended. This includes attaching the frothing jug and the steam wand correctly, as well as ensuring all parts are securely locked in place. Finally, choosing the right milk type is also important, as different types of milk produce different textures and flavors. By following these steps, you can ensure your Nespresso milk frother is ready to produce high-quality frothed milk for your coffee. To start, let's take a closer look at cleaning and maintenance.
Cleaning and Maintenance
Cleaning and maintenance are crucial steps in ensuring the longevity and optimal performance of your Nespresso milk frother. To clean the frother, start by descaling it every three to six months to prevent mineral buildup. Use a mixture of equal parts water and white vinegar or a descaling solution specifically designed for Nespresso machines. Run the solution through the frother, then rinse it thoroughly with fresh water. Next, wipe down the exterior with a damp cloth and dry it with a soft towel to prevent water spots. For more thorough cleaning, mix equal parts water and milk frother cleaning solution, and run it through the frother. Repeat the process until the solution comes out clean. Regular cleaning will prevent milk residue and bacteria from building up, ensuring your frother continues to produce high-quality milk froth. Additionally, check and replace the frother's seals and gaskets regularly to maintain its performance and prevent leaks. By following these simple cleaning and maintenance steps, you'll be able to enjoy perfectly frothed milk for your coffee creations.
Assembling the Frother
Assembling the Frother is a straightforward process that requires attention to detail to ensure all parts are securely attached and functioning properly. Begin by removing all the components from the box, including the frother base, jug, and lid. Next, attach the jug to the frother base by aligning the jug's spout with the base's connector and twisting it clockwise until it clicks into place. Make sure the jug is securely attached to prevent any accidents or spills during use. Then, attach the lid to the jug by aligning the lid's spout with the jug's connector and twisting it clockwise until it clicks into place. Ensure the lid is tightly closed to prevent any milk from spilling out during frothing. Finally, plug in the frother and ensure all parts are properly aligned and securely attached before proceeding to the next step. It's essential to follow the manufacturer's instructions and take your time when assembling the frother to ensure it's working correctly and safely. By doing so, you'll be able to enjoy perfectly frothed milk for your coffee creations.
Choosing the Right Milk Type
When it comes to choosing the right milk type for your Nespresso milk frother, there are several options to consider. Whole milk, skim milk, and semi-skimmed milk are popular choices, each with its own unique characteristics and benefits. Whole milk contains 3.5% fat, which creates a rich and creamy texture when frothed, making it ideal for cappuccinos and lattes. Skim milk, on the other hand, has almost no fat, resulting in a lighter and more velvety texture, perfect for those watching their calorie intake. Semi-skimmed milk falls in between, offering a balance of flavor and texture. Additionally, you can also experiment with non-dairy milk alternatives like almond milk, soy milk, or coconut milk, which are great options for those with dietary restrictions or preferences. It's worth noting that the type of milk you choose may affect the frothing performance of your Nespresso milk frother, so it's a good idea to experiment with different types to find the one that works best for you. Ultimately, the right milk type will depend on your personal taste preferences, dietary needs, and the type of coffee drink you're trying to create.
Operating the Nespresso Milk Frother
The Nespresso Milk Frother is a versatile and user-friendly device that allows you to create a variety of milk-based coffee drinks with ease. To get the most out of your Nespresso Milk Frother, it's essential to understand the basics of frothing, as well as how to adjust the texture and temperature of the froth to suit your taste preferences. Additionally, with a little practice, you can even create intricate latte art and designs to elevate your coffee game. In this article, we'll explore the ins and outs of operating the Nespresso Milk Frother, starting with the fundamental techniques of frothing. By mastering these basic techniques, you'll be well on your way to creating delicious and visually appealing coffee drinks. So, let's dive in and explore the world of frothing with the Nespresso Milk Frother, beginning with the basics of frothing techniques.
Basic Frothing Techniques
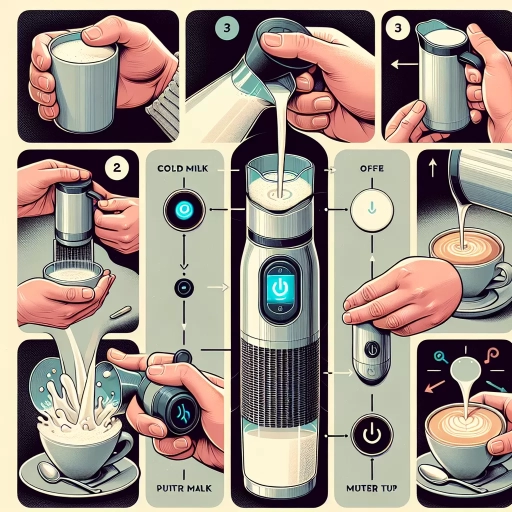
To master the art of frothing milk with your Nespresso Milk Frother, it's essential to understand the basic techniques involved. Frothing milk is a delicate process that requires a combination of temperature, texture, and technique. The ideal temperature for frothing milk is between 140°F and 160°F, which is slightly below the boiling point. To achieve this temperature, simply pour cold milk into the frother and select the desired temperature setting. Next, it's crucial to create a whirlpool effect in the milk by holding the frother at an angle and gently pouring the milk in a circular motion. This helps to incorporate air and create a smooth, creamy texture. As the milk begins to froth, you'll notice it start to thicken and hold its shape. To achieve the perfect microfoam, continue frothing the milk until it reaches the desired consistency, which should be thick and creamy but still pourable. It's also important to note that the type of milk used can affect the frothing process, with whole milk and half-and-half producing the best results. By mastering these basic frothing techniques, you'll be able to create a variety of delicious coffee drinks, from cappuccinos to lattes, with ease and precision.
Adjusting Froth Texture and Temperature
Adjusting the froth texture and temperature is a crucial step in operating the Nespresso Milk Frother. To achieve the perfect froth, you need to understand how to adjust the froth texture and temperature settings. The Nespresso Milk Frother comes with two main settings: froth texture and temperature. The froth texture setting allows you to choose from three different levels of froth: low, medium, and high. The low setting produces a smooth and creamy froth, while the medium setting produces a thicker and more velvety froth. The high setting produces a thick and stiff froth, perfect for cappuccinos and lattes. The temperature setting allows you to choose from three different temperatures: cold, warm, and hot. The cold setting is perfect for cold brews and iced coffees, while the warm setting is perfect for hot chocolates and teas. The hot setting is perfect for espresso-based drinks. To adjust the froth texture and temperature, simply turn the dial to your desired setting and press the button. The machine will automatically adjust the froth texture and temperature to your desired level. It's also worth noting that the Nespresso Milk Frother comes with a built-in thermometer, which ensures that the milk is heated to the perfect temperature every time. This feature is especially useful for those who are particular about their coffee temperature. By adjusting the froth texture and temperature, you can create a wide range of coffee drinks, from cappuccinos and lattes to macchiatos and flat whites. With a little practice, you'll be able to create the perfect froth and temperature for your favorite coffee drinks.
Creating Latte Art and Designs
Creating latte art and designs is an art form that requires skill, patience, and practice. To create beautiful designs on the surface of your latte, you'll need to master the technique of frothing and pouring milk. Start by frothing the milk to the right consistency, which should be thick and creamy but still pourable. Next, hold the pitcher at an angle and gently pour the milk into the cup with the espresso, holding back the foam with a spoon. As you pour, move the pitcher in a circular motion to create a layered effect. To create designs, you can use a variety of techniques, such as free pouring, etching, or stamping. Free pouring involves pouring the milk in a smooth, flowing motion to create a design, while etching involves using a tool to create patterns on the surface of the latte. Stamping involves using a stencil or a spoon to create a design on the surface of the latte. With practice and patience, you can create beautiful and intricate designs that will impress your friends and family. Some popular latte art designs include hearts, leaves, and rosettas, but you can also experiment with your own unique designs and patterns. Remember to always use high-quality milk and a clean and well-maintained frother to ensure the best results.